


Introduction to how to use the jQuery Collapse1.1.0 folding plug-in

This article mainly introduces how to use the jQuery Collapse1.1.0 folding plug-in , has certain reference value, interested friends can refer to it, I hope it can help everyone.
/*!
* jQuery collapse - A Wizard Plugin - http://www.cnblogs.com/yeyuansheng/
* ------------------------------------------------------------------------------------
*
* @version 1.1.0
* @since 2017.08.28
* @author 夜原生
* @documentation http://www.cnblogs.com/yeyuansheng/
*
* Usage with default values:
* ------------------------------------------------------------------------------------
* {
* panel: '',//默认空为第一个标签
* content: '',//默认空为第二个标签
* active: 'active',//点击样式
* shut: true,//展开的在次点击可闭合
* style: 'y',//x,y,0上下左右滑动展开/无动作展开
* speed: 200,//动作的速度
* event: "click",//动作
* class: 'active',//item 样式
* func: function(){},//增加事件
* open:''//默认打开
* }
*/

(function($) {
  var collapse = {
    version:'1.1.0',
    style:{
      slideRight: {
        width : "hide",
        paddingLeft : "hide",
        paddingRight : "hide",
        marginLeft : "hide",
        marginRight : "hide"
      },
      slideLeft: {
        width : "show",
        paddingLeft : "show",
        paddingRight : "show",
        marginLeft : "show",
        marginRight : "show"
      },
      slideUp: {
        borderTopWidth: "hide",
        borderBottomWidth: "hide",
        paddingTop: "hide",
        paddingBottom: "hide",
        height: "hide"
      },
      slideDown: {
        borderTopWidth: "show",
        borderBottomWidth: "show",
        paddingTop: "show",
        paddingBottom: "show",
        height: "show"
      }
    },
    init:function(options){
      var opts = $.extend({}, $.fn.collapse.defaults, options);
      if(opts.style == 'x' && options.shut == 'undefined'){
        opts.shut = false;
      }
      return opts;
    },
    clickChange:function(obj,op){
      var panel = (op.panel == '')?$(obj).children(':first'):$(obj).find('> '+op.panel);
      panel.on(op.event,function(){
        var parent = $(this).parent();
        var sub = (op.content == '')?parent.children().eq(1):parent.find('> '+op.content);
        if($(sub).is(':visible')) {
          if(op.shut){
            collapse._animate(sub,op,0,function(){
              parent.removeClass(op.class);
              op.func();
            });
          }
        }else{
          parent.siblings().each(function(){
            var t = $(this);
            if(t.hasClass(op.active)){
              var uls = (op.content == '')?t.children().eq(1):t.find('> '+op.content);
              if(uls.length == 0){
                t.removeClass(op.active);
              }else{
                collapse._animate(uls,op,0,function(){
                  t.removeClass(op.active);
                });
              }
            }
          });
          parent.addClass(op.active);
          collapse._animate(sub,op,1,function(){
            op.func();
          });
        }
      });
    },
    itemChange:function(item,op){
      var uls = (op.content == '')?$(item).children().eq(1):$(item).children().find('> '+op.content);
      uls.children().on(op.event,function(){
        $(item).parent().children().each(function(){
          if(op.content == ''){
            $(this).children().eq(1).children().removeClass(op.class);
          }else{
            $(this).children().find('> '+op.content).children().removeClass(op.class);
          }
        });
        $(this).addClass(op.class);
      });
    },
    _animate:function(obj,op,bool,callback){
      if(op.style){
        if(bool){
          slide =(op.style == 'x')?collapse.style.slideLeft:collapse.style.slideDown;
        }else{
          slide =(op.style == 'x')?collapse.style.slideRight:collapse.style.slideUp;
        }
        obj.animate(slide,op.speed,callback);
      }else{
        (bool)?obj.show():obj.hide();//可以改用CLASS控制
      }
    },
    open:function(obj,op,open){
      var li = $(obj).children().eq(open[0]);
      li.addClass(op.active);
      var ul = (op.content == '')?li.children().eq(1):li.find('> '+op.content);
      ul.show();
      ul.children().eq(open[1]).addClass(op.class);
    }
  }
  $.fn.collapse = function(options){
    var opts = collapse.init(options);
    if(opts.open != '')collapse.open(this,opts,opts.open);
    $(this).children().each(function(){
      collapse.clickChange(this,opts);
      collapse.itemChange(this,opts);
    });
  }
  $.fn.collapse.defaults = {
    panel: '',
    content: '',
    active: 'active',
    shut: true,
    style: 'y',
    speed: 200,
    event: "click",
    class: 'active',
    func: function(){},
    open:''
  }
})(jQuery);Related recommendations:
Detailed explanation of the difference between css properties border-collapse and border-spacing
CSS border-collapse property for overlapping cell borders in tables
Detailed explanation of the use of css border-collapse
The above is the detailed content of Introduction to how to use the jQuery Collapse1.1.0 folding plug-in. For more information, please follow other related articles on the PHP Chinese website!

Hot AI Tools

Undresser.AI Undress
AI-powered app for creating realistic nude photos

AI Clothes Remover
Online AI tool for removing clothes from photos.

Undress AI Tool
Undress images for free

Clothoff.io
AI clothes remover

AI Hentai Generator
Generate AI Hentai for free.

Hot Article
Hot Tools

Notepad++7.3.1
Easy-to-use and free code editor

SublimeText3 Chinese version
Chinese version, very easy to use

Zend Studio 13.0.1
Powerful PHP integrated development environment

Dreamweaver CS6
Visual web development tools

SublimeText3 Mac version
God-level code editing software (SublimeText3)
Hot Topics
 1378
1378
 52
52

 How to use DirectX repair tool? Detailed usage of DirectX repair tool
Mar 15, 2024 am 08:31 AM
How to use DirectX repair tool? Detailed usage of DirectX repair tool
Mar 15, 2024 am 08:31 AM
The DirectX repair tool is a professional system tool. Its main function is to detect the DirectX status of the current system. If an abnormality is found, it can be repaired directly. There may be many users who don’t know how to use the DirectX repair tool. Let’s take a look at the detailed tutorial below. 1. Use repair tool software to perform repair detection. 2. If it prompts that there is an abnormal problem in the C++ component after the repair is completed, please click the Cancel button, and then click the Tools menu bar. 3. Click the Options button, select the extension, and click the Start Extension button. 4. After the expansion is completed, re-detect and repair it. 5. If the problem is still not solved after the repair tool operation is completed, you can try to uninstall and reinstall the program that reported the error.
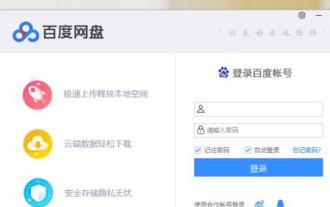 How to use Baidu Netdisk-How to use Baidu Netdisk
Mar 04, 2024 pm 09:28 PM
How to use Baidu Netdisk-How to use Baidu Netdisk
Mar 04, 2024 pm 09:28 PM
Many friends still don’t know how to use Baidu Netdisk, so the editor will explain how to use Baidu Netdisk below. If you are in need, hurry up and take a look. I believe it will be helpful to everyone. Step 1: Log in directly after installing Baidu Netdisk (as shown in the picture); Step 2: Then select "My Sharing" and "Transfer List" according to the page prompts (as shown in the picture); Step 3: In "Friend Sharing", you can share pictures and files directly with friends (as shown in the picture); Step 4: Then select "Share" and then select computer files or network disk files (as shown in the picture); Fifth Step 1: Then you can find friends (as shown in the picture); Step 6: You can also find the functions you need in the "Function Treasure Box" (as shown in the picture). The above is the editor’s opinion
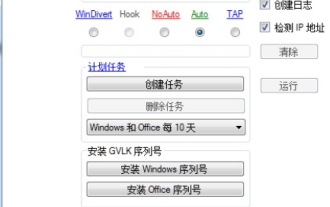 What is the KMS activation tool? How to use the KMS activation tool? How to use KMS activation tool?
Mar 18, 2024 am 11:07 AM
What is the KMS activation tool? How to use the KMS activation tool? How to use KMS activation tool?
Mar 18, 2024 am 11:07 AM
The KMS Activation Tool is a software tool used to activate Microsoft Windows and Office products. KMS is the abbreviation of KeyManagementService, which is key management service. The KMS activation tool simulates the functions of the KMS server so that the computer can connect to the virtual KMS server to activate Windows and Office products. The KMS activation tool is small in size and powerful in function. It can be permanently activated with one click. It can activate any version of the window system and any version of Office software without being connected to the Internet. It is currently the most successful and frequently updated Windows activation tool. Today I will introduce it Let me introduce to you the kms activation work
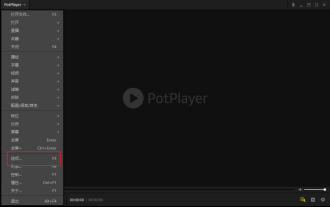 How to use potplayer-How to use potplayer
Mar 04, 2024 pm 06:10 PM
How to use potplayer-How to use potplayer
Mar 04, 2024 pm 06:10 PM
Potplayer is a very powerful media player, but many friends still don’t know how to use potplayer. Today I will introduce how to use potplayer in detail, hoping to help everyone. 1. PotPlayer shortcut keys. The default common shortcut keys for PotPlayer player are as follows: (1) Play/pause: space (2) Volume: mouse wheel, up and down arrow keys (3) forward/backward: left and right arrow keys (4) bookmark: P- Add bookmarks, H-view bookmarks (5) full screen/restore: Enter (6) multiple speeds: C-accelerate, 7) Previous/next frame: D/
 How to use Xiaoma win7 activation tool - How to use Xiaoma win7 activation tool
Mar 04, 2024 pm 06:16 PM
How to use Xiaoma win7 activation tool - How to use Xiaoma win7 activation tool
Mar 04, 2024 pm 06:16 PM
I believe that many users are using the Xiaoma win7 activation tool, but do you know how to use the Xiaoma win7 activation tool? Then, the editor will bring you how to use the Xiaoma win7 activation tool. For those who are interested in this, please come to the following article Let's see. The first step is to go to "My Computer" after reinstalling the system, click "System Properties" in the upper menu, and check the Windows activation status. In the second step, click to download the win7 activation tool online and click to open it (there are many resources available everywhere). The third step is to open the Xiaoma activation tool and click "Activate Windows permanently". The fourth step is to wait for the activation process to complete activation. Step 5: Check the Windows activation status again and find that the system has been activated.
 How to use PUT request method in jQuery?
Feb 28, 2024 pm 03:12 PM
How to use PUT request method in jQuery?
Feb 28, 2024 pm 03:12 PM
How to use PUT request method in jQuery? In jQuery, the method of sending a PUT request is similar to sending other types of requests, but you need to pay attention to some details and parameter settings. PUT requests are typically used to update resources, such as updating data in a database or updating files on the server. The following is a specific code example using the PUT request method in jQuery. First, make sure you include the jQuery library file, then you can send a PUT request via: $.ajax({u
 jQuery Tips: Quickly modify the text of all a tags on the page
Feb 28, 2024 pm 09:06 PM
jQuery Tips: Quickly modify the text of all a tags on the page
Feb 28, 2024 pm 09:06 PM
Title: jQuery Tips: Quickly modify the text of all a tags on the page In web development, we often need to modify and operate elements on the page. When using jQuery, sometimes you need to modify the text content of all a tags in the page at once, which can save time and energy. The following will introduce how to use jQuery to quickly modify the text of all a tags on the page, and give specific code examples. First, we need to introduce the jQuery library file and ensure that the following code is introduced into the page: <
 How to use magnet links - How to use magnet links
Mar 04, 2024 pm 04:37 PM
How to use magnet links - How to use magnet links
Mar 04, 2024 pm 04:37 PM
Are you also using magnet link software? But do you know how to use magnet links? The following is the method of using magnet links brought by the editor. Interested users can come and take a look below. The first method is relatively simple. If [PC] uses a magnet link to download, first open Thunder. Then, copy the magnet link directly. The link will be automatically detected in Thunder, and a download window will pop up. Just click to confirm the download to start the download process. Note: Some old versions of Xunlei cannot automatically detect the magnet links you copied. To use them, you need to update to the latest version of Xunlei.
