


PHPMyadmin is a very easy-to-use database management interface, especially suitable for novices who are not familiar with database operation commands. PHPMyadmin also has many configuration items. Today we will explain the configuration file of PHPMyadmin in detail. You can also refer to the mysql database video tutorial: MySql Tutorial
phpmyadmin Quick Start Tutorial
The content of the PHPMyadmin configuration file config.inc.php is as follows, and relevant comments have been added where settings need to be made.
Let me tell you how to install this tool:
1. Download phpmyadmin
First download it onlinephpmyadmin, and then decompress it to an accessible web directory (if it is a virtual space, you can decompress it and upload it to the web directory through ftp, etc.). Of course, you can modify the name of the decompressed file.
Related tutorial recommendations:
1.《phpMyAdmin latest download and installation video tutorial》
2. Basic knowledge of mysql (mysql novice tutorial)
2. Configuration config file
Open the config.default.php file under libraries, find the following items in order, and configure them according to the instructions:
A. Visit the URL
$cfg['PmaAbsoluteUri'] = '';
Fill in the access URL of phpmyadmin here, such as: $cfg['PmaAbsoluteUri'] = 'http://your site/phpmyadmin/';
B.mysql host information
$cfg['Servers'][$i]['host'] = 'localhost'; // MySQL hostname or IP address
Fill in the ip address of localhost or the server where mysql is located. If mysql and the phpmyadmin are on the same server, press the default localhost
$cfg['Servers'][$i]['port'] = ''; // MySQL port - leave blank for default port
mysql port, if it is the default 3306, just leave it blank
C.mysql username and password
$cfg['Servers'][$i]['user'] = 'root';
MySQL user MySQL username used to access phpmyadmin
fg['Servers'][$i]['password'] = '';
MySQL password (only neededThe password corresponding to the above mysql user name
D. Authentication method
$cfg['Servers'][$i]['auth_type'] = 'cookie';
There are four modes available here Select: cookie, http, HTTP, config
01: The config method is to enter the access URL of phpmyadmin to enter directly without entering the user name and password. It is unsafe and not recommended.
02: When this item is set to cookie, http or HTTP, logging in to phpmyadmin requires a data username and password for verification.
The details are as follows:
PHP installation mode is Apache, you can use http and cookie;
PHP installation mode is CGI, you can use cookie
E. Phrase password (blowfish_secret) setting
$cfg['blowfish_secret'] = '';
If authenticated If the method is set to cookie, you need to set a phrase password. It is up to you to decide what password to set, but it cannot be left blank, otherwise an error will be prompted when logging in to phpmyadmin. Okay, that's it. phpmyadmin has been successfully installed. It’s easy. Log in and experience it.
Instructions: This document only explains the basic configuration of installing phpmyadmin. , for detailed descriptions of each configuration parameter in the config.default.php file, please see its English comments.
1.《Detailed explanation of how to import database sql files in phpMyadmin (with video)
》 2.《phpMyadmin Detailed steps to export backup database files (with video)
》 3.《How to use phpmyadmin to add, delete, modify and check databases and data tables? (Text + Video)
》
Detailed version: phpMyAdmin is a MySQL database management tool, install this tool After that, you can directly manage MySQL data through the web form without the need to execute system commands. It is very suitable for database managers who are not familiar with database operation commands. The installation method of this tool is explained in detail below.
1. Download1. First go to the site to download the phpMyAdmin installation package: //m.sbmmt.com/xiazai/gongju/97 (the installation includes various Languages all-languages)
2. Unzip it to a directory that can be accessed by the web. If it is a virtual space, you can decompress it and upload it to the web directory through the ftp tool. At the same time, you can modify the decompressed file. Name (you can customize the directory name).
2. Configuration3. Open the
/libraries/config.default.php file (the old version is config.inc in the root directory .php file)<p>用写字板(不要用记事本,这是UTF8编码)进行编辑,按照说明配置即可。</p><p>4、查找<code> $cfg['PmaAbsoluteUri']=‘'; // 修改为你将上传到空间的phpMyAdmin的网址
如:$cfg['PmaAbsoluteUri'] =‘http: // 网站域名/phpmyadmin/';
5、查找 $cfg['Servers'][$i]['host'] =‘localhost'; // 通常用默认,也有例外,可以不用修改
6、查找 $cfg['Servers'][$i]['auth_type'] =‘config'; // 在自己的机子里调试用config;如果在网络上的空间用cookie.
在此有四种模式可供选择:cookie,http,HTTP,config
① config 方式即输入phpMyAdmin 的访问网址即可直接进入,无需输入用户名和密码,是不安全的,不推荐使用。
② 设置cookie,http,HTTP方式,登录 phpMyAdmin 需要数据用户名和密码进行验证。
具体如下:PHP 安装模式为 Apache,可以使用 http 和 cookie;PHP 安装模式为 CGI,可以使用 cookie。
7、查找 $cfg['Servers'][$i]['user'] = ‘root'; // MySQL用户名
8、查找 $cfg['Servers'][$i]['password'] =''; // MySQL 密码 (only needed 留空就可以了)
9、查找 $cfg['Servers'][$i]['only_db'] = ''; // 你只有一个数据就设置一下,设置为你的数据库名;如果你想架设服务器,那么建议留空
10、查找 $cfg['DefaultLang'] = ‘zh'; // 这里是选择语言,zh代表简体中文的意思
11、查找$cfg['blowfish_secret'] =''; // 如果认证方法设置为cookie,就需要设置短语密码,设置为什么密码,由您自己决定,这里不能留空,否则会在登录 phpMyAdmin 时提示如下图所示的错误。

12、设置完毕后保存,现在可以上传到网络空间上了,浏览http://网站域名/phpmyadmin/测试一下。(输入数据库的用户名及密码就可以了) 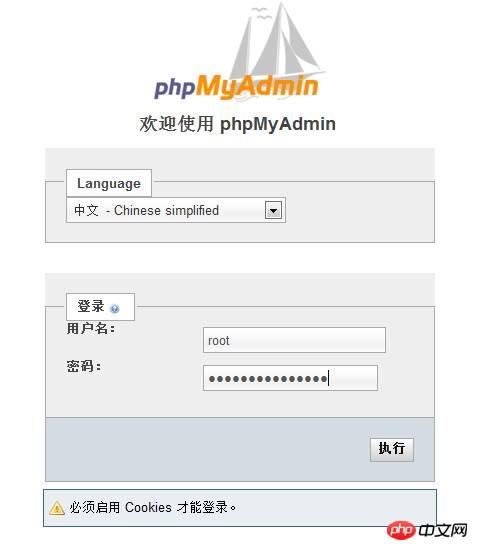
三:常见问题
1. 如果要安装过程中出现:“phpMyAdmin - 错误 缺少 mysqli 扩展。请检查 PHP 配置。”错误。
解决方法如下:
①到phpmyadmin文件夹的\libraries\config.default.php文件中找:$cfg['Servers'][$i]['extension']='mysql';语句。
②如果有找到$cfg['Servers'][$i]['extension']='mysql';这句,就继续查找下面这句$cfg['Servers'][$i]['extension']='<span style="COLOR: #ff0000">mysqli</span>'; 并把其的注释去掉。
③如果没有找到$cfg['Servers'][$i]['extension']='mysql';这句,就把$cfg['Servers'][$i]['extension']='<span style="COLOR: #ff0000">mysqli</span>';语句,改成$cfg['Servers'][$i]['extension']='mysql'; 语句。(即确保 " mysql " 值能生效)
= 4.3.0)-----是否使用压缩协议,PHP版本须>= 4.3.0

$cfg['Servers'][$i]['controluser']   = '';          // MySQL control user settings
                                                    // (this user must have read-only
$cfg['Servers'][$i]['controlpass']   = '';          // access to the "mysql/user"
                                                    // and "mysql/db" tables)-----MySQL控制用户设定,该用户只对mysql数据库下的user和db表有完全权限

$cfg['Servers'][$i]['auth_type']     = 'config';
// Authentication method (config, http or cookie based)?-----如果PHP安装模式为Apache,可以使用http和cookie;如果PHP安装模式为CGI,可以使用cookie;默认为config,是不安全的,不推荐。

$cfg['Servers'][$i]['user']          = 'root';      // MySQL user-----MySQL连接用户

$cfg['Servers'][$i]['password']      = '';
// MySQL password (only needed with 'config' auth_type)-----MySQL连接密码,建议在安装好PHP和MySQL后,先用phpmyadmin设定root密码,然后在这里填写

$cfg['Servers'][$i]['only_db']       = '';          // If set to a db-name, only
                                                    // this db is displayed
                                                    // at left frame
                                                    // It may also be an array
                                                    // of db-names-----如果在这里设定一个数据库的名字,那么登陆后框架左边将只显示这个数据库

$cfg['Servers'][$i]['verbose']       = '';          // Verbose name for this host - leave blank to show the hostname

$cfg['Servers'][$i]['pmadb']         = '';          // Database used for Relation, Bookmark and PDF Features
                                                    // (see scripts/create_tables.sql)
                                                    //   - leave blank for no support
                                                    //     DEFAULT: 'phpmyadmin'
$cfg['Servers'][$i]['bookmarktable'] = '';          // Bookmark table
                                                    //   - leave blank for no bookmark support
                                                    //     DEFAULT: 'pma_bookmark'
$cfg['Servers'][$i]['relation']      = '';          // table to describe the relation between links (see doc)
                                                    //   - leave blank for no relation-links support
                                                    //     DEFAULT: 'pma_relation'
$cfg['Servers'][$i]['table_info']    = '';          // table to describe the display fields
                                                    //   - leave blank for no display fields support
                                                    //     DEFAULT: 'pma_table_info'
$cfg['Servers'][$i]['table_coords'] = '';          // table to describe the tables position for the PDF schema
                                                    //   - leave blank for no PDF schema support
                                                    //     DEFAULT: 'pma_table_coords'
$cfg['Servers'][$i]['pdf_pages']     = '';          // table to describe pages of relationpdf
                                                    //   - leave blank if you don't want to use this
                                                    //     DEFAULT: 'pma_pdf_pages'
$cfg['Servers'][$i]['column_info']   = '';          // table to store column information
                                                    //   - leave blank for no column comments/mime types
                                                    //     DEFAULT: 'pma_column_info'
$cfg['Servers'][$i]['history']       = '';          // table to store SQL history
                                                    //   - leave blank for no SQL query history
                                                    //     DEFAULT: 'pma_history'
$cfg['Servers'][$i]['verbose_check'] = TRUE;        // set to FALSE if you know that your pma_* tables
                                                    // are up to date. This prevents compatibility
                                                    // checks and thereby increases performance.
$cfg['Servers'][$i]['AllowDeny']['order']           // Host authentication order, leave blank to not use
                                     = '';
$cfg['Servers'][$i]['AllowDeny']['rules']           // Host authentication rules, leave blank for defaults
                                     = array();


$i++;
$cfg['Servers'][$i]['host']            = '';
$cfg['Servers'][$i]['port']            = '';
$cfg['Servers'][$i]['socket']          = '';
$cfg['Servers'][$i]['connect_type']    = 'tcp';
$cfg['Servers'][$i]['compress']        = FALSE;
$cfg['Servers'][$i]['controluser']     = '';
$cfg['Servers'][$i]['controlpass']     = '';
$cfg['Servers'][$i]['auth_type']       = 'config';
$cfg['Servers'][$i]['user']            = 'root';
$cfg['Servers'][$i]['password']        = '';
$cfg['Servers'][$i]['only_db']         = '';
$cfg['Servers'][$i]['verbose']         = '';
$cfg['Servers'][$i]['pmadb']           = ''; // 'phpmyadmin' - see scripts/create_tables.sql
$cfg['Servers'][$i]['bookmarktable']   = ''; // 'pma_bookmark'
$cfg['Servers'][$i]['relation']        = ''; // 'pma_relation'
$cfg['Servers'][$i]['table_info']      = ''; // 'pma_table_info'
$cfg['Servers'][$i]['table_coords']    = ''; // 'pma_table_coords'
$cfg['Servers'][$i]['pdf_pages']       = ''; // 'pma_pdf_pages'
$cfg['Servers'][$i]['column_info']     = ''; // 'pma_column_info'
$cfg['Servers'][$i]['history']         = ''; // 'pma_history'
$cfg['Servers'][$i]['verbose_check']   = TRUE;
$cfg['Servers'][$i]['AllowDeny']['order']
                                       = '';
$cfg['Servers'][$i]['AllowDeny']['rules']
                                       = array();

// If you have more than one server configured, you can set $cfg['ServerDefault']
// to any one of them to autoconnect to that server when phpMyAdmin is started,
// or set it to 0 to be given a list of servers without logging in
// If you have only one server configured, $cfg['ServerDefault'] *MUST* be
// set to that server.[color]=red]-----是否显示所有的MySQL服务器
$cfg['ServerDefault'] = 1;              // Default server (0 = no default server)
$cfg['Server']        = '';
unset($cfg['Servers'][0]);


/**
* Other core phpMyAdmin settings
*/
$cfg['OBGzip']                  = 'auto'; // use GZIP output buffering if possible (TRUE|FALSE|'auto')-----有必要的话是否使用GZIP输出缓冲

$cfg['PersistentConnections']   = FALSE; // use persistent connections to MySQL database-----是否使用MySQL持久连接,即pconnect

$cfg['ExecTimeLimit']           = 300;    // maximum execution time in seconds (0 for no limit)-----最大脚本执行时间,单位:秒

$cfg['SkipLockedTables']        = FALSE; // mark used tables, make possible to show
                                          // locked tables (since MySQL 3.23.30)
$cfg['ShowSQL']                 = TRUE;   // show SQL queries as run-----运行查询时显示SQL查询语句

$cfg['AllowUserDropDatabase']   = FALSE; // show a 'Drop database' link to normal users-----是否对普通用户显示“删除数据库”连接

$cfg['Confirm']                 = TRUE;   // confirm 'DROP TABLE' & 'DROP DATABASE'-----删除数据表/库前是否出现确认提示框

$cfg['LoginCookieRecall']       = TRUE;   // recall previous login in cookie auth. mode or not-----是否收回先前cookie认证模式的cookie

$cfg['UseDbSearch']             = TRUE;   // whether to enable the "database search" feature
                                          // or not
$cfg['IgnoreMultiSubmitErrors'] = FALSE; // if set to true, PMA continues computing multiple-statement queries
                                          // even if one of the queries failed
$cfg['VerboseMultiSubmit']      = TRUE;   // if set to true, PMA will show the affected rows of EACH statement on
                                          // multiple-statement queries. See the read_dump.php file for hardcoded
                                          // defaults on how many queries a statement may contain!
$cfg['AllowArbitraryServer'] = FALSE; // allow login to any user entered server in cookie based auth2. 在日常开发中,有的人可能会不小心将我们www下的phpmyadmin给删除了,这时我们再通http://localhost/phpMyAdmin/访问我们的数据库就没办法访问了,页面会提示Not Found了,也就是文件不存在,我们已经删除了phpmyadmin怎么会存在呢?对吧!
第一步:
我们可以到phpmyadmin的官网来下载phpmyadmin进行安装
地址:https://www.phpmyadmin.net/

那么我们如何来重新下载安装呢?
第二步:
将解压到C盘根目录下,重命名为phpMyAdmin,进入该文件夹,找到config.sample.inc.php,改名为config.inc.php,编辑器打开改文件。找到下列代码
$cfg['blowfish_secret'] = ''
改为
$cfg['blowfish_secret'] = 'c4ca4238a0b923820dcc509a6f75849b';//一个长字符串密码就行
保存退出
第三步:
进入到环境中的apache的conf文件夹下,新建一个phpmyadmin.conf文件,代码编辑器打开,加入下列代码:
Alias /phpmyadmin "c:/phpMyAdmin/"
<Directory "c:/phpMyAdmin/">
Options Indexes FollowSymLinks MultiViews
AllowOverride all
Require all granted
php_admin_value upload_max_filesize 128M
php_admin_value post_max_size 128M
php_admin_value max_execution_time 360
php_admin_value max_input_time 360
</Directory>
保存退出
第四步:
在该文件夹内找到配置文件httdp.conf,用文本编辑器打开,在末尾增加一行以下代码:
Include conf/phpmyadmin.conf
保存退出
第五步:最后一步将apache重启一下
这个时候我们再来访问http://localhost/phpmyadmin/已经恢复正常了!
相关推荐:
1. PHPMyAdmin中使用sql-parser进行SQL语法分析
2. phpmyadmin用法教程
3. MySQL可视化管理工具phpMyAdmin的学习
The above is the detailed content of Detailed explanation of PHPMyadmin configuration. For more information, please follow other related articles on the PHP Chinese website!


![[Web front-end] Node.js quick start](https://img.php.cn/upload/course/000/000/067/662b5d34ba7c0227.png)


