


A better way to manage front-end environment variables

This article mainly analyzes the problems encountered when using environment variables to manage front-end projects, and introduces common tools to provide solutions.
How to use environment variables
When building a front-end project based on webpack (or any Node-based Projects (this article takes the webpack project as an example) generally need to provide two operating modes: development mode and production mode. The usual approach is to set the environment variable <span style="font-size: 14px;">NODE_ENV</span> to <span style="font-size: 14px;">production</span> before executing the command. , such as executing the <span style="font-size: 14px;">NODE_ENV=production webpack</span> command, and then passing <span style="font-size: 14px;">process.env.NODE_ENV === in the JavaScript code 'production'</span> to determine whether it is production mode, otherwise it is development mode. By distinguishing between different modes, you can perform different operations, such as starting a development server and proxy forwarding APIs in development mode, or compressing and merging code in production mode. In order to better unify the front-end engineering commands, you can add the commands to start development mode and production mode to the scripts field of the package.json file respectively. In the future, you only need to execute <span style="font-size: 14px;">npm start</span> or <span style="font-size: 14px;">npm run build</span>. The need to perform differential operations in the project is well solved by defining environment variables. If you want to support member-defined environment variables, just use the value in the environment variable first in the program. For example, if the port number has been set to give priority to the value of <span style="font-size: 14px;">PORT</span> in the environment variable, project members will execute <span style="font-size: 14px;">PORT=8080 when developing. npm start</span> command can customize the port number to 8080.
Problems encountered when using environment variables
The above solutions can be applied to most scenarios, but they cannot solve the problem of setting environment variables. Cross-platform and persistence issues
Cross-platform
If there are members using the Windows operating system in the project, It will fail when executing <span style="font-size: 14px;">npm run build</span> (i.e. <span style="font-size: 14px;">NODE_ENV=production webpack</span>) , because Windows commands do not support setting environment variables in this way. Although you can also manually execute <span style="font-size: 14px;">set NODE_ENV=production webpack</span> under Windows based on the content of the build script, it destroys the original intention of unifying front-end engineering commands. For this reason, Introducing a library that solves the problem of setting environment variables across platforms. If using cross-env, just rewrite the build script in package.json to <span style="font-size: 14px;">cross-env NODE_ENV=production webpack</span> and it will work across platforms.
Persistence
As the scale of the project increases, the number of custom environment variables for the project may increase. many. For example, static resources need to use CDN after deployment, and the project production mode needs to provide an environment variable to support the publicPath field of custom webpack; for example, some members do not run the API server locally, but run it in a virtual machine. Or on another computer, the project development mode needs to provide two environment variables to support the custom API server address and port number... Some members may have to execute a long command like this every time they develop: <span style="font-size: 14px;">PORT=8080 API_SERVER=192.168.100.100 API_PORT=9000 npm start</span>, so you need a tool that can persist environment variables, such as dotenv or env-cmd. Taking env-cmd as an example, you only need to create a .env.local file (not included in version management) and write:
<span style="font-size: 14px;">NODE_ENV=development<br>PORT=8080<br>API_SERVER=192.168.100.100<br>API_PORT=9000<br></span>
Rewrite the start command (build command) in package.json Similar) is <span style="font-size: 14px;">env-cmd --fallback ./.env.local webpack</span> to solve the problem of too many custom environment variables and tedious manual input each time. .
真正好用的环境变量管理工具
管理环境变量有很多工具,下面简单分析一下常用工具 dotenv、cross-env 和 env-cmd 的优势与不足:
dotenv 可以解决跨平台和持久化的问题,但使用场景有限,只适用 node 项目,且和项目代码强耦合,需要在 node 代码运行后手动执行触发
cross-env 支持在命令行自定义环境变量。问题也非常明显,不能解决大型项目中自定义环境变量的持久化问题
env-cmd 也可以解决跨平台和持久化的问题,支持定义默认环境变量,不足的是不支持在命令行中自定义环境变量
事实上 NPM 本身也提供了类似设置项目环境变量的功能。以上述自定义端口号的需求为例,也可以在项目目录下执行 <span style="font-size: 14px;">npm config set project-name:PORT 8080</span>(project-name 为项目名称),执行 <span style="font-size: 14px;">npm start</span> 后在代码中可以通过 <span style="font-size: 14px;">process.env.npm_package_config_PORT</span> 获取到 8080。而且还可以将 package.json 中 config 字段设置为 <span style="font-size: 14px;">{"PORT": 8000}</span>,用于指定 <span style="font-size: 14px;">npm_package_config_PORT</span> 的默认值。使用 NPM 的 config 功能管理环境变量的最大优势是原生支持,放在 package.json config 字段中的默认环境变量也非常方便查看。遗憾是的,变量名前面都会有冗长的 <span style="font-size: 14px;">npm_package_config_</span>;脚本必须从 package.json 的 scripts 字段中执行(即执行 npm run your_script_name);还有就是所有项目共用一份配置文件(.npmrc,默认在用户目录下),不方便手动编辑和查看。
因此一个好用的前端环境变量管理工具应该具备以下功能:
支持命令行设置环境变量
跨平台
持久化,最好能够提供一个设置本地环境变量的命令行工具
支持设置默认环境变量
支持获取 NPM 提供的环境变量(
<span style="font-size: 14px;">npm_package_*</span>和<span style="font-size: 14px;">npm_config_*</span>)
为此又诞生了一个环境变量管理工具:fuck-env,取义“恶搞环境变量”,支持以上所有功能。
fuck-env 安装和使用
<span style="font-size: 14px;">npm install fuck-env<br></span>
如有一个包含 package.json 和 main.js 两个文件的项目,文件代码如下:
package.json
<span style="font-size: 14px;">{<br> "name": "fuck-env-demo",<br> "config": {<br> "PORT": 8000,<br> "APP_NAME": "$npm_package_name"<br> },<br> "scripts": {<br> "start": "fuck-env node main.js"<br> },<br> "dependencies": {<br> "fuck-env": "*"<br> }<br>}<br></span>main.js
<span style="font-size: 14px;">console.log(process.env.PORT) // 8080<br>console.log(process.env.APP_NAME) // fuck-env-demo<br></span>
执行 <span style="font-size: 14px;">fuck-env PORT=8080 npm start</span> 后,输出“8080”和“fuck-env-demo”,不论是在 Windows 还是 POSIX(macOS、Linux 等)系统中。
如果成员希望本地持久化自定义的端口号,可以新建一个 .env 文件(此文件须加入 .gitignore,不计入版本管理,格式为类 .ini 文件的简单键值对)。
.env
<span style="font-size: 14px;">PORT=8080<br></span>
以后只需执行 <span style="font-size: 14px;">npm start</span> 即可。此外 fuck-env 还提供了另一个命令行工具:fuck,用于快速设置本地环境变量。比如,如果成员又希望使用 9000 端口,可以在项目根目录下执行 <span style="font-size: 14px;">fuck set PORT 9000</span>(需全局安装 fuck-env),此时项目目录下 .env 文件的内容即会变为“PORT=9000”,使用 fuck 命令在环境变量较多时非常方便。
When there are too many environment variables, all the config fields in package.json will also appear bloated. fuck-env supports unified management of default environment variables. Just move all environment variables under the config field to the default.env file (included in the version library).
For more examples, please refer here
fuck-env is committed to solving various problems encountered by users when managing environment variables. Currently, It is in the Beta stage and more user-friendly designs will be added in the future. If you have any ideas, welcome to give valuable suggestions to the project.
Original address: https://lon.im/post/use-envir...
This article mainly analyzes the problems encountered when using environment variables to manage front-end projects, and introduces common tools to provide solutions.
How to use environment variables
#When building a front-end project based on webpack (or any project based on Node, this article takes the webpack project as an example) , generally need to provide two operating modes: development mode and production mode. The usual approach is to set the environment variable <span style="font-size: 14px;">NODE_ENV</span> to <span style="font-size: 14px;">production</span> before executing the command. , such as executing the <span style="font-size: 14px;">NODE_ENV=production webpack</span> command, and then passing <span style="font-size: 14px;">process.env.NODE_ENV === in the JavaScript code 'production'</span> to determine whether it is production mode, otherwise it is development mode. By distinguishing between different modes, you can perform different operations, such as starting a development server and proxy forwarding APIs in development mode, or compressing and merging code in production mode. In order to better unify the front-end engineering commands, you can add the commands to start development mode and production mode to the scripts field of the package.json file respectively. In the future, you only need to execute <span style="font-size: 14px;">npm start</span> or <span style="font-size: 14px;">npm run build</span>. The need to perform differential operations in the project is well solved by defining environment variables. If you want to support member-defined environment variables, just use the value in the environment variable first in the program. For example, if the port number has been set to give priority to the value of <span style="font-size: 14px;">PORT</span> in the environment variable, project members will execute <span style="font-size: 14px;">PORT=8080 when developing. npm start</span> command can customize the port number to 8080.
Problems encountered when using environment variables
The above solutions can be applied to most scenarios, but they cannot solve the problem of setting environment variables. Cross-platform and persistence issues
Cross-platform
If there are members using the Windows operating system in the project, It will fail when executing <span style="font-size: 14px;">npm run build</span> (i.e. <span style="font-size: 14px;">NODE_ENV=production webpack</span>) , because Windows commands do not support setting environment variables in this way. Although you can also manually execute <span style="font-size: 14px;">set NODE_ENV=production webpack</span> under Windows based on the content of the build script, it destroys the original intention of unifying front-end engineering commands. For this reason, Introducing a library that solves the problem of setting environment variables across platforms. If using cross-env, just rewrite the build script in package.json to <span style="font-size: 14px;">cross-env NODE_ENV=production webpack</span> and it will work across platforms.
Persistence
As the scale increases, the number of project custom environment variables may increase. For example, static resources need to use CDN after deployment, and the project production mode needs to provide an environment variable to support the publicPath field of custom webpack; for example, some members do not run the API server locally, but run it in a virtual machine. Or on another computer, the project development mode needs to provide two environment variables to support the custom API server address and port number... Some members may have to execute a long command like this every time they develop: <span style="font-size: 14px;">PORT=8080 API_SERVER=192.168.100.100 API_PORT=9000 npm start</span>, so you need a tool that can persist environment variables, such as dotenv or env-cmd. Taking env-cmd as an example, you only need to create a .env.local file (not included in version management) and write:
<span style="font-size: 14px;">NODE_ENV=development<br>PORT=8080<br>API_SERVER=192.168.100.100<br>API_PORT=9000<br></span>
Rewrite the start command (build command) in package.json Similar) is <span style="font-size: 14px;">env-cmd --fallback ./.env.local webpack</span> to solve the problem of too many custom environment variables and tedious manual input each time. .
Really useful environment variable management tools
There are many tools for managing environment variables. Let’s briefly analyze the commonly used tools dotenv and cross-env. Advantages and disadvantages of env-cmd:
dotenv can solve cross-platform and persistence problems, but its usage scenarios are limited and is only applicable to node projects, and The project code is strongly coupled and needs to be triggered manually after the node code is run.
cross-env supports customizing environment variables on the command line. The problem is also very obvious. It cannot solve the persistence problem of custom environment variables in large projects.
env-cmd can also solve the problem of cross-platform and persistence. It supports defining default environment variables. The disadvantage is that it does not support customizing environment variables in the command line.
In fact, NPM itself also provides similar settings for project environment variables. Function. Taking the above requirement for custom port numbers as an example, you can also execute <span style="font-size: 14px;">npm config set project-name:PORT 8080</span> in the project directory (project-name is Project name), after executing <span style="font-size: 14px;">npm start</span>, you can pass <span style="font-size: 14px;">process.env.npm_package_config_PORT</span>## in the code # Obtained 8080. And you can also set the config field in package.json to {"PORT": 8000}<span style="font-size: 14px;"></span> to specify Default value for npm_package_config_PORT<span style="font-size: 14px;"></span>. The biggest advantage of using NPM's config function to manage environment variables is native support. The default environment variables placed in the package.json config field are also very convenient to view. Unfortunately, there will be a lengthy npm_package_config_<span style="font-size: 14px;"></span> in front of the variable name; the script must be executed from the scripts field of package.json (that is, execute npm run your_script_name); Also, all projects share a configuration file (.npmrc, in the user directory by default), which is inconvenient for manual editing and viewing.
Therefore, a useful front-end environment variable management tool should have the following functions:
Support command line setting environment Variables
Cross-platform
Persistence, it is best to provide a setting for the local environment Variable command line tool
Supports setting default environment variables
Supports obtaining NPM provided Environment variables (
npm_package_*<span style="font-size: 14px;"></span>andnpm_config_*<span style="font-size: 14px;"></span>)
For this reason, another environment variable management tool was born: fuck-env, which means "fuck environment variable" and supports all the above functions.
fuck-env installation and use
<span style="font-size: 14px;">npm install fuck-env<br></span>
If there is one containing package.json and main.js The project of the file, the file code is as follows:
package.json
<span style="font-size: 14px;">{<br> "name": "fuck-env-demo",<br> "config": {<br> "PORT": 8000,<br> "APP_NAME": "$npm_package_name"<br> },<br> "scripts": {<br> "start": "fuck-env node main.js"<br> },<br> "dependencies": {<br> "fuck-env": "*"<br> }<br>}<br></span>main.js
<span style="font-size: 14px;">console.log(process.env.PORT) // 8080<br>console.log(process.env.APP_NAME) // fuck-env-demo<br></span>
执行 <span style="font-size: 14px;">fuck-env PORT=8080 npm start</span> 后,输出“8080”和“fuck-env-demo”,不论是在 Windows 还是 POSIX(macOS、Linux 等)系统中。
如果成员希望本地持久化自定义的端口号,可以新建一个 .env 文件(此文件须加入 .gitignore,不计入版本管理,格式为类 .ini 文件的简单键值对)。
.env
<span style="font-size: 14px;">PORT=8080<br></span>
以后只需执行 <span style="font-size: 14px;">npm start</span> 即可。此外 fuck-env 还提供了另一个命令行工具:fuck,用于快速设置本地环境变量。比如,如果成员又希望使用 9000 端口,可以在项目根目录下执行 <span style="font-size: 14px;">fuck set PORT 9000</span>(需全局安装 fuck-env),此时项目目录下 .env 文件的内容即会变为“PORT=9000”,使用 fuck 命令在环境变量较多时非常方便。
当环境变量过多时,全部放置 package.json 的 config 字段也会显得臃肿。fuck-env 支持统一管理默认环境变量,只需将 config 字段下所有环境变量移至 default.env 文件(计入版本库)中即可。
以上内容就是如何更好的管理前端环境变量的方法,希望对大家有帮助。
相关推荐:
The above is the detailed content of A better way to manage front-end environment variables. For more information, please follow other related articles on the PHP Chinese website!

Hot AI Tools

Undresser.AI Undress
AI-powered app for creating realistic nude photos

AI Clothes Remover
Online AI tool for removing clothes from photos.

Undress AI Tool
Undress images for free

Clothoff.io
AI clothes remover

AI Hentai Generator
Generate AI Hentai for free.

Hot Article
Hot Tools

Notepad++7.3.1
Easy-to-use and free code editor

SublimeText3 Chinese version
Chinese version, very easy to use

Zend Studio 13.0.1
Powerful PHP integrated development environment

Dreamweaver CS6
Visual web development tools

SublimeText3 Mac version
God-level code editing software (SublimeText3)
Hot Topics
 1378
1378
 52
52

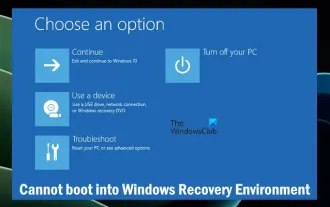 Unable to boot into Windows recovery environment
Feb 19, 2024 pm 11:12 PM
Unable to boot into Windows recovery environment
Feb 19, 2024 pm 11:12 PM
Windows Recovery Environment (WinRE) is an environment used to repair Windows operating system errors. After entering WinRE, you can perform system restore, factory reset, uninstall updates, etc. If you are unable to boot into WinRE, this article will guide you through fixes to resolve the issue. Unable to boot into the Windows Recovery Environment If you cannot boot into the Windows Recovery Environment, use the fixes provided below: Check the status of the Windows Recovery Environment Use other methods to enter the Windows Recovery Environment Did you accidentally delete the Windows Recovery Partition? Perform an in-place upgrade or clean installation of Windows below, we have explained all these fixes in detail. 1] Check Wi
 PHP and Vue: a perfect pairing of front-end development tools
Mar 16, 2024 pm 12:09 PM
PHP and Vue: a perfect pairing of front-end development tools
Mar 16, 2024 pm 12:09 PM
PHP and Vue: a perfect pairing of front-end development tools. In today's era of rapid development of the Internet, front-end development has become increasingly important. As users have higher and higher requirements for the experience of websites and applications, front-end developers need to use more efficient and flexible tools to create responsive and interactive interfaces. As two important technologies in the field of front-end development, PHP and Vue.js can be regarded as perfect tools when paired together. This article will explore the combination of PHP and Vue, as well as detailed code examples to help readers better understand and apply these two
 Questions frequently asked by front-end interviewers
Mar 19, 2024 pm 02:24 PM
Questions frequently asked by front-end interviewers
Mar 19, 2024 pm 02:24 PM
In front-end development interviews, common questions cover a wide range of topics, including HTML/CSS basics, JavaScript basics, frameworks and libraries, project experience, algorithms and data structures, performance optimization, cross-domain requests, front-end engineering, design patterns, and new technologies and trends. . Interviewer questions are designed to assess the candidate's technical skills, project experience, and understanding of industry trends. Therefore, candidates should be fully prepared in these areas to demonstrate their abilities and expertise.
 What are instance variables in Java
Feb 19, 2024 pm 07:55 PM
What are instance variables in Java
Feb 19, 2024 pm 07:55 PM
Instance variables in Java refer to variables defined in the class, not in the method or constructor. Instance variables are also called member variables. Each instance of a class has its own copy of the instance variable. Instance variables are initialized during object creation, and their state is saved and maintained throughout the object's lifetime. Instance variable definitions are usually placed at the top of the class and can be declared with any access modifier, which can be public, private, protected, or the default access modifier. It depends on what we want this to be
 How to get variables from PHP method using Ajax?
Mar 09, 2024 pm 05:36 PM
How to get variables from PHP method using Ajax?
Mar 09, 2024 pm 05:36 PM
Using Ajax to obtain variables from PHP methods is a common scenario in web development. Through Ajax, the page can be dynamically obtained without refreshing the data. In this article, we will introduce how to use Ajax to get variables from PHP methods, and provide specific code examples. First, we need to write a PHP file to handle the Ajax request and return the required variables. Here is sample code for a simple PHP file getData.php:
 Mind map of Python syntax: in-depth understanding of code structure
Feb 21, 2024 am 09:00 AM
Mind map of Python syntax: in-depth understanding of code structure
Feb 21, 2024 am 09:00 AM
Python is widely used in a wide range of fields with its simple and easy-to-read syntax. It is crucial to master the basic structure of Python syntax, both to improve programming efficiency and to gain a deep understanding of how the code works. To this end, this article provides a comprehensive mind map detailing various aspects of Python syntax. Variables and Data Types Variables are containers used to store data in Python. The mind map shows common Python data types, including integers, floating point numbers, strings, Boolean values, and lists. Each data type has its own characteristics and operation methods. Operators Operators are used to perform various operations on data types. The mind map covers the different operator types in Python, such as arithmetic operators, ratio
 Is Django front-end or back-end? check it out!
Jan 19, 2024 am 08:37 AM
Is Django front-end or back-end? check it out!
Jan 19, 2024 am 08:37 AM
Django is a web application framework written in Python that emphasizes rapid development and clean methods. Although Django is a web framework, to answer the question whether Django is a front-end or a back-end, you need to have a deep understanding of the concepts of front-end and back-end. The front end refers to the interface that users directly interact with, and the back end refers to server-side programs. They interact with data through the HTTP protocol. When the front-end and back-end are separated, the front-end and back-end programs can be developed independently to implement business logic and interactive effects respectively, and data exchange.
 Exploring Go language front-end technology: a new vision for front-end development
Mar 28, 2024 pm 01:06 PM
Exploring Go language front-end technology: a new vision for front-end development
Mar 28, 2024 pm 01:06 PM
As a fast and efficient programming language, Go language is widely popular in the field of back-end development. However, few people associate Go language with front-end development. In fact, using Go language for front-end development can not only improve efficiency, but also bring new horizons to developers. This article will explore the possibility of using the Go language for front-end development and provide specific code examples to help readers better understand this area. In traditional front-end development, JavaScript, HTML, and CSS are often used to build user interfaces
