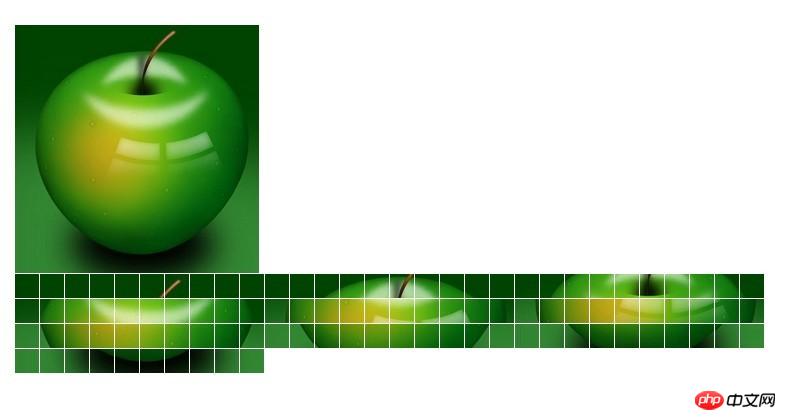
In our daily development work, we often encounter slide switches. Then we all know that common slide switches are nothing more than carousels and gradients. No matter which kind of slide switches, timer is used. This is achieved by gradually changing certain attributes of pictures or picture groups. Today I will introduce to you a simple example of JavaScript to implement a slideshow!
Abandon other effects, the simplest carousel only has one statement:
parent.appendChild(parent.firstChild), continuously add an element of the list to the last one, appendChild will add the node Removed from its original position, so it can create a switching effect.
One point, IE treats text nodes differently from other browsers. You need to pay attention when getting child nodes. In addition, in different versions of FF, the children attribute also needs to be paid attention to.
The following demo does not set #view's overflow:hidden.
demo_1:
The code is as follows:
<!DOCTYPE html PUBLIC "-//W3C//DTD XHTML 1.0 Transitional//EN"
"http://www.w3.org/TR/xhtml1/DTD/xhtml1-transitional.dtd">
<html>
<head>
<meta http-equiv="Content-Type" content="text/html; charset=utf-8"/>
<title></title>
<style type="text/css">
*{ margin: 0; padding: 0;}
ul{ list-style: none;}
#view{ position: relative; width: 320px; height: 120px; margin-left:320px; border: 10px solid #bc8f8f; }
#view:after{ content: '.'; display: block; clear: both; height: 0; visibility:hidden;}
#img_list{ position: absolute; width: 960px;}
#img_list li{ float: left; width: 320px; height: 120px; }
#a{ background: #87ceeb;}
#b{ background: #ff69b4;}
#c{ background: #98fb98;}
</style>
</head>
<body>
<p id="view">
<ul id="img_list">
<li id="a"></li>
<li id="b"></li>
<li id="c"></li>
</ul>
</p>
<script type="text/javascript">
var img_list = document.getElementById('img_list');
setInterval(function(){
img_list.appendChild(img_list.firstChild);
},500)
</script>
</body>
</html>
(The above demo actually does not need to be floated, just for the sake of subsequent demonstration)
Another way is to move the entire list in a certain direction without changing the node order (continuously changing the left attribute of the list),
demo_2:
The code is as follows:
<html>
<head>
<meta http-equiv="Content-Type" content="text/html; charset=utf-8"/>
<title></title>
<style type="text/css">
*{ margin: 0; padding: 0;}
ul{ list-style: none;}
#view{ position: relative; width: 320px; height: 120px; margin-left:320px; border: 10px solid #bc8f8f; }
#view:after{ content: '.'; display: block; clear: both; height: 0; visibility:hidden;}
#img_list{ position: absolute; width: 960px;}
#img_list li{ float: left; width: 320px; height: 120px; }
#a{ background: #87ceeb;}
#b{ background: #ff69b4;}
#c{ background: #98fb98;}
</style>
</head>
<body>
<p id="view">
<ul id="img_list">
<li id="a"></li>
<li id="b"></li>
<li id="c"></li>
</ul>
</p>
<script type="text/javascript">
var img_list = document.getElementById('img_list');
img_list.style.left = 0;
setInterval(function(){
img_list.style.left = parseInt(img_list.style.left) == -640 ? 0: (parseInt(img_list.style.left) - 320 + 'px');
},500)
</script>
</body>
</html>The demo above is abrupt and feels bad, so you can add a smooth movement effect.
The so-called smooth movement effect is actually to decompose each big step of the second demo above into several small parts, and divide a movement of 320px into 50 times to execute;
demo_3:
The code is as follows:
<!DOCTYPE html PUBLIC "-//W3C//DTD XHTML 1.0 Transitional//EN"
"http://www.w3.org/TR/xhtml1/DTD/xhtml1-transitional.dtd">
<html>
<head>
<meta http-equiv="Content-Type" content="text/html; charset=utf-8"/>
<title></title>
<style type="text/css">
*{ margin: 0; padding: 0;}
ul{ list-style: none;}
#view{ position: relative; width: 320px; height: 120px; margin-left:320px; border: 10px solid #bc8f8f; }
#view:after{ content: '.'; display: block; clear: both; height: 0; visibility:hidden;}
#img_list{ position: absolute; width: 960px;}
#img_list li{ float: left; width: 320px; height: 120px; }
#a{ background: #87ceeb;}
#b{ background: #ff69b4;}
#c{ background: #98fb98;}
</style>
</head>
<body>
<p id="view">
<ul id="img_list">
<li id="a"></li>
<li id="b"></li>
<li id="c"></li>
</ul>
</p>
<script type="text/javascript">
var img_list = document.getElementById('img_list');
img_list.style.left = 0;
setInterval(function(){
for(var i = 0 ; i < 100 ; i++){
(function(pos){
setTimeout(function(){
img_list.style.left = parseInt(img_list.style.left) == -640 ? 0: -pos/100 * 640+'px';
},(pos + 1)*10)
})(i)
}
},1500)
</script>
</body>
</html>For the case of demo_1, we can continuously reduce the width of firstChild to achieve an effect similar to demo_3.
demo_4
The code is as follows:
<!DOCTYPE html PUBLIC "-//W3C//DTD XHTML 1.0 Transitional//EN"
"http://www.w3.org/TR/xhtml1/DTD/xhtml1-transitional.dtd">
<html>
<head>
<meta http-equiv="Content-Type" content="text/html; charset=utf-8"/>
<title></title>
<style type="text/css">
*{ margin: 0; padding: 0;}
ul{ list-style: none;}
#view{ position: relative; width: 320px; height: 120px; margin-left:320px; border: 10px solid #bc8f8f; }
#view:after{ content: '.'; display: block; clear: both; height: 0; visibility:hidden;}
#img_list{ position: absolute; width: 960px;}
#img_list li{ float: left; width: 320px; height: 120px; }
#a{ background: #87ceeb;}
#b{ background: #ff69b4;}
#c{ background: #98fb98;}
</style>
</head>
<body>
<p id="view">
<ul id="img_list">
<li id="a"></li>
<li id="b"></li>
<li id="c"></li>
</ul>
</p>
<script type="text/javascript">
var img_list = document.getElementById('img_list');
setInterval(function(){
var current = img_list.children[0];
for(var i = 0 ; i < 100 ; i++){
(function(pos){
setTimeout(function(){
current.style.width = 320 - (pos/100)*320 + 'px';
},(pos + 1)*10)
})(i)
}
setTimeout(function(){
img_list.appendChild(current);
current.style.width = '320px';
},1010);
},1500)
</script>
</body>
</html>The methods and principles above are similar. In addition, you can also set a transparent gradient to make the transparency of a picture from 1 to 0. Therefore, switching effects can also be produced with minimal code changes.
demo_5:
The code is as follows:
<!DOCTYPE html PUBLIC "-//W3C//DTD XHTML 1.0 Transitional//EN"
"http://www.w3.org/TR/xhtml1/DTD/xhtml1-transitional.dtd">
<html>
<head>
<meta http-equiv="Content-Type" content="text/html; charset=utf-8"/>
<title></title>
<style type="text/css">
*{ margin: 0; padding: 0;}
ul{ list-style: none;}
#view{ position: relative; width: 320px; height: 120px; margin-left:320px; border: 10px solid #bc8f8f; }
#view:after{ content: '.'; display: block; clear: both; height: 0; visibility:hidden;}
#img_list{ position: absolute; width: 960px;}
#img_list li{position: absolute; top:0; left: 0; width: 320px; height: 120px; }
#a{ background: #87ceeb;}
#b{ background: #ff69b4;}
#c{ background: #98fb98;}
</style>
</head>
<body>
<p id="view">
<ul id="img_list">
<li id="a"></li>
<li id="b"></li>
<li id="c"></li>
</ul>
</p>
<script type="text/javascript">
var img_list = document.getElementById('img_list');
setInterval(function(){
var current = img_list.children[0];
for(var i = 0 ; i < 100 ; i++){
(function(pos){
setTimeout(function(){
current.style.opacity = 1 - (pos/100)*1;
},(pos + 1)*10)
})(i)
}
setTimeout(function(){
img_list.appendChild(current);
current.style.opacity = 1;
},1010);
},1500)
</script>
</body>
</html>As for other gorgeous effects, it can be processed through some other combinations.
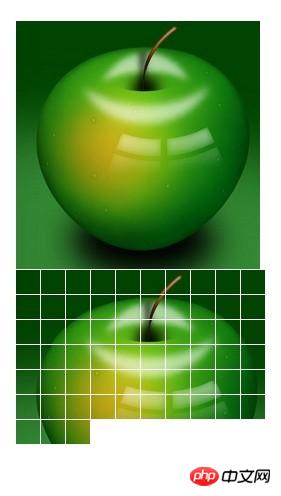
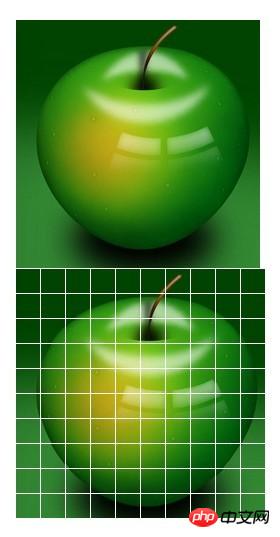
One processing method is to divide the picture into n areas, set the background to the picture that needs to be displayed, and then display the corresponding background in different areas. In this way, a 100*100 picture can be divided into 100 small squares of 10*10, and then these squares are processed to get more effects. In theory, it can be divided into 10,000 1*1 dots, but the browser will explode...
demo_6:
The code is as follows:
<!DOCTYPE html PUBLIC "-//W3C//DTD XHTML 1.0 Transitional//EN"
"http://www.w3.org/TR/xhtml1/DTD/xhtml1-transitional.dtd">
<html>
<head>
<meta http-equiv="Content-Type" content="text/html; charset=utf-8"/>
<title></title>
<style type="text/css">
*{ margin: 0; padding: 0; border: 0;}
body{ padding: 50px;}
.sep{ float: left; margin:1px 1px 0 0;}
</style>
</head>
<body>
<img id="img" src="../动画/apple.jpg" alt="" />
<p id="wrap" style="position: relative; "></p>
<script type="text/javascript">
var img = document.getElementById('img');
var wrap = document.getElementById('wrap');
img.onload = function(){
console.dir(img);
var h = img.naturalHeight;
var w = img.naturalWidth;
newPanel(w,h);
}
function newPanel(w,h){
var cols = 10;
var rows = 10;
var colWidth = Math.floor(w/cols);
var rowHeight = Math.floor(w/rows);
for(var row = 0; row < rows; row++){
for(var col =0; col < cols; col++){
var p = document.createElement('p');
p.style.width = colWidth + 'px';
p.style.height= rowHeight + 'px';
p.className= 'sep';
p.style.backgroundImage = 'url(' + img.src + ')';
p.style.backgroundPosition = -colWidth*col +'px ' + -rowHeight*row +'px' ;
wrap.appendChild(p);
}
}
}
setTimeout(function(){
setInterval(function(){
wrap.lastChild && wrap.removeChild(wrap.lastChild);
},50)
},1000)
</script>
</body>
</html>


It’s just a demonstration, the specific width and arrangement need to be organized by yourself. Or eliminate, or mask, corresponding to different arrangements and combinations, other methods are also easier to implement.
Finally, everyone knows that CSS3 can also achieve some slide effects,
demo_7:
The code is as follows:
<!DOCTYPE HTML PUBLIC "-//W3C//DTD HTML 4.01 Transitional//EN"
"http://www.w3.org/TR/html4/loose.dtd">
<html>
<head>
<meta http-equiv="Content-Type" content="text/html; charset=utf-8"/>
<title></title>
<style type="text/css">
*{
margin: 0;
padding: 0;
}
#test{
position: relative;
width: 300px;
height: 200px;
overflow: hidden;
border: 1px solid #d4d4d4;
}
#test ul{
position: absolute;
top:0;
left: 0;
height:200px;
}
#test ul li{
float: left;
width: 300px;
height:200px;
}
@-webkit-keyframes myAnimation{
0%{
top:0;
}
40%{
top:-200px;
}
70%{
top:-400px;
}
100%{
top:-600px;
}
}
#test ul{
-webkit-animation-name:myAnimation;
-webkit-animation-duration:4s;
-webkit-animation-timing-function:linear;
-webkit-animation-iteration-count:infinite;
}
</style>
</head>
<body>
<p id="test">
<ul>
<li><img width="300" height="200" src="../image/a.jpg" alt="" /></li>
<li><img width="300" height="200" src="../image/a.jpg" alt="" /></li>
<li><img width="300" height="200" src="../image/a.jpg" alt="" /></li>
<li><img width="300" height="200" src="../image/a.jpg" alt="" /></li>
</ul>
</p>
</body>
</html>
Summary:
This article uses many examples to explain the operation of JavaScript to implement slides. I believe that my friends will pass the study of this article. , I have a certain understanding of the implementation of slides!
Related recommendations:
php+javascript slideshow generation code
Javascript implements the slideshow effect source code for image switching
JS implements the Taobao slideshow effect
The above is the detailed content of Simple example of JavaScript slideshow. For more information, please follow other related articles on the PHP Chinese website!


