

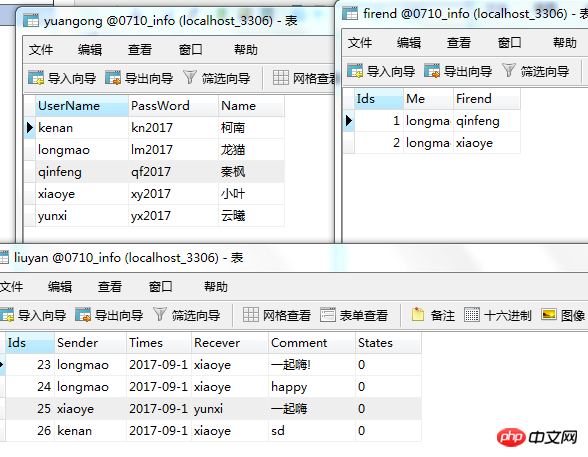
PHP implements the message board function:
1 The first is the login page:
<!DOCTYPE html>
<html>
    <head>
        <meta charset="UTF-8">
        <title>留言板登录</title>
        <script src="bootstrap/js/jquery-1.11.2.min.js"></script>
        <script src="bootstrap/js/bootstrap.min.js"></script>
        <link href="bootstrap/css/bootstrap.min.css" rel="stylesheet" type="text/css"/>
    </head>
    <style>
        .header{
            margin-left: 550px;
            margin-top: 150px;
            height: 300px;
            max-width: 300px;
        }
        .xiugai{
            max-width: 200px;
        }
        .login{
            margin-top: 10px;
        }
    </style>
    <body>
        <form action="messloginchuli.php" method="post">
        <p class="header">
            <h2>开发部内部留言板</h2>
            <p class="input-group xiugai">
                <span class="input-group-addon" style="margin-top: 20px;">用户名:</span>
                <input type="text" class="form-control" name="uid" placeholder="请输入用户名">
            </p>
            <p class="input-group xiugai" style="margin-top: 10px;">
                <span class="input-group-addon">口令:</span>
                <input type="text" class="form-control" name="pwd" placeholder="请输入口令">
            </p>
            <button type="submit" class="btn btn-success login">登录</button>
        </p>
    </form>
    </body>
</html>2 After the login page is completed, you need to enter the login processing page, which is the messageloginchuli.php# submitted above. ##
<?phpsession_start();
// 登录之后要把所包含登录的页面连接起来,开启session$uid = $_POST["uid"];
$pwd = $_POST["pwd"];
require_once "./DBDA.class.php";
$db = new DBDA();
$sql = "select password from yuangong where username=' {
$uid
}
'";
$arr = $db->query($sql,0);
//var_dump($arr[0][0]);
if($arr[0][0]=$pwd && !empty($pwd)) {
$_SESSION["uid"]=$uid;
header("location:message.php");
}
?>
<!DOCTYPE html>
<html>
<head>
<meta charset="UTF-8">
<title></title>
<script src="bootstrap/js/jquery-1.11.2.min.js"></script>
<script src="bootstrap/js/bootstrap.min.js"></script>
<link href="bootstrap/css/bootstrap.min.css" rel="stylesheet" type="text/css"/>
</head>
<style>
.mess{
max-width: 800px;
margin-left: 250px;
margin-top: 150px;
}
</style>
<body>
<?php
session_start();
$uid = $_SESSION["uid"];
if(empty($_SESSION["uid"])){
header("location:messlogin.php");
exit;
}
?>
<p style="margin-left: 880px; margin-top: 50px;font-size: 20px;" >
<a href="publish_info.php" >发布信息</a>
<a href="tuichuchuli.php">退出系统</a>
</p>
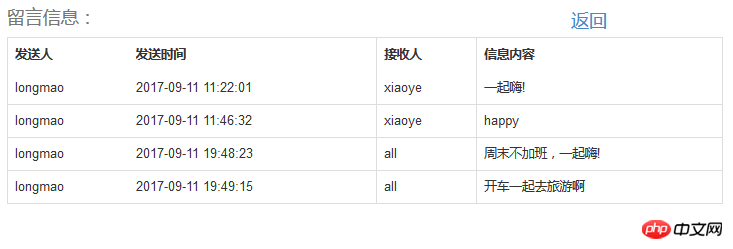
<table class="table table-bordered mess" style="margin-top: -40px;">
<caption style="font-size: 20px;">
留言信息:
</caption>
<thead>
<tr>
<th>发送人</th>
<th>发送时间</th>
<th>接收人</th>
<th>信息内容</th>
</tr>
</thead>
<tbody>
<?php
require_once "./DBDA.class.php";
$db = new DBDA();
$sql = "select * from liuyan where recever='{$uid}' or recever='all'";
$arr = $db->query($sql,0);
foreach($arr as $v){
echo "<tr>
<td>{$v[1]}</td>
<td>{$v[2]}</td>
<td>{$v[3]}</td>
<td>{$v[4]}</td>
</tr>";
}
?>
</tbody>
</table>
</body>
</html>Exit the login system to implement user logout, and return to the login page. The function code is as follows:
<?phpsession_start();
    $uid = $_SESSION["uid"];
    unset($uid);
    header("location:messlogin.php");
?>
<!DOCTYPE html><html> <head> <meta charset="UTF-8"> <title>发布信息界面</title> <script src="bootstrap/js/jquery-1.11.2.min.js"></script> <script src="bootstrap/js/bootstrap.min.js"></script> <link href="bootstrap/css/bootstrap.min.css" rel="stylesheet" type="text/css"/> </head> <style> .mess {
max-width: 200px;
margin-top: 10px;
}
.mess1 {
margin-top: 10px;
}
.opt {
max-width: 200px;
margin-left: 80px;
}
.txt {
max-width: 200px;
}
</style> <body><?phpsession_start();
$uid = $_SESSION["uid"];
if (empty($_SESSION["uid"])) {
header("location:messlogin.php");
exit ;
}
?> <p style="margin-left: 500px;
margin-top: 150px;
"> <p style="margin-left: 60px;
margin-bottom: 20px;
font-size: 20px;
" > <a href="message.php" >查看信息</a> <a href="seemess.php" style="margin-left: 80px;
" >查看发送信息</a> </p> <form class="form-horizontal" role="form" action="infochuli.php" method="post"> <p class="form-group"> <label for="firstname" class="col-sm-2 control-label mess1">接收人:</label> <p class="form-group "> <select class="form-control opt" name="recever"> <option value="all">所有人</option> <?php require_once "./DBDA.class.php";
$db = new DBDA();
//这里可以给特定的朋友发送信息的sql语句 //$sql = "select firend.firend,yuangong.name from firend,yuangong where firend.firend //= yuangong.username and firend.me = ' {
$uid
}
'";
$sname = "select * from yuangong where username not in (' {
$uid
}
')";
$arr = $db->query($sname,0);
//var_dump($arr[0][2]);
foreach($arr as $v) {
echo "<option value=' {
$v[0]
}
'> {
$v[2]
}
</option>";
}
?> </select> </p> </p> <p class="form-group"> <label for="lastname" class="col-sm-2 control-label mess1">信息内容:</label> <p class="col-sm-10"> <textarea class="form-control txt" rows="3" name="content"></textarea> </p> </p> <p class="form-group"> <p class="col-sm-offset-2 col-sm-10"> <button type="submit" class="btn btn-default"> 发送 </button> </p> </p> </form> </p> </body></html>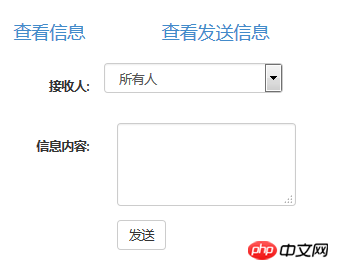
<?phpsession_start();
$uid = $_SESSION["uid"];
$recever = $_POST["recever"];
$content = $_POST["content"];
$arr = $_POST["recever"];
$t = date("Y-m-d H:i:s");
require_once "./DBDA.class.php";
$db = new DBDA();
$sql = "insert into liuyan values('',' {
$uid
}
',' {
$t
}
',' {
$recever
}
',' {
$content
}
',0)";
$arr = $db->query($sql);
if($arr && !empty($arr)) {
header("location:publish_info.php");
}
else {
echo "发送失败!";
}
?>The above is the detailed content of How to use PHP to connect to the database to implement the message board function. For more information, please follow other related articles on the PHP Chinese website!


![[Web front-end] Node.js quick start](https://img.php.cn/upload/course/000/000/067/662b5d34ba7c0227.png)


