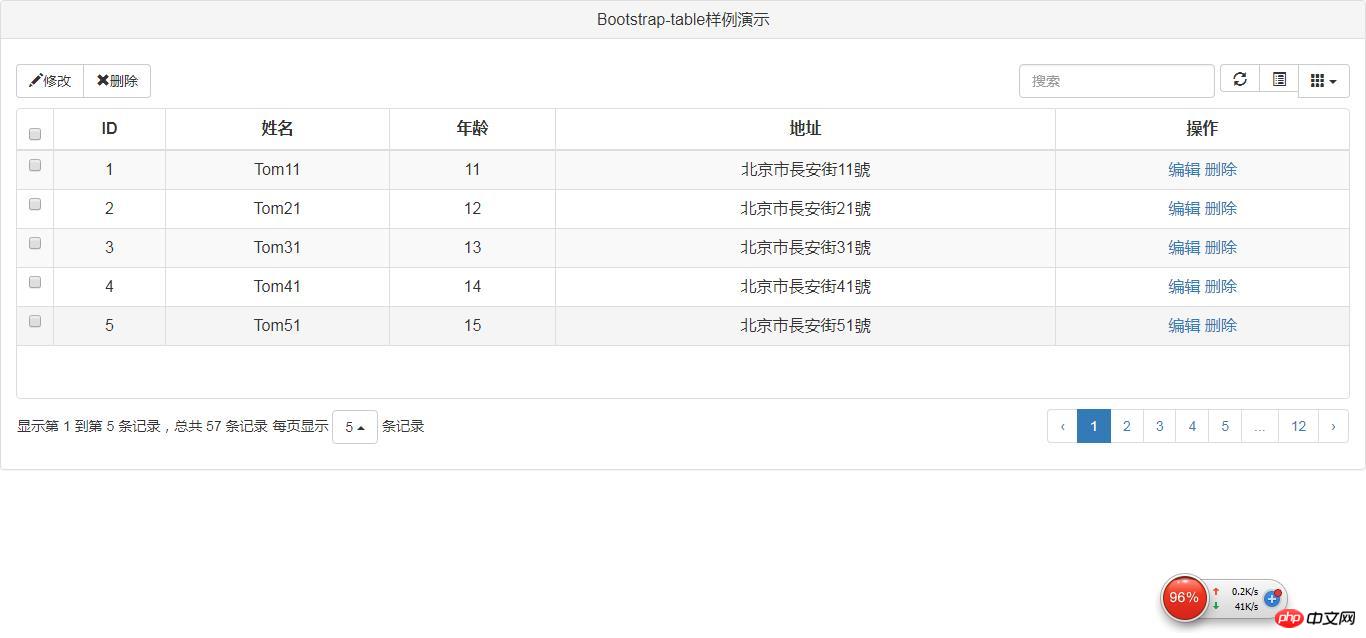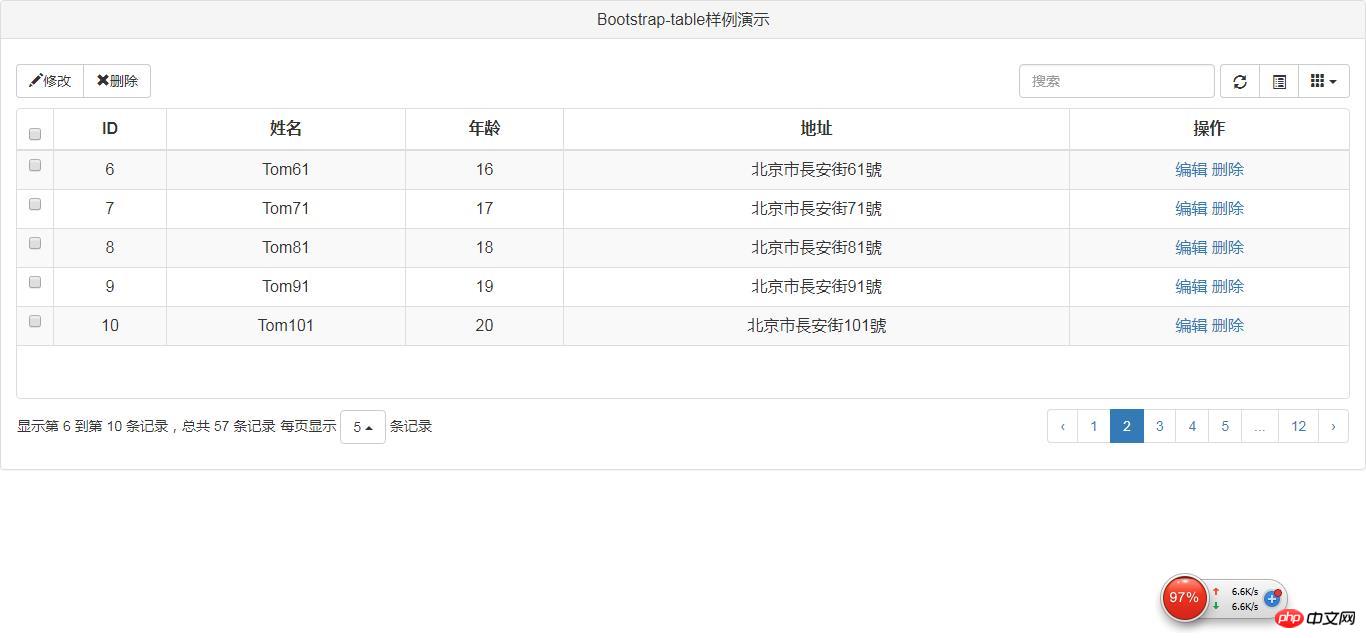
This article is mainly about letting you play with BootstrapTable easily. The backend uses SpringMVC+Hibernate, which has a certain reference value. Interested friends can refer to it
It’s still the old saying, it’s not as easy to remember as it is Bad writing. I remember that there was pagination in a previous Demo project, but no plug-in was used. I hand-written the paging process, but the effect was not very good. Recently I came into contact with the plug-in BootstrapTable, which has the same style as Bootstrap. Now let’s talk about how to use it.
When you first get started, you can directly insert json data into it, and then set the paging method to client'. The table will be created quickly. However, in general projects, the background is used for paging, and it is impossible to start paging at once. Thousands of pieces of data were retrieved from the database. Not to mention the traffic problem, the client-side rendering was also difficult. In the process of using server back-end paging, I also encountered some problems. I believe that most people who come into contact with BootstrapTable for the first time will encounter them. So hereby write a complete example, which should be continued to be improved later, including additions, deletions, and changes.
Okay, stop talking nonsense and get on with the code.
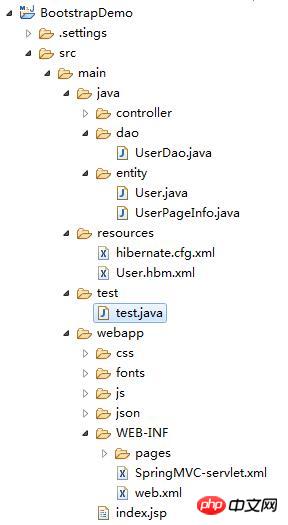
Let’s start with the project structure:

The project is built using maven. Since the project structure is not very complicated, I won’t introduce it too much.
Next look at index.jsp
<%@ page contentType="text/html;charset=UTF-8"%>
<html>
<link rel="stylesheet" href="css/bootstrap.css" type="text/css" />
<link rel="stylesheet" href="css/bootstrap-table.css" type="text/css">
<script type="text/javascript" src="js/jquery-2.0.0.min.js"></script>
<script type="text/javascript" src="js/bootstrap.js"></script>
<script type="text/javascript" src="js/bootstrap-table.js"></script>
<script type="text/javascript" src="js/bootstrap-table-zh-CN.js"></script>
<body>
<p class="panel panel-default">
<p class="panel-heading">
<h3 class="panel-title text-center">Bootstrap-table样例演示</h3>
</p>
<p class="panel-body">
<p id="toolbar" class="btn-group">
<button id="btn_edit" type="button" class="btn btn-default">
<span class="glyphicon glyphicon-pencil" aria-hidden="true"></span>修改
</button>
<button id="btn_delete" type="button" class="btn btn-default">
<span class="glyphicon glyphicon-remove" aria-hidden="true"></span>删除
</button>
</p>
<table data-toggle="table" id="table" data-height="400"
data-classes="table table-hover" data-striped="true"
data-pagination="true" data-side-pagination="server"
data-search="true" data-show-refresh="true" data-show-toggle="true"
data-show-columns="true" data-toolbar="#toolbar">
<thead>
<tr>
<th data-field="state" data-checkbox='ture'></th>
<th></th>
<th></th>
<th></th>
<th></th>
</tr>
</thead>
</table>
</p>
</p>
</body>
<script type="text/javascript">
$("#superBtn").click(function() {
$.get("getPageInfo?limit=5&offset=0", function(data, status) {
alert(status);
alert(data.userList[0].name);
});
});
$(document).ready(function(){
$("button[name='toggle']").height(20);
$("button[name='refresh']").height(20);
});
function edit(id) {
alert(id);
}
$("#table")
.bootstrapTable(
{
url : "getPageInfo", //数据请求路径
clickToSelect : true, //点击表格项即可选择
dataType : "json", //后端数据传递类型
pageSize : 5,
pageList : [ 5, 10, 20 ],
// contentType : "application/x-www-form-urlencoded",
method : 'get', //请求类型
dataField : "data", //很重要,这是后端返回的实体数据!
//是否显示详细视图和列表视图的切换按钮
queryParams : function(params) {//自定义参数,这里的参数是传给后台的,我这是是分页用的
return {//这里的params是table提供的
offset : params.offset,//从数据库第几条记录开始
limit : params.limit
//找多少条
};
},
responseHandler : function(res) {
//在ajax获取到数据,渲染表格之前,修改数据源
return res;
},
columns : [
{
field : 'state',
},
{
field : 'id',
title : 'ID',
align : 'center'
},
{
field : 'name',
title : '姓名',
align : 'center'
},
{
field : 'age',
title : '年龄',
align : 'center'
},
{
field : 'address',
title : '地址',
align : 'center'
},
{
title : '操作',
field : 'id',
align : 'center',
formatter : function(value, row, index) {
var e = '<a href="#" mce_href="#" onclick="edit(\''
+ row.id + '\')">编辑</a> ';
var d = '<a href="#" mce_href="#" onclick="del(\''
+ row.id + '\')">删除</a> ';
return e + d;
}
} ]
});
</script>
</html>Important points:
1. Import the necessary css files and js files, And pay attention to the version issue, which will be discussed later.
2. queryParams: This is the data passed from the front end to the back end when clicking paging or loading the table for the first time. There are two data, namely limit and offset. Limit means The number of records requested, offset represents the offset of the record
3. dataField: represents the object data passed by the backend, and the name must be the same as the name of the object.
Let’s look at the Controller again:
package controller;

import java.util.Map;

import org.springframework.stereotype.Controller;
import org.springframework.web.bind.annotation.RequestMapping;
import org.springframework.web.bind.annotation.ResponseBody;

import dao.UserDao;

@Controller
public class BootstrapTableController {

  @RequestMapping("/getPageInfo")
  public @ResponseBody Map<String,Object> getPageInfo(int limit,int offset) {
    System.out.println("limit is:"+limit);
    System.out.println("offset is:"+offset);
    UserDao userDao = new UserDao();
    Map<String,Object> map = userDao.queryPageInfo(limit, offset);
    return map;
  }
}The Controller receives the limit and offset parameters passed from the front end, and then calls based on these two parameters. layer method to obtain data. Look at UserDao again:
package dao;

import java.util.HashMap;
import java.util.List;
import java.util.Map;

import org.hibernate.Session;
import org.hibernate.SessionFactory;
import org.hibernate.Transaction;
import org.hibernate.cfg.Configuration;
import org.hibernate.query.Query;

import entity.User;

public class UserDao {

  private Session session;

  private Transaction transaction;

  public Session getSession() {
    Configuration config = new Configuration().configure();
    SessionFactory sessionFactory = config.buildSessionFactory();
    Session session = sessionFactory.openSession();
    return session;
  }

  public Map<String, Object> queryPageInfo(int limit, int offset) {
    String sql = "from User";
    Session session = this.getSession();

    Query query = session.createQuery(sql);
    query.setFirstResult(offset);
    query.setMaxResults(limit);
    List<User> userList = query.list();

    String sql2 = "select count(*) from User";
    int totalRecord = Integer.parseInt(session.createQuery(sql2).uniqueResult().toString());

    Map<String, Object> map = new HashMap<String, Object>();
    map.put("total", totalRecord);
    map.put("data", userList);
    return map;
  }
}userDao is also relatively simple. The key is total and data. This is the data to be returned to the front desk. Note that the name must be the same as the front desk Correspondingly, you only need to return the entity data and total number of records, and BootstrapTable will do the rest for you.
Next, let’s take a look at the User in the entity layer
package entity;

public class User {

  private int id;

  private String name;

  private int age;

  private String address;

  public User() {
    super();
  }

  public User(int id,String name, int age, String address) {
    super();
    this.id = id;
    this.name = name;
    this.age = age;
    this.address = address;
  }

  public String getName() {
    return name;
  }

  public int getId() {
    return id;
  }

  public void setId(int id) {
    this.id = id;
  }

  public void setName(String name) {
    this.name = name;
  }

  public int getAge() {
    return age;
  }

  public void setAge(int age) {
    this.age = age;
  }

  public String getAddress() {
    return address;
  }

  public void setAddress(String address) {
    this.address = address;
  }

  @Override
  public String toString() {
    return "User [id=" + id + ", name=" + name + ", age=" + age + ", address=" + address + "]";
  }
} There are also several configuration files, namely the SpirngMVC configuration file and web.xml And pom.xml, what should be matched should be matched:
SpringMVC-servlet.xml:
##
<?xml version="1.0" encoding="UTF-8"?>
<beans xmlns="http://www.springframework.org/schema/beans"
xmlns:xsi="http://www.w3.org/2001/XMLSchema-instance"        xmlns:p="http://www.springframework.org/schema/p"
xmlns:context="http://www.springframework.org/schema/context"
xmlns:util="http://www.springframework.org/schema/util" xmlns:mvc="http://www.springframework.org/schema/mvc"
xsi:schemaLocation="
 http://www.springframework.org/schema/beans
 http://www.springframework.org/schema/beans/spring-beans-4.3.xsd
 http://www.springframework.org/schema/util
 http://www.springframework.org/schema/util/spring-util-4.3.xsd
 http://www.springframework.org/schema/context
 http://www.springframework.org/schema/context/spring-context-4.3.xsd
 http://www.springframework.org/schema/mvc
 http://www.springframework.org/schema/mvc/spring-mvc-4.3.xsd">

<!--   <mvc:annotation-driven/>  -->
  <mvc:annotation-driven>
    <mvc:message-converters>
      <bean class="org.springframework.http.converter.StringHttpMessageConverter" />
      <bean class="org.springframework.http.converter.json.MappingJackson2HttpMessageConverter" />
    </mvc:message-converters>
  </mvc:annotation-driven>

  <context:component-scan base-package="controller"/>

  <!-- 这两个类用来启动基于Spring MVC的注解功能,将控制器与方法映射加入到容器中 -->
  <bean
    class="org.springframework.web.servlet.mvc.annotation.DefaultAnnotationHandlerMapping" />
  <bean
    class="org.springframework.web.servlet.mvc.annotation.AnnotationMethodHandlerAdapter" />

  <!-- 这个类用于Spring MVC视图解析 -->
  <bean id="viewResolver"
    class="org.springframework.web.servlet.view.InternalResourceViewResolver">
    <property name="prefix" value="/WEB-INF/pages/" />
    <property name="suffix" value=".jsp" />
  </bean>

</beans><!DOCTYPE web-app PUBLIC
"-//Sun Microsystems, Inc.//DTD Web Application 2.3//EN"
"http://java.sun.com/dtd/web-app_2_3.dtd" >
<web-app>
<display-name>Archetype Created Web Application</display-name>
<servlet>
<servlet-name>SpringMVC</servlet-name>
<servlet-class>org.springframework.web.servlet.DispatcherServlet</servlet-class>
<load-on-startup>1</load-on-startup>
</servlet>
<servlet-mapping>
<servlet-name>SpringMVC</servlet-name>
<url-pattern>/</url-pattern>
</servlet-mapping>
<servlet-mapping>
<servlet-name>default</servlet-name>
<url-pattern>*.css</url-pattern>
</servlet-mapping>
<servlet-mapping>
<servlet-name>default</servlet-name>
<url-pattern>*.js</url-pattern>
</servlet-mapping>
<servlet-mapping>
<servlet-name>default</servlet-name>
<url-pattern>*.ttf</url-pattern>
</servlet-mapping>
<servlet-mapping>
<servlet-name>default</servlet-name>
<url-pattern>*.woff</url-pattern>
</servlet-mapping>
<servlet-mapping>
<servlet-name>default</servlet-name>
<url-pattern>*.woff2</url-pattern>
</servlet-mapping>
</web-app><project xmlns="http://maven.apache.org/POM/4.0.0" xmlns:xsi="http://www.w3.org/2001/XMLSchema-instance"
xsi:schemaLocation="http://maven.apache.org/POM/4.0.0 http://maven.apache.org/maven-v4_0_0.xsd">
<modelVersion>4.0.0</modelVersion>
<groupId>Demo</groupId>
<artifactId>BootstrapDemo</artifactId>
<packaging>war</packaging>
<version>0.0.1-SNAPSHOT</version>
<name>BootstrapDemo Maven Webapp</name>
<url>http://maven.apache.org</url>
<dependencies>
<dependency>
<groupId>junit</groupId>
<artifactId>junit</artifactId>
<version>3.8.1</version>
<scope>test</scope>
</dependency>
<dependency>
<groupId>javax.servlet</groupId>
<artifactId>javax.servlet-api</artifactId>
<version>3.1.0</version>
<scope>provided</scope>
</dependency>
<dependency>
<groupId>org.hibernate</groupId>
<artifactId>hibernate-core</artifactId>
<version>5.2.6.Final</version>
</dependency>
<dependency>
<groupId>mysql</groupId>
<artifactId>mysql-connector-java</artifactId>
<version>5.1.41</version>
</dependency>
<!-- https://mvnrepository.com/artifact/org.springframework/spring-webmvc -->
<dependency>
<groupId>org.springframework</groupId>
<artifactId>spring-webmvc</artifactId>
<version>4.3.10.RELEASE</version>
</dependency>
<dependency>
<groupId>com.fasterxml.jackson.core</groupId>
<artifactId>jackson-core</artifactId>
<version>2.8.9</version>
</dependency>
<dependency>
<groupId>com.fasterxml.jackson.core</groupId>
<artifactId>jackson-databind</artifactId>
<version>2.8.9</version>
</dependency>
<dependency>
<groupId>com.fasterxml.jackson.core</groupId>
<artifactId>jackson-annotations</artifactId>
<version>2.8.9</version>
</dependency>
</dependencies>
<build>
<finalName>BootstrapDemo</finalName>
</build>
</project>

The above is the detailed content of BootstrapTable usage backend uses SpringMVC+Hibernate. For more information, please follow other related articles on the PHP Chinese website!
 How to make charts and data analysis charts in PPT
 Android voice playback function implementation method
 AC contactor use
 The difference between vscode and visual studio
 The difference between Java and Java
 Introduction to hard disk interface types
 nagios configuration method
 How to delete a folder in linux


