
1. What is SVG?
SVG refers to Scalable Vector Graphics, which is used to define vector-based graphics for the web and uses XML format to define graphics. SVG images can be enlarged or resized without losing graphic quality. In addition, SVG is a World Wide Web Consortium standard, and SVG is integrated with W3C standards such as DOM and XSL. In January 2003, SVG 1.1 was established as a W3C standard. Compared with other image formats, the advantages of using SVG are as follows:
1.SVG 可被非常多的工具读取和修改(比如记事本)
2.SVG 与 JPEG 和 GIF 图像比起来,尺寸更小,且可压缩性更强。
3.SVG 是可伸缩的
4.SVG 图像可在任何的分辨率下被高质量地打印
5.SVG 可在图像质量不下降的情况下被放大
6.SVG 图像中的文本是可选的,同时也是可搜索的(很适合制作地图)
7.SVG 可以与 Java 技术一起运行
8.SVG 是开放的标准
9.SVG 文件是纯粹的 XML
The main competitor of SVG is Flash. Compared with Flash, the biggest advantage of SVG is that it is compatible with other standards (such as XSL and DOM) compatible. Flash is a proprietary technology that is not open source.
2. SVG Example
The following example is an example of a simple SVG file. SVG files must be saved with the .svg suffix:
<?xml version="1.0" standalone="no"?>
<!DOCTYPE svg PUBLIC "-//W3C//DTD SVG 1.1//EN" "http://www.w3.org/Graphics/SVG/1.1/DTD/svg11.dtd">
<svg width="100%" height="100%" version="1.1" xmlns="http://www.w3.org/2000/svg">
     <circle cx="200" cy="100" r="50" stroke="red" stroke-width="2" fill="green"/>
</svg>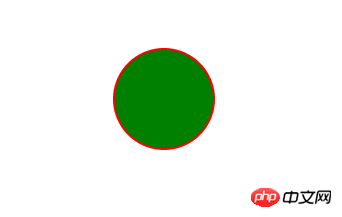
Running results
Code explanation:
One line contains the XML declaration. Please note the standalone attribute! This property specifies whether this SVG file is "standalone" or contains a reference to an external file. standalone="no" means that the SVG document will reference an external file - in this case, the DTD file. The second references this external SVG DTD. This DTD is located at W3C and contains all allowed SVG elements.
1.SVG The code starts with the < svg > element, including the opening tag < svg > and the closing tag < /svg >, which is the root element. The
2.width and height properties set the width and height of this SVG document. The version attribute defines the SVG version used, and the xmlns attribute defines the SVG namespace.
3.SVG's < circle > is used to create a circle, and the cx and cy attributes define the x of the center of the circle. and y coordinates. If these two properties are omitted, the dot will be set to (0, 0). The r attribute defines the radius of the circle. The
4.stroke and stroke-width properties control how the shape's outline is displayed. We set the circle's outline to 2px wide, with a red border.
5.fill The property sets the color within the shape. We set the fill color to the forgiveness color.
The closing tag is used to close the SVG element and the document itself.
Note: All opening tags must have closing tags!
SVG in HTML pages
SVG files can be embedded in HTML documents through the following tags: < embed > , < object > or < iframe >.
Three different ways to embed SVG files into HTML pages.
Use the < embed > tag
The< embed > tag is supported by all major browsers and allows the use of scripts.
Note: Using the < embed > tag is the Adobe SVG Viewer recommended method when embedding SVG in an HTML page! However, if you need to create valid XHTML, you cannot use < embed >. There is no < embed > tag in any HTML specification.
Syntax:
< src="rect.svg" width="300" height="100" type="image/svg+xml" pluginspage="http://www.adobe.com/svg/viewer/install/">
Comments: The pluginspage attribute points to the URL to download the plugin.
Use the < object > tag
The< object > tag is a standard tag in HTML 4 and is supported by all newer browsers. Its disadvantage is that it does not allow scripting.
Note: If you have the latest version of Adobe SVG Viewer installed, SVG files will not work when using the < object > tag (at least not in IE)!
Syntax:
<object data="rect.svg" width="300" height="100" type="image/svg+xml" codebase="http://www.adobe.com/svg/viewer/install/" />
Comments: The codebase attribute points to the URL to download the plug-in.
Using the < iframe > tag
The< iframe > tag works in most browsers.
Grammar:
<iframe src="rect.svg" width="300" height="100"></iframe>
3. SVG shape introduction
(1) SVG rectangle
can be associated with the previous circle, The rect element draws a rectangle on the screen. In fact, only 6 basic attributes can control its position and shape on the screen.
<svg width="100%" height="100%" version="1.1" xmlns="http://www.w3.org/2000/svg">
    <rect x="20" y="20" rx="10" ry="10" width="300" height="100"
    style="fill:rgb(0,0,255);
    stroke-width:1;
    stroke:rgb(0,0,0);
    fill-opacity:0.1;
    stroke-opacity:0.9;
    opacity:0.9"/>
</svg>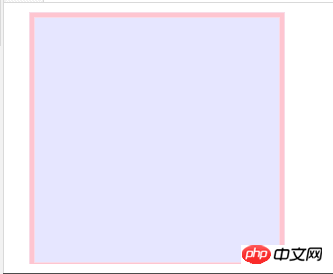
Running results.png
Code explanation:
rect 元素的 width 和 height 属性可定义矩形的高度和宽度
style 属性用来定义 CSS 属性
CSS 的 fill 属性定义矩形的填充颜色(rgb 值、颜色名或者十六进制值)
CSS 的 stroke-width 属性定义矩形边框的宽度
CSS 的 stroke 属性定义矩形边框的颜色
x 属性定义矩形的左侧位置(例如,x="0" 定义矩形到浏览器窗口左侧的距离是 0px)
y 属性定义矩形的顶端位置(例如,y="0" 定义矩形到浏览器窗口顶端的距离是 0px)
CSS 的 fill-opacity 属性定义填充颜色透明度(合法的范围是:0 - 1)
CSS 的 stroke-opacity 属性定义笔触颜色的透明度(合法的范围是:0 - 1
CSS 的 opacity 属性定义整个元素的透明值(合法的范围是:0 - 1)
rx 和 ry 属性可使矩形产生圆角。
(二)SVG 圆形:详细见上svg实例
(三)SVG椭圆:
ellipse 标签可用来创建椭圆。椭圆与圆很相似。不同之处在于椭圆有不同的 x 和 y 半径,而圆的 x 和 y 半径是相同的。
<svg width="100%" height="100%" version="1.1" xmlns="http://www.w3.org/2000/svg">
    <ellipse cx="275" cy="125" rx="100" ry="50" style="fill:rgb(200,100,50);stroke:rgb(0,0,100);stroke-width:2"/>
</svg>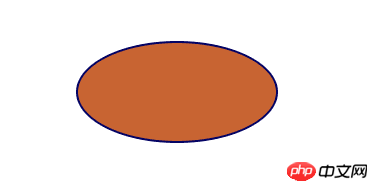
运行结果.png
代码解释:
cx 属性定义圆点的 x 坐标
cy 属性定义圆点的 y 坐标
rx 属性定义水平半径
ry 属性定义垂直半径
(四)SVG线条
line 标签用来创建线条
<svg width="100%" height="100%" version="1.1" xmlns="http://www.w3.org/2000/svg">
    <line x1="0" y1="0" x2="300" y2="300" style="stroke:rgb(99,99,99);stroke-width:2"/>
</svg>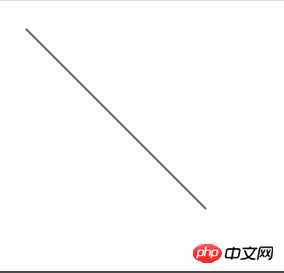
运行结果.png
代码解释:
x1 属性在 x 轴定义线条的开始
y1 属性在 y 轴定义线条的开始
x2 属性在 x 轴定义线条的结束
y2 属性在 y 轴定义线条的结束
(五)SVG多边形
polygon 标签用来创建含有不少于三个边的图形。它们都是由连接一组点集的直线构成。polygon的路径在最后一个点处自动回到第一个点。需要注意的是,矩形也是一种多边形,如果需要更多灵活性的话,你也可以用多边形创建一个矩形。
<svg width="100%" height="100%" version="1.1" xmlns="http://www.w3.org/2000/svg">
    <polygon points="220,100 300,210 170,250" style="fill:#cccccc;stroke:#000000;stroke-width:1"/>
</svg>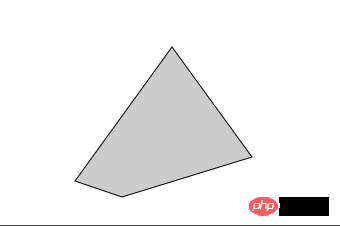
运行结果.png
代码解释:
points 属性定义多边形每个角的 x 和 y 坐标
点集数列。每个数字用空白符、逗号、终止命令或者换行符分隔开。每个点必须包含2个数字,一个是x坐标,一个是y坐标。所以点列表 (0,0), (1,1) 和(2,2)可以写成这样:“0 0, 1 1, 2 2”。路径绘制完后闭合图形,所以最终的直线将从位置(2,2)连接到位置(0,0)。
(六)SVG 折线
polyline 标签用来创建仅包含直线的形状。它是一组连接在一起的直线。因为它可以有很多的点,折线的的所有点位置都放在一个points属性中:
<svg width="100%" height="100%" version="1.1" xmlns="http://www.w3.org/2000/svg">
    <polyline points="20,100 40,60 70,80 100,20" style="fill:white;stroke:red;stroke-width:2"></polyline>
</svg>
运行结果.png
points
点集数列。每个数字用空白符、逗号、终止命令或者换行符分隔开。每个点必须包含2个数字,一个是x坐标,一个是y坐标。所以点列表 (0,0), (1,1) 和(2,2)可以写成这样:“0 0, 1 1, 2 2”。路径绘制完后闭合图形,所以最终的直线将从位置(2,2)连接到位置(0,0)。
四.SVG 滤镜简介
所有互联网的SVG滤镜定义在 < defs > 元素中, < filter > 标签用来定义SVG滤镜, < filter > 标签使用必须的ID属性来定义向图形应用到那个滤镜中。在 SVG 中,可用的滤镜有:
feBlend SVG 滤镜。使用不同的混合模式把两个对象合成在一起。
feColorMatrix SVG 滤镜。应用matrix转换。
feComponentTransfer SVG 滤镜。执行数据的 component-wise 重映射。
feComposite SVG 滤镜。
feConvolveMatrix SVG 滤镜。
feDiffuseLighting SVG 滤镜。
feDisplacementMap SVG 滤镜。
feDistantLight SVG 滤镜。 Defines a light source
feFlood SVG 滤镜。
feGaussianBlur SVG 滤镜。对图像执行高斯模糊。
feImage SVG 滤镜。
feMerge SVG 滤镜。创建累积而上的图像。
feMorphology SVG 滤镜。 对源图形执行"fattening" 或者 "thinning"。
feOffset SVG 滤镜。相对与图形的当前位置来移动图像。
fePointLight SVG 滤镜。
feSpecularLighting SVG 滤镜。
feSpotLight SVG 滤镜。
feTile SVG 滤镜。
feTurbulence SVG 滤镜。
注释:您可以在每个 SVG 元素上使用多个滤。
(一)SVG 高斯滤镜
< filter > 标签必须嵌套在 < defs > 标签内。< defs > 标签是 definitions 的缩写,它允许对诸如滤镜等特殊元素进行定义。
<svg width="100%" height="100%" version="1.1" xmlns="http://www.w3.org/2000/svg">
  <defs>
    <filter id="Gaussian_Blur">
        <feGaussianBlur in="SourceGraphic" stdDeviation="3" />
    </filter>
  </defs>
  <ellipse cx="200" cy="150" rx="70" ry="40" style="fill:#ff0000;stroke:#000000;stroke-width:2;filter:url(#Gaussian_Blur)"/>
</svg>
运行结果.png
代码解释:
< filter > 标签的 id 属性可为滤镜定义一个唯一的名称(同一滤镜可被文档中的多个元素使用)
filter:url 属性用来把元素链接到滤镜。当链接滤镜 id 时,必须使用 # 字符
滤镜效果是通过 < feGaussianBlur > 标签进行定义的。fe 后缀可用于所有的滤镜
< feGaussianBlur > 标签的 stdDeviation 属性可定义模糊的程度
in="SourceGraphic" 这个部分定义了由整个图像创建效果。
(二)SVG 阴影效果
feOffset 元素用于创建阴影效果
偏移一个矩形(带 < feOffset > ),然后混合偏移图像顶部(含 < feBlend > )
SVG代码:
<svg xmlns="http://www.w3.org/2000/svg" version="1.1">
  <defs>
    <filter id="f1" x="0" y="0" width="200%" height="200%">
      <feOffset result="offOut" in="SourceGraphic" dx="20" dy="20" />
      <feBlend in="SourceGraphic" in2="offOut" mode="normal" />
    </filter>
  </defs>
  <rect width="90" height="90" stroke="green" stroke-width="3"  fill="yellow" filter="url(#f1)" />
</svg>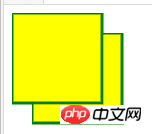
运行结果.png
代码解释:
< filter > 标签的 id 属性可为滤镜定义一个唯一的名称(同一滤镜可被文档中的多个元素使用)
filter:url 属性用来把元素链接到滤镜。当链接滤镜 id 时,必须使用 # 字符
(三)SVG 线性渐变
渐变是一种从一种颜色到另一种颜色的平滑过渡。另外,可以把多个颜色的过渡应用到同一个元素上。
在 SVG 中,有两种主要的渐变类型:
线性渐变
放射性渐变
< linearGradient > 可用来定义 SVG 的线性渐变。
< linearGradient > 标签必须嵌套在 < defs > 的内部。< defs > 标签是 definitions 的缩写,它可对诸如渐变之类的特殊元素进行定义。
线性渐变可被定义为水平、垂直或角形的渐变:
当 y1 和 y2 相等,而 x1 和 x2 不同时,可创建水平渐变
当 x1 和 x2 相等,而 y1 和 y2 不同时,可创建垂直渐变
当 x1 和 x2 不同,且 y1 和 y2 不同时,可创建角形渐变
<svg width="100%" height="100%" version="1.1" xmlns=" http://www.w3.org/2000/svg">
    <defs>
        <linearGradient id="orange-red" x1="0%" y1="0%" x2="100%" y2="0%">
            <stop offset="0%" style="stop-color:rgb(255,255,0);stop-opacity:1"/>
            <stop offset="100%" style="stop-color:rgb(255,0,0);stop-opacity:1"/>
        </linearGradient>
     </defs>
     <ellipse cx="200" cy="190" rx="85" ry="55" style="fill:url(#orange-red)"/>
</svg>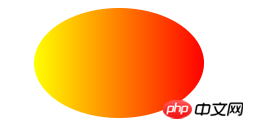
运行结果.png
代码解释:
1.< linearGradient > 标签的 id 属性可为渐变定义一个唯一的名称。
2.fill:url(#orange-red) 属性把 ellipse 元素链接到此渐变。
3.< linearGradient > 标签的 x1、x2、y1、y2 属性可定义渐变的开始和结束位置。
4.渐变的颜色范围可由两种或多种颜色组成。每种颜色通过一个 < stop > 标签来规定。offset 属性用来定义渐变的开始和结束位置。
(四)SVG 放射渐变
< radialGradient > 用来定义放射性渐变。
<svg width="100%" height="100%" version="1.1" xmlns="http://www.w3.org/2000/svg">
  <defs>
      <radialGradient id="grey_blue" cx="50%" cy="50%" r="50%" fx="50%" fy="50%">
          <stop offset="0%" style="stop-color:rgb(200,200,200);stop-opacity:0"/>
          <stop offset="100%" style="stop-color:rgb(0,0,255);stop-opacity:1"/>
      </radialGradient>
  </defs>
      <ellipse cx="230" cy="200" rx="110" ry="100" style="fill:url(#grey_blue)"/>
</svg>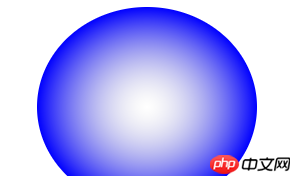
运行结果.png
代码解释:
< radialGradient > 标签的 id 属性可为渐变定义一个唯一的名称,fill:url(#grey-blue) 属性把 ellipse 元素链接到此渐变,cx、cy 和 r 属性定义外圈,而 fx 和 fy 定义内圈 渐变的颜色范围可由两种或多种颜色组成。每种颜色通过一个 < stop > 标签来规定。offset 属性用来定义渐变的开始和结束位置。
The above is the detailed content of HTML5 Basics SVG Tutorial. For more information, please follow other related articles on the PHP Chinese website!
 what is h5
 What are the production methods of html5 animation production?
 The difference between HTML and HTML5
 How to implement h5 to slide up and load the next page on the web side
 MySQL's storage engine for modifying data tables
 Introduction to linux operating system
 The difference between c drive and d drive
 what files are


