
Some drawing methods in the Canvas drawing environment are immediate drawing methods, and some drawing methods are path-based.
There are only two methods for drawing graphics immediately, strokeRect() and fillRect(). Although the strokezText() and fillText() methods are also drawn immediately, the text is not considered a graphic.
Path-based drawing system
Most drawing systems, such as: SVG (Scalable Verctor Graphics, scalable vector graphics), Adobe Illustrator, etc., They are all based on paths.
When using these drawing systems, you need to define a path first, and then stroke or fill it. You can also stroke and fill so that the graphics can display.
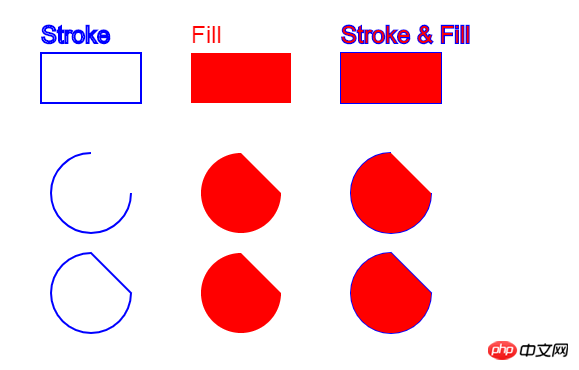
Three drawing methods in Canvas:
##Draw a line segment
In the Canvas drawing environment, line segments are also drawn based on paths, called linear paths. Create linear paths Methods: moveTO() and lineTo(). Only by calling the stroke() method after creating the path can you draw a line segment in Canvas.
This is the path-based drawing method we mentioned earlier, which must be stroked or filled;
Usually two points are connected A line is therefore very simple to draw a line segment, specify the starting point of the line through moveTO(), and move to another point through lineTo().
function drawLine(){
    cxt.moveTo(50, 50);
    cxt.lineTo(100, 100);
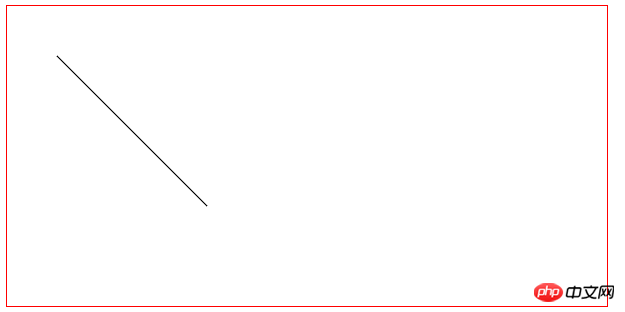
}However, we cannot see the line segments in the canvas. Earlier we mentioned that the path-based drawing method must be stroked or filled. So to see the result, we must also use the stroke() method.
So we modify the method to the following so that a line segment will be drawn
function drawLine(){
    cxt.moveTo(50, 50);
    cxt.lineTo(200, 200);
    cxt.stroke();
}
We can draw line segments in the canvas only by using lineTo(). We change the above code to be as shown below, and the effect is the same
function drawLine(){
    cxt.lineTo(50, 50);
    cxt.lineTo(200, 200);
    cxt.stroke();
}Summarize the usage of moveTo() and lineTo()
If there is a subpath in the current path, this method will add the point you specified to the subpath.
Change the style of the line segment
Change the width of the line segment
function= 14;
    cxt.lineTo(50, 50);
    cxt.lineTo(200, 200);
    cxt.stroke();
}
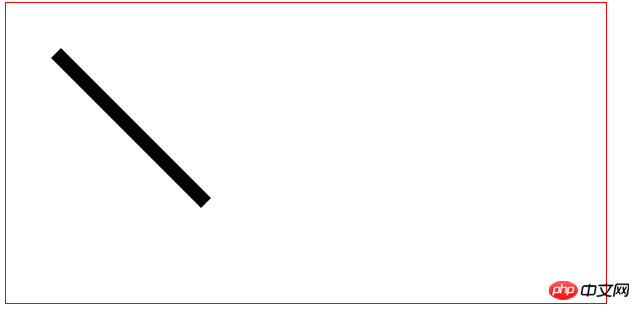
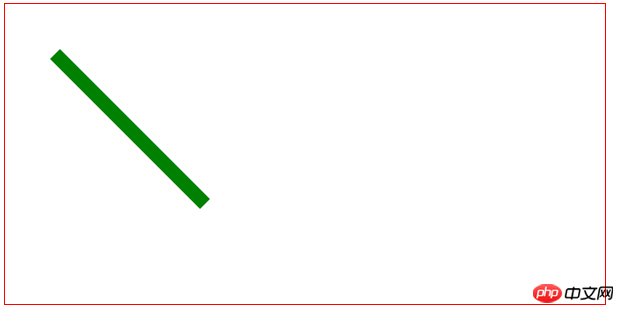
function drawLine(){
    cxt.lineWidth = 14;
    cxt.strokeStyle = 'green';
    cxt.lineTo(50, 50);
    cxt.lineTo(200, 200);
    cxt.stroke();
}
function drawLine(){
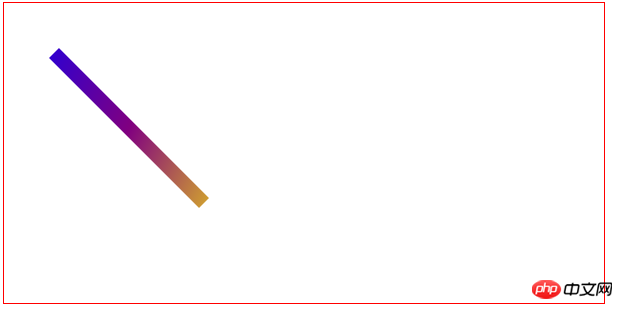
    cxt.lineWidth = 14;var gradient = cxt.createLinearGradient(0, 0, canvas.width/2, canvas.height/2);
    gradient.addColorStop(0, 'blue');
    gradient.addColorStop(0.5, 'purple');
    gradient.addColorStop(1, 'yellow');
    cxt.strokeStyle = gradient;
    cxt.lineTo(50, 50);
    cxt.lineTo(200, 200);
    cxt.stroke();
}
beginPath() and closePath()
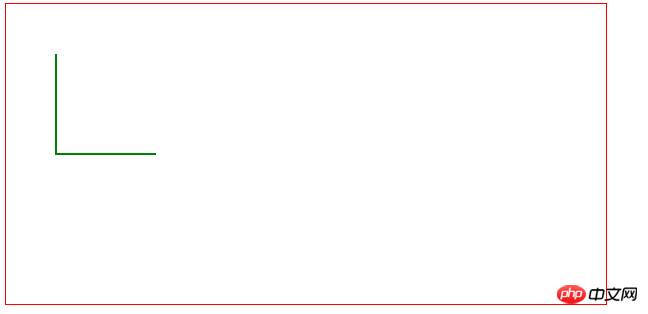
From the three drawing methods in canvas above We can see that the arc path in the second row is an open path, and the arc in the last row is a closed path. So how is a closed path achieved?Let’s take a look at the two more important methods of path drawing in canvas
function drawLine(){
    cxt.strokeStyle = 'green';
    cxt.lineWidth = 2;
    cxt.moveTo(50, 50);
    cxt.lineTo(50, 150);
    cxt.lineTo(150, 150);
    cxt.stroke();
}
修改上面例子中的代码在代码中添加beginPath()与closePath()方法
cxt.strokeStyle = 'green'= 250, 5050, 150150, 150150, 250 cxt.closePath();
}
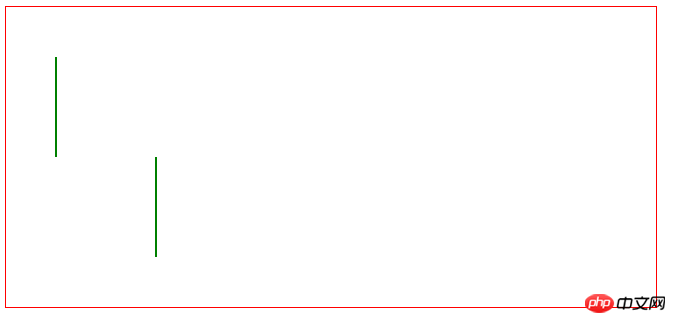
可以看出我们在画布中绘制了两条路径
注意:调用beginPath()之后,或者canvas刚建的时候,第一条路径构造命令通常被视为是moveTo()。所以我们在绘制图形的时候一定要先使用beginPath()。
我们继续修改我们的代码
function drawLine(){//描边三角形cxt.strokeStyle = 'green';
    cxt.lineWidth = 2;
    cxt.beginPath();
    cxt.moveTo(50, 50);
    cxt.lineTo(50, 150);
    cxt.lineTo(150, 150);
    cxt.closePath();
    cxt.stroke();//折线cxt.translate(150, 0);
    cxt.strokeStyle = 'red';
    cxt.lineWidth = 2;
    cxt.beginPath();
    cxt.moveTo(50, 50);
    cxt.lineTo(50, 150);
    cxt.lineTo(150, 150);
    cxt.stroke();
    cxt.closePath();//绿色填充三角形cxt.translate(150, 0);
    cxt.fillStyle = 'green';
    cxt.lineWidth = 2;
    cxt.beginPath();
    cxt.moveTo(50, 50);
    cxt.lineTo(50, 150);
    cxt.lineTo(150, 150);
    cxt.fill();
    cxt.closePath();//红色填充三角形cxt.translate(150, 0);
    cxt.fillStyle = 'red';
    cxt.lineWidth = 2;
    cxt.beginPath();
    cxt.moveTo(50, 50);
    cxt.lineTo(50, 150);
    cxt.lineTo(150, 150);
    cxt.closePath();
    cxt.fill();
}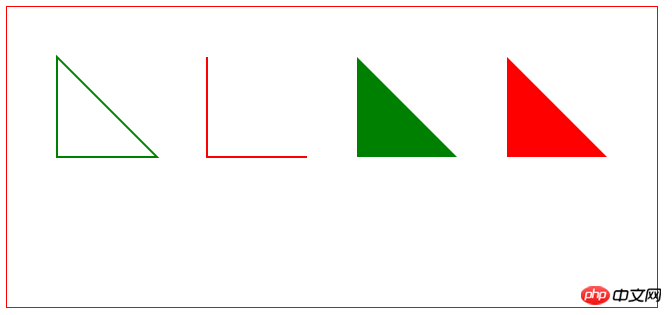
从上面的例子我们可以看出closePath()的位置不同,也会影响我们的图形
注意:当你调用fill()函数时,所有没有闭合的形状都会自动闭合,所以此时closePath()函数不是必须的。
但是调用stroke():如果你在stroke()方法之前只用closePath()会形成闭合路径,如果在stroke()方法之后调用closePath()方法,此时图形已经绘制完成,当前的绘制路径已经关闭,所以closePath()方法不起作用。
线段与像素边界
先来看一个例子
function drawLine(){//描边三角形cxt.lineWidth = 1;
    cxt.beginPath();
    cxt.moveTo(50, 50);
    cxt.lineTo(450, 50);
    cxt.stroke();
    cxt.beginPath();
    cxt.moveTo(50.5, 150.5);
    cxt.lineTo(450.5, 150.5);
    cxt.stroke();
}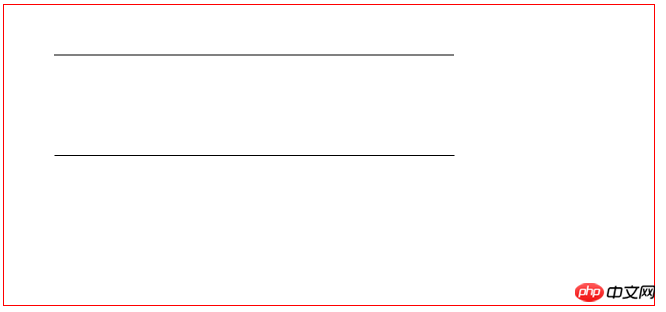
从图中我们可以看出,我们将两条线段的lineWidth都是设置为1像素,但是上面的线段画出的却是两像素。
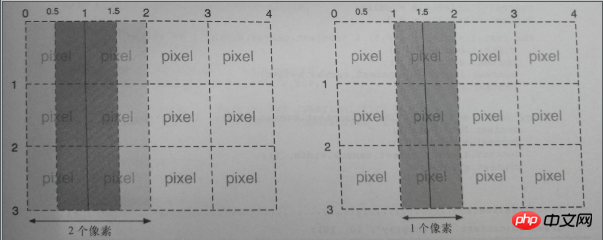
如果你在某2个像素的边界处绘制一条1像素宽的线段,那么该线段实际会占据2个像素的宽度;
因为当你在像素边界处绘制一条1像素宽度的垂直线段时,canvas的绘图环境对象会试着将半个像素画在边界中线的右边,将另外半个像素画在边界中线的左边。
然而,在一个整像素的范围内绘制半个像素宽的线段是不可能的,所以在左右两个方向上的半个像素都被扩展为1个像素。
另外一方面,绘制在两个像素之间,这样的话,中线左右两端的那半个像素就不会延伸,它们结合起来恰好占据1个像素的宽度。所以说,如果要绘制一条真正1像素宽度的线段,你必须将该线段绘制在某两个像素之间
网格的绘制
既然我们已经明白了如何绘制真正的1像素的线段,那我们就开始绘制网格
function drawLine(stepx, stepy){
    cxt.lineWidth = 0.5;
    cxt.strokeStyle = 'green';//绘制竖线for(var i= stepx + 0.5; i< cxt.canvas.width; i+= stepx){
        cxt.beginPath();
        cxt.moveTo(i, 0);
        cxt.lineTo(i, cxt.canvas.height);
        cxt.stroke();
    }//绘制横线for(var i= stepy + 0.5; i< cxt.canvas.height; i+= stepy){
        cxt.beginPath();
        cxt.moveTo(0, i);
        cxt.lineTo(cxt.canvas.width, i);
        cxt.stroke();
    }
}
drawLine(10, 10);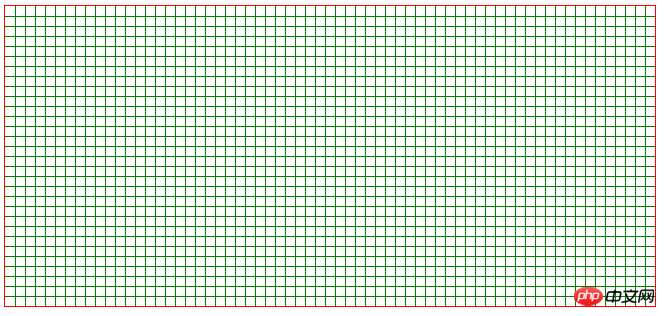
In the above example, we draw the line segment on the pixel between two pixels, and the drawn line segment is only 0.5 pixels wide,
Although the canvas specification does not explicitly stipulate it, the Canvas implementation of all browsers uses "anti-aliasing" technology to create a "sub-pixel" line segment drawing effect.
Summary
This section mainly explains the method of drawing linear paths in canvas, mainly Use moveTo() to define the starting point, lineTo() to define the end point, and stroke() to draw the current path. These three methods draw line segments
There are two important methods for drawing paths in canvas, beginPath() and closePath(). Calling beginPath() before drawing graphics is a necessary step for drawing multiple graphics.
closePath() can be omitted when using fill(), and you must also pay attention to the calling position of the closePath() method.
When drawing a line segment, we can use lineWidth to change the width of the line segment and strokeStyle to change the color of the line segment.
Clear the pixel boundaries of the line segment so that we can draw a true 1 pixel line width line segment.
The above is the detailed content of How to draw a path - line segments. For more information, please follow other related articles on the PHP Chinese website!


