
Please indicate when reprinting: @小五义
Do you want to get a WIFI jammer? After collecting information online, I found that esp8266 can be used to implement simple interference functions, including disconnection, copying, deception, etc. I happen to have a Tyboard V202 (30 yuan) on hand, which also has an esp8266 chip. I also want to change the firmware, is it possible? Give it a try over the weekend.
1. Downloaded an open source firmware from the Internet that uses esp8266 to create Deauth wireless attack, which was developed by arduino.
github download address:
It contains arduino IDE (arduino-1.8.2-windows.exe) and firmware source code (esp8266_deauther-master.rar). In addition, you also need the esp8266 development kit (Arduino15.rar), which can be downloaded from the link below:
2. After downloading, unzip it.

3. Double-click arduino-1.8.2-windows.exe to install arduino IDE. (If you have already installed arduino IDE, this step can be omitted).
4. After the installation is complete, open arduino, find File -> Preferences in the menu, and click the red area to enter the SDK directory. My path is: C:\Users\Administrator\AppData\Local\Arduino15
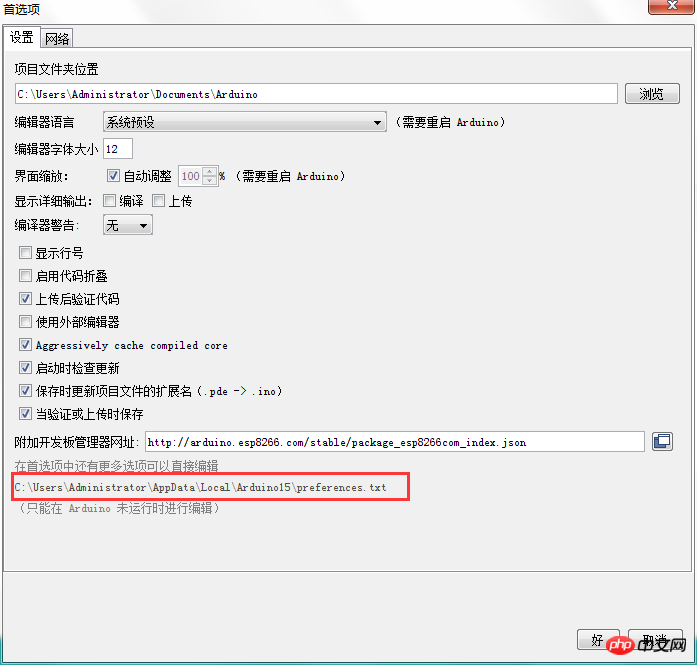
Unzip the Arduino15.rar downloaded from the network disk and directly overwrite the files inside C: File under \Users\Administrator\AppData\Local\Arduino15.

Connect the typyboard V202 to the computer, find the tools in the arduino IDE menu - "Development board in the menu on the right Search down and you will find a TPYBoard v202 click to select it.
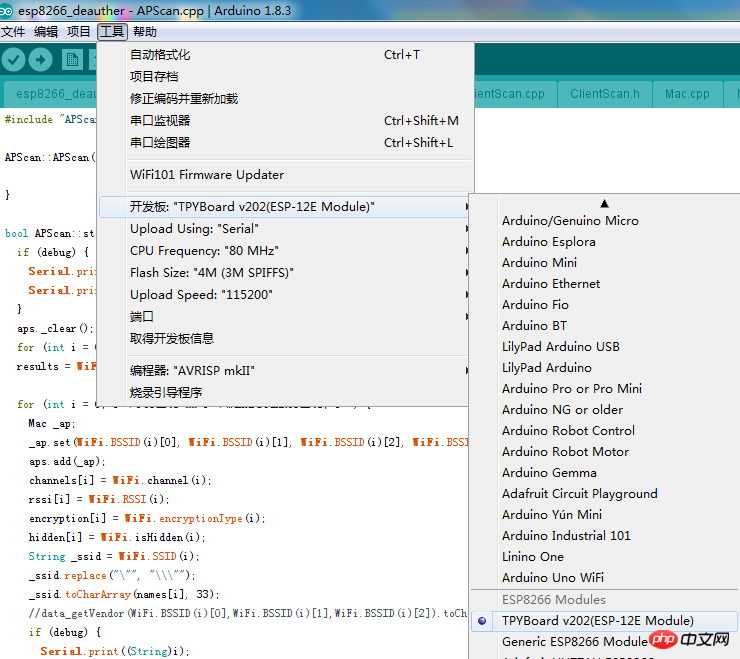
1. Unzip esp8266_deauther-master.rar, arduino IDE menu bar file - "Open esp8266_deauther-master source code package esp8266_deauther\ esp8266_deauther.ino
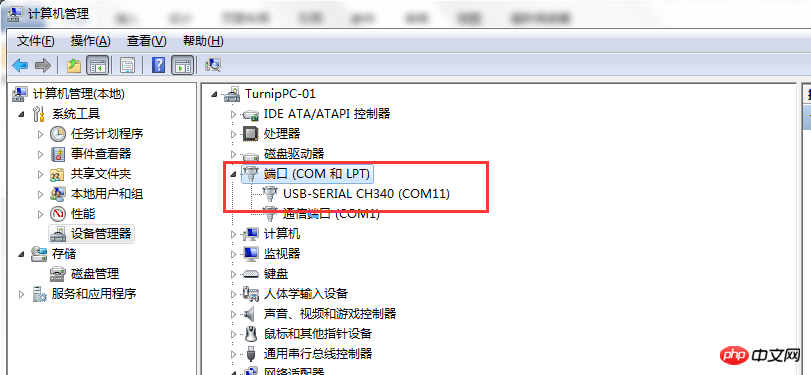
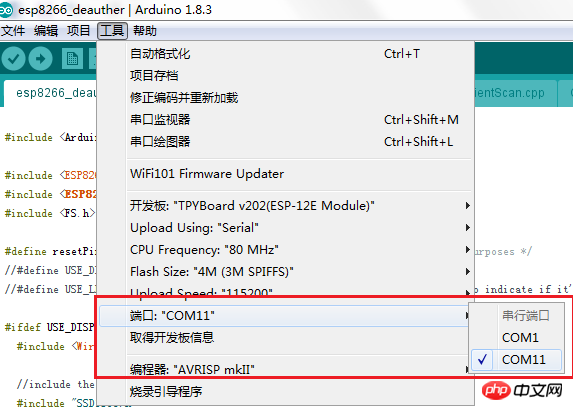
2. TPYBoard v202 is connected to the computer using a micro USB data cable. Check the installed USB to serial port. Open your computer's device manager (here it's COM11).
## 4. In the green icon menu area below the menu bar, select upload, start compiling, and burn firmware
5. View the bottom Log area
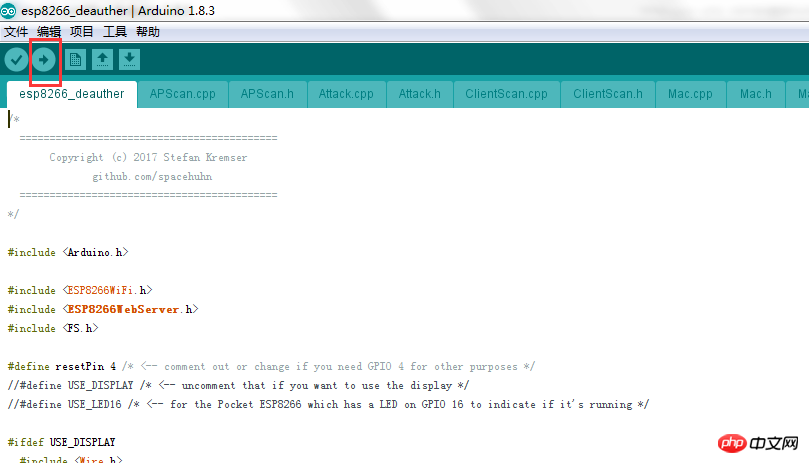

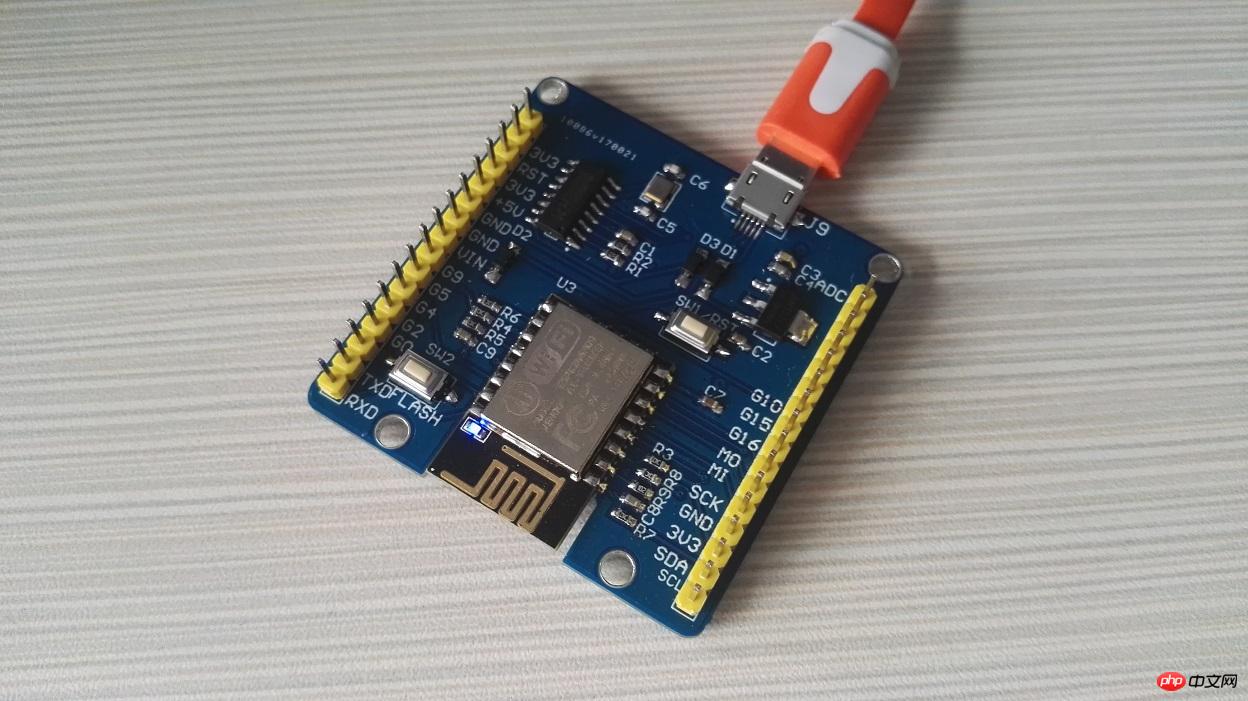
 #When the firmware is being programmed, the small blue LED on the board will flash rapidly.
 After the programming is completed, it will show that the upload was successful and the small blue LED on the board will stop flashing.
 0X05 Test attack effect
1. After successfully burning the firmware, turn on the wireless and search for a hotspot named TPYBoard v202. The password defaults to tpyboard. connect.

The original version of the webpage is in English. For the convenience of use, I simply translated it (the wifi SSID and password were also modified). The downloaded compressed package also contains the original English version.
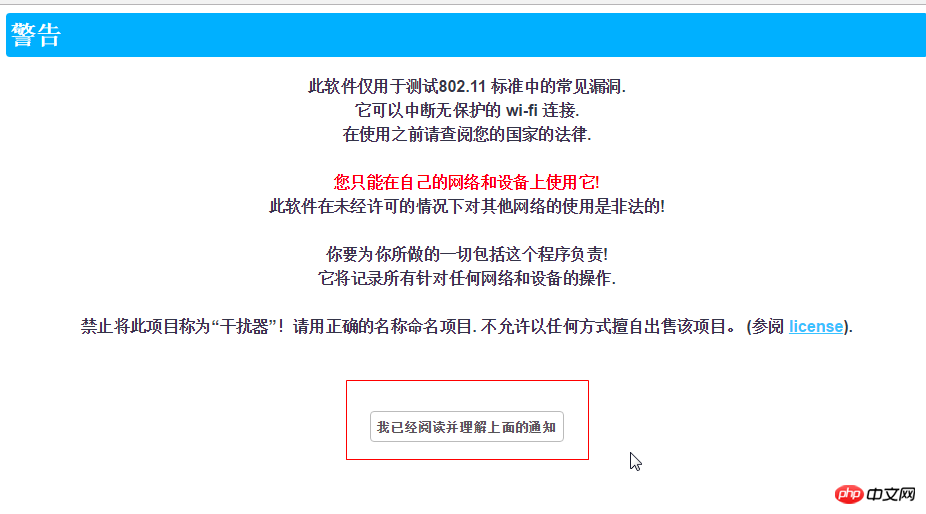
3. After clicking in, first scan the nearby wifi. Click [Scan].
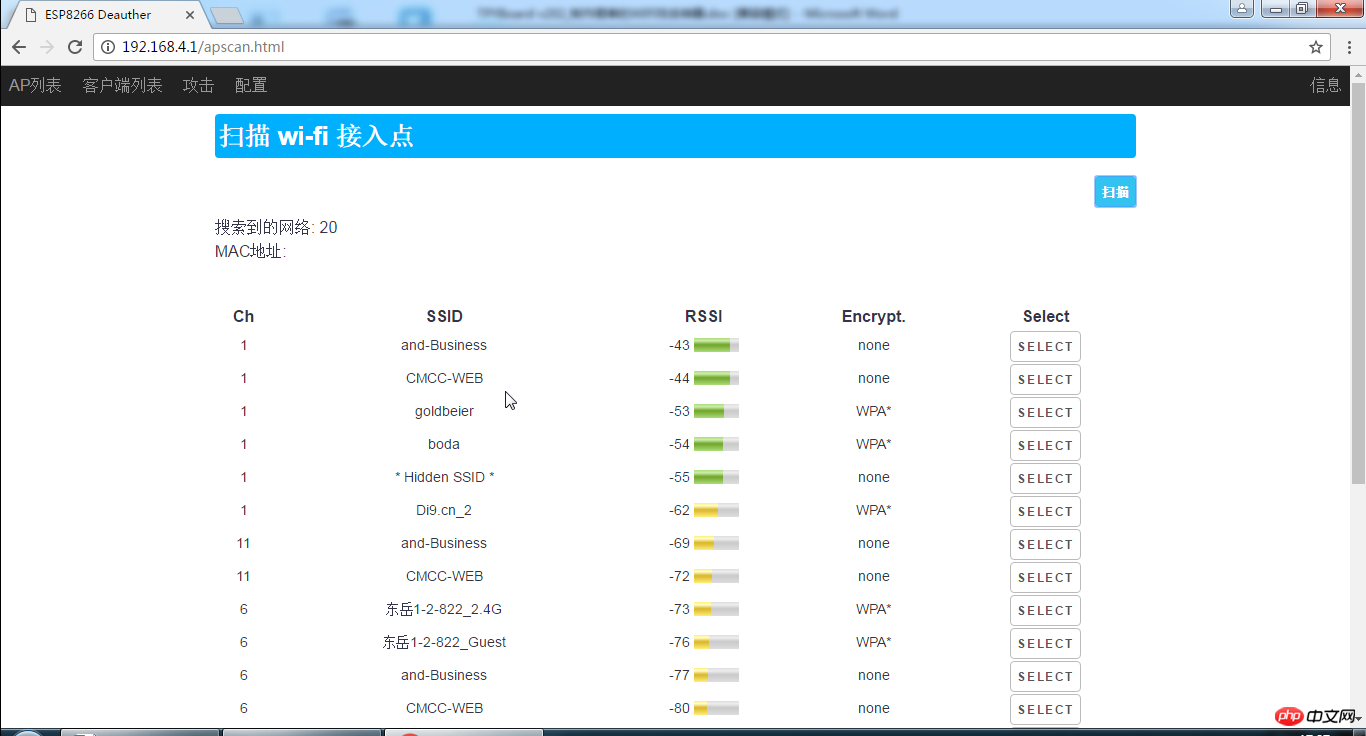
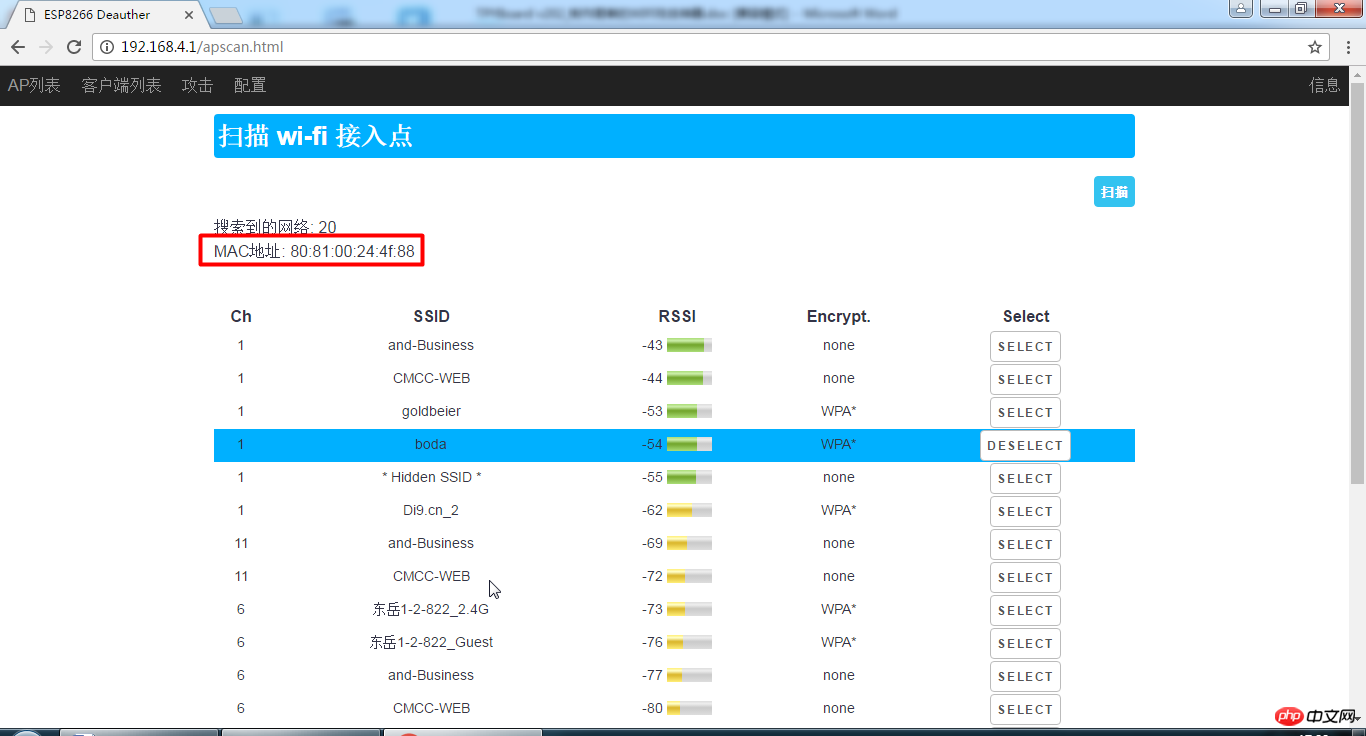 ## 5. After selecting, click [Attack] on the top menu bar to enter the attack page
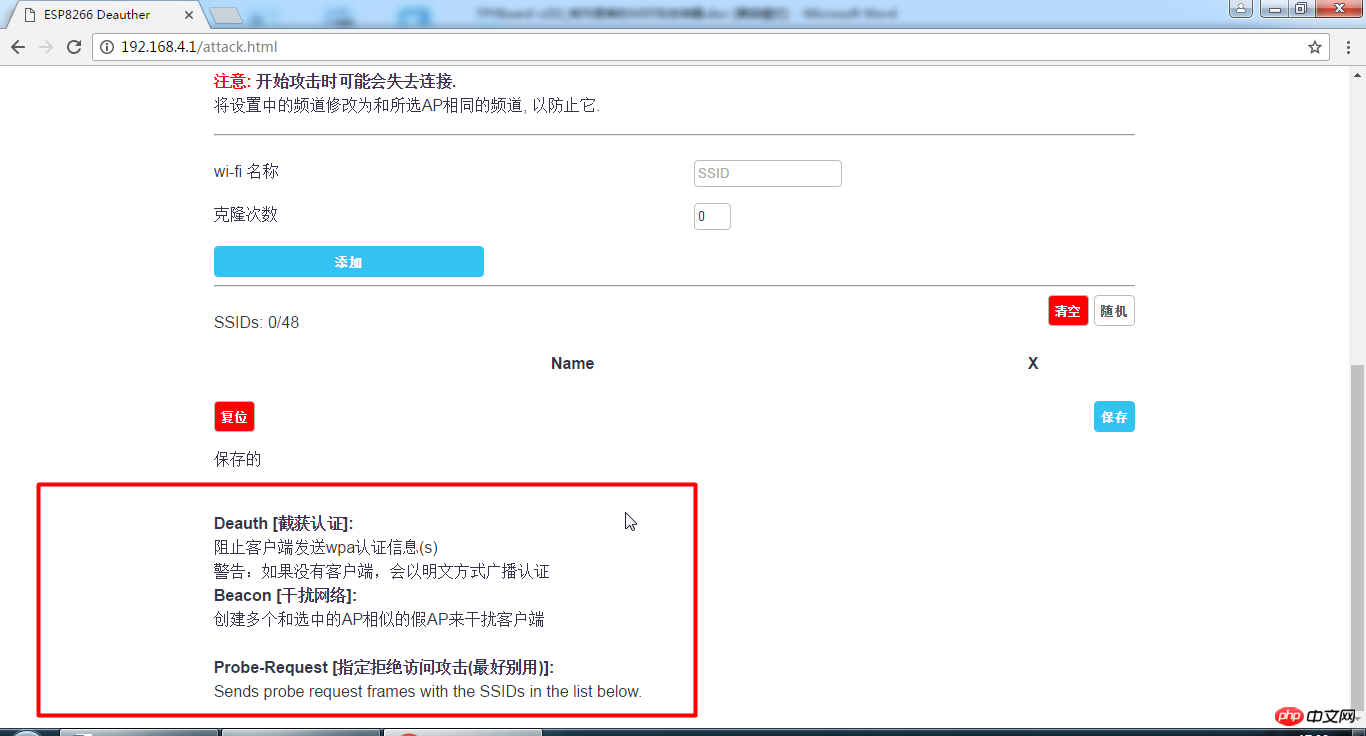
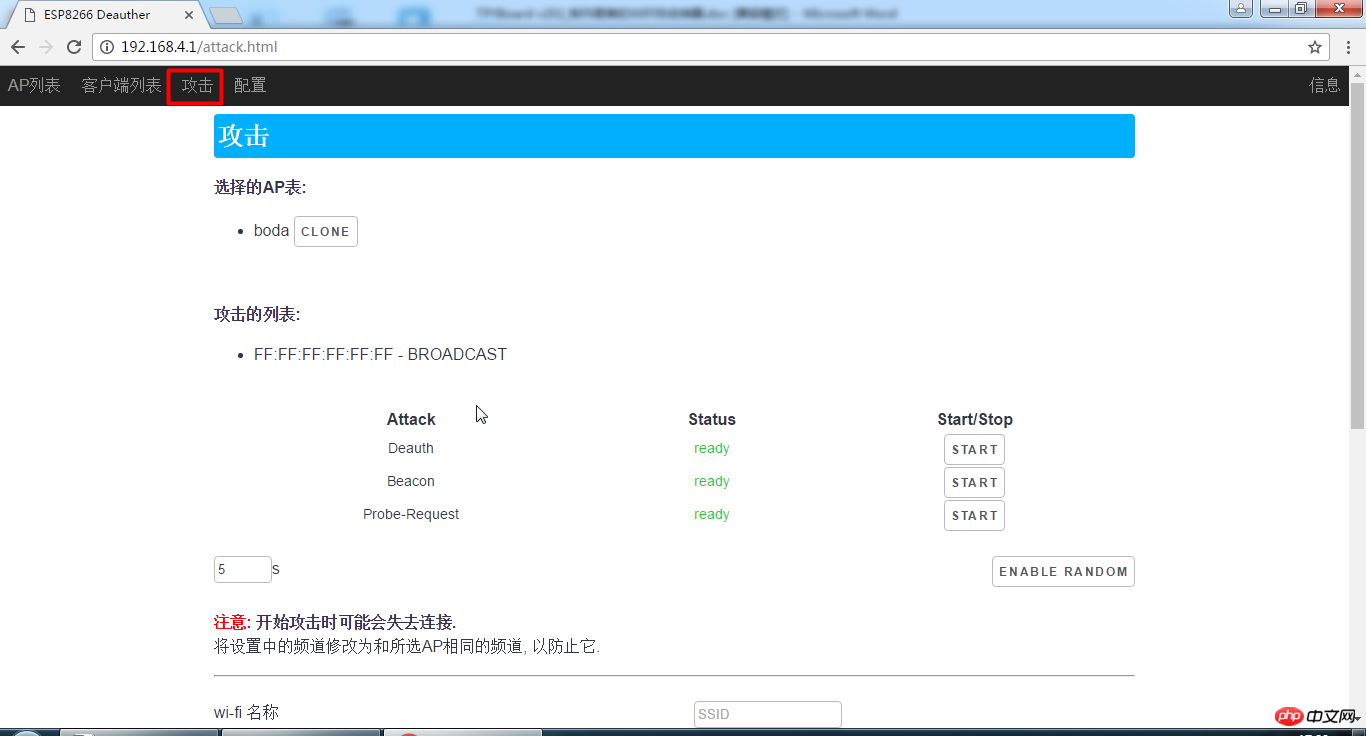 6. There are three attack methods, Deauther, Beacon and Probe-Request. There is an introduction to these three methods at the bottom of the page. I really don’t know how to translate Probe-Request. Can anyone give me some advice?
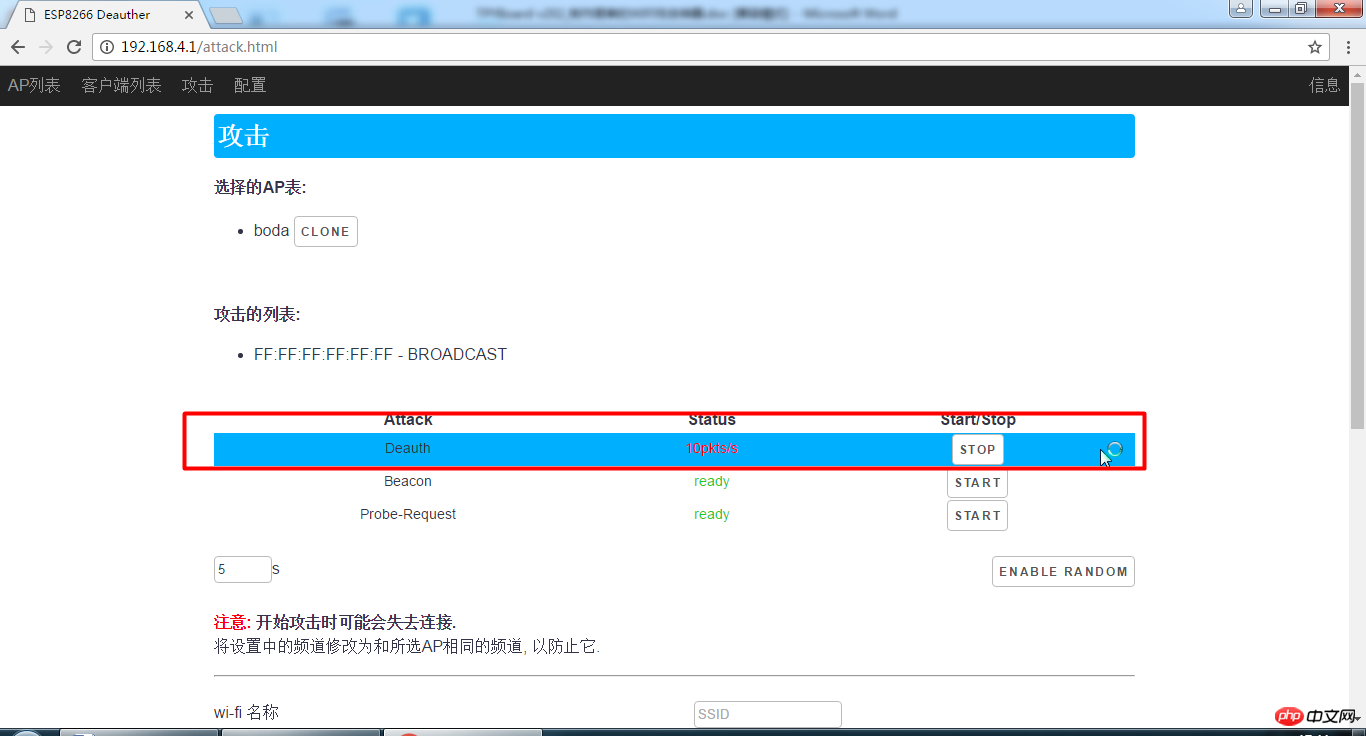
7. This time we use the Deauther method to prevent the client from connecting, and click [START] to start the attack.
 8. Find a mobile phone and do an experiment to see if you can still connect to boda.
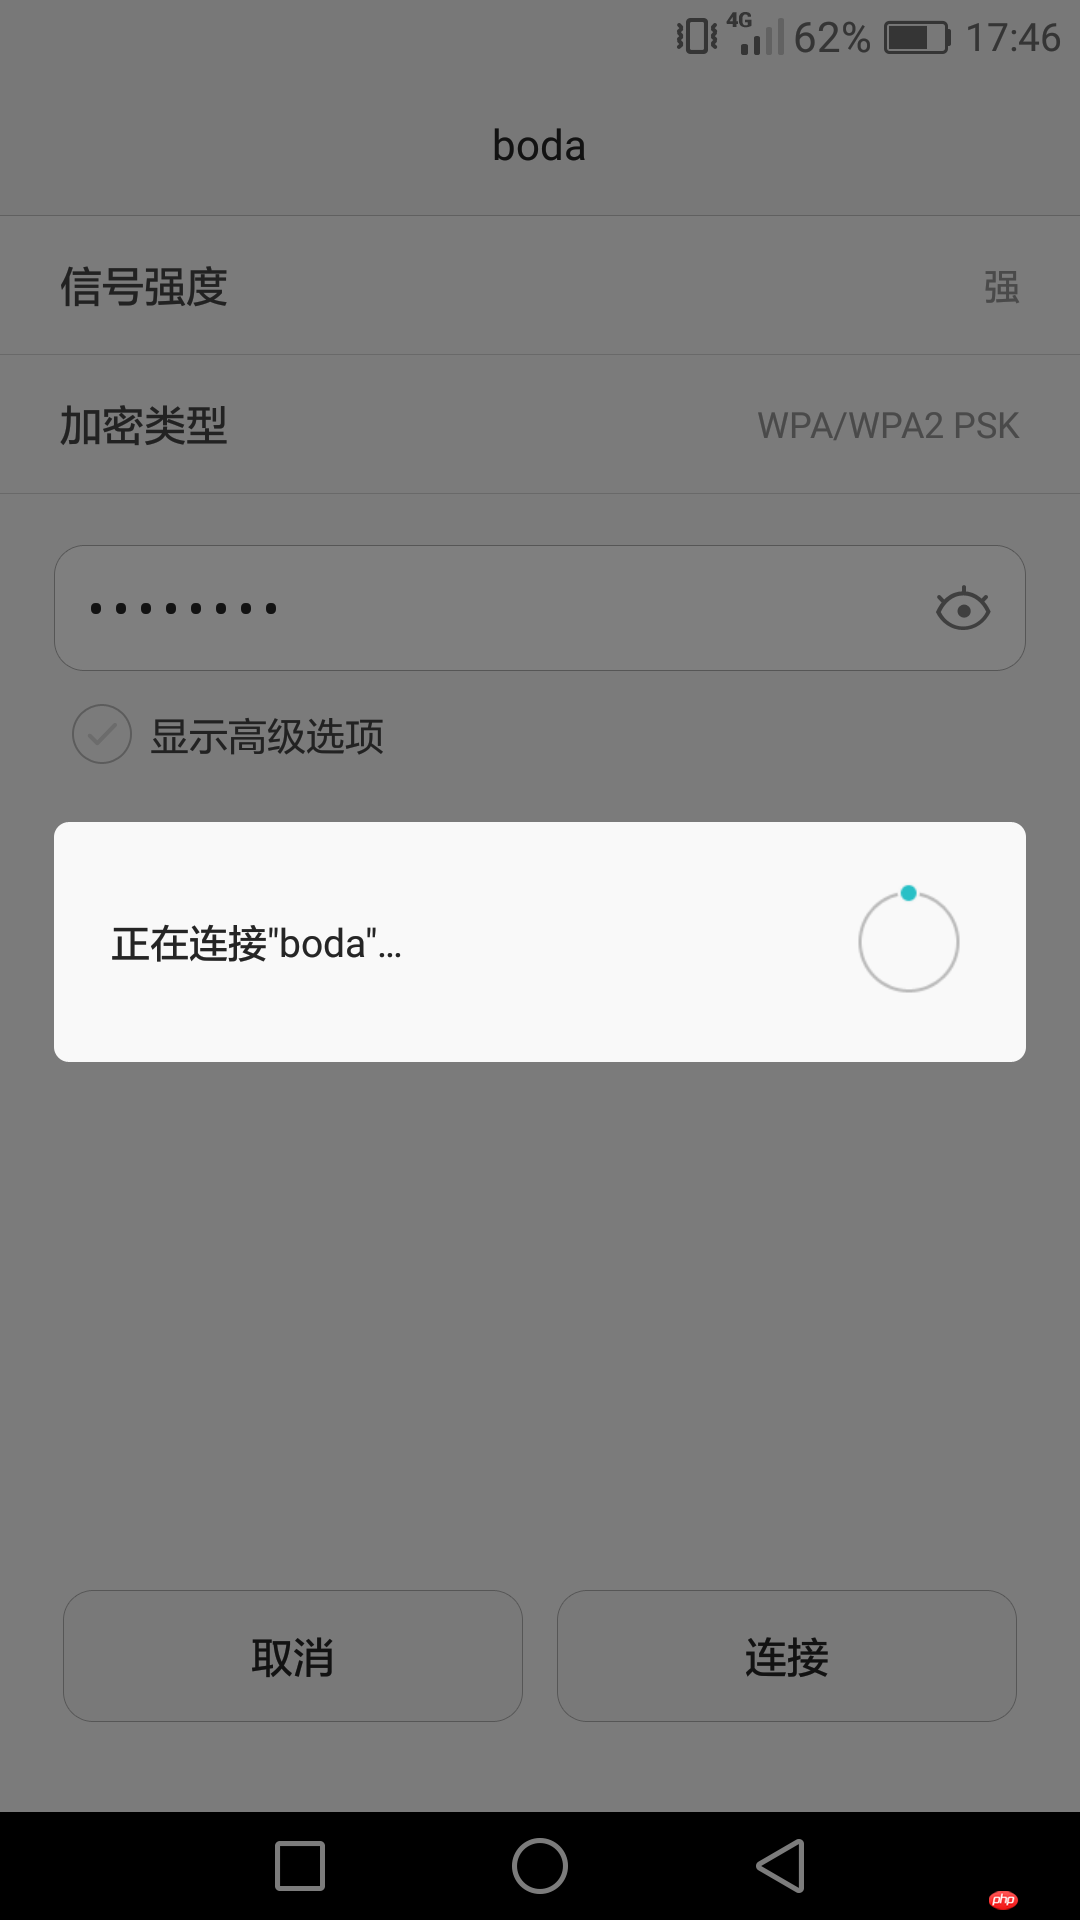 If it is the first time to connect, it will always stay on the connecting interface and the connection cannot be successful.
9. Click [STOP] to stop the attack. After stopping, the phone successfully connected to boda.
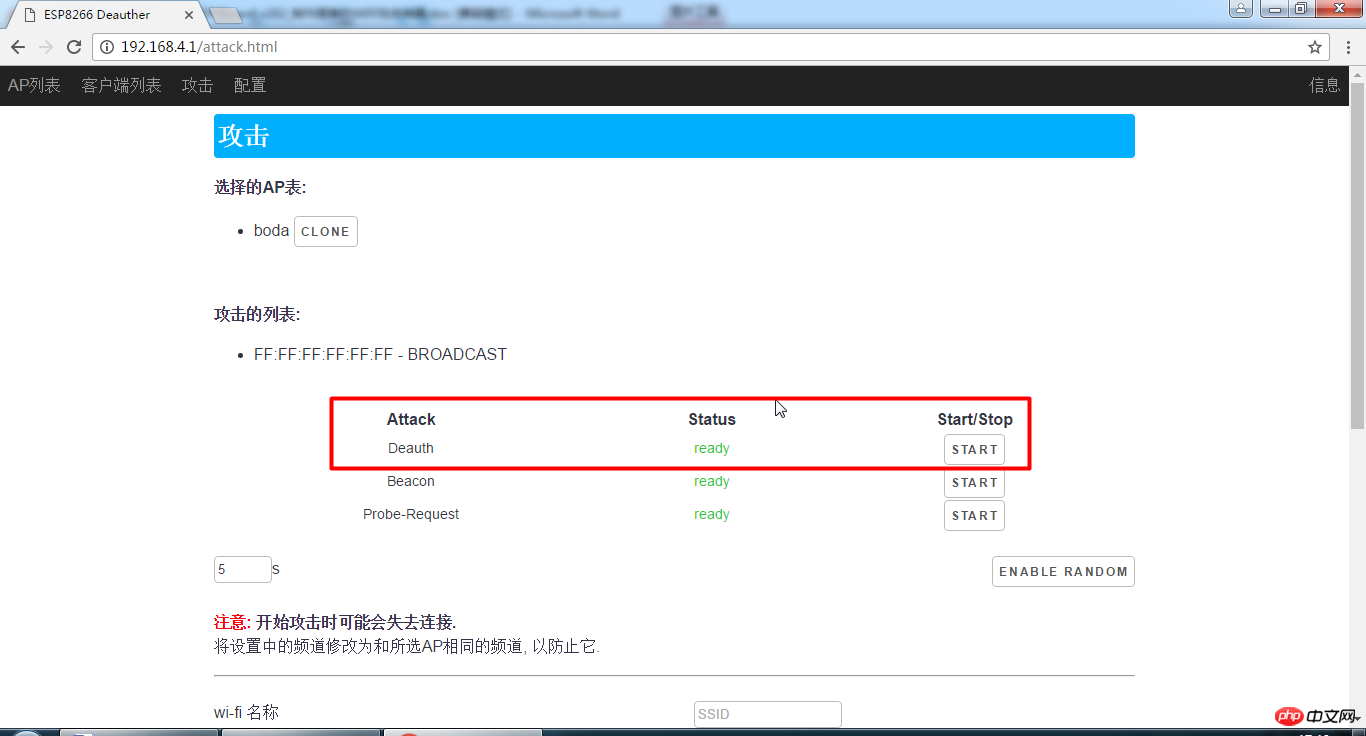 Finally, esp8266_deauther also comes with other attack methods such as wifi replication, so everyone knows.
【Disclaimer】
Please do not use TPYboard to carry out attacks under illegal circumstances. This behavior will be regarded as illegal activities. The author will not bear any responsibility for any adverse consequences caused by this software. Please use it with caution.
The above is the detailed content of TPYBoard makes cheap WIFI jammer. For more information, please follow other related articles on the PHP Chinese website!
 How to solve the invalid mysql identifier error
 How to delete blank pages in word without affecting other formats
 js split usage
 stripslashes function usage
 How to copy an Excel table to make it the same size as the original
 Introduction to the use of vscode
 Linux adds update source method
 Basic usage of insert statement


