


I believe everyone is familiar with uploading on the website, and it can be considered a small technical difficulty, especially in asp.net, some upload size restrictions, upload progress control, and user experience, etc. , today I share here a file upload in asp.net mvc mode, which is also suitable for other web types bootstrap-fileinput.
It comes from an open source project github.com/kartik- v/bootstrap-fileinput/
Document address: plugins.krajee.com/file-input
I spent an afternoon reading the document once, and made the following steps according to the document instructions A small demo, the effect is surprisingly good, the following is the rendering:
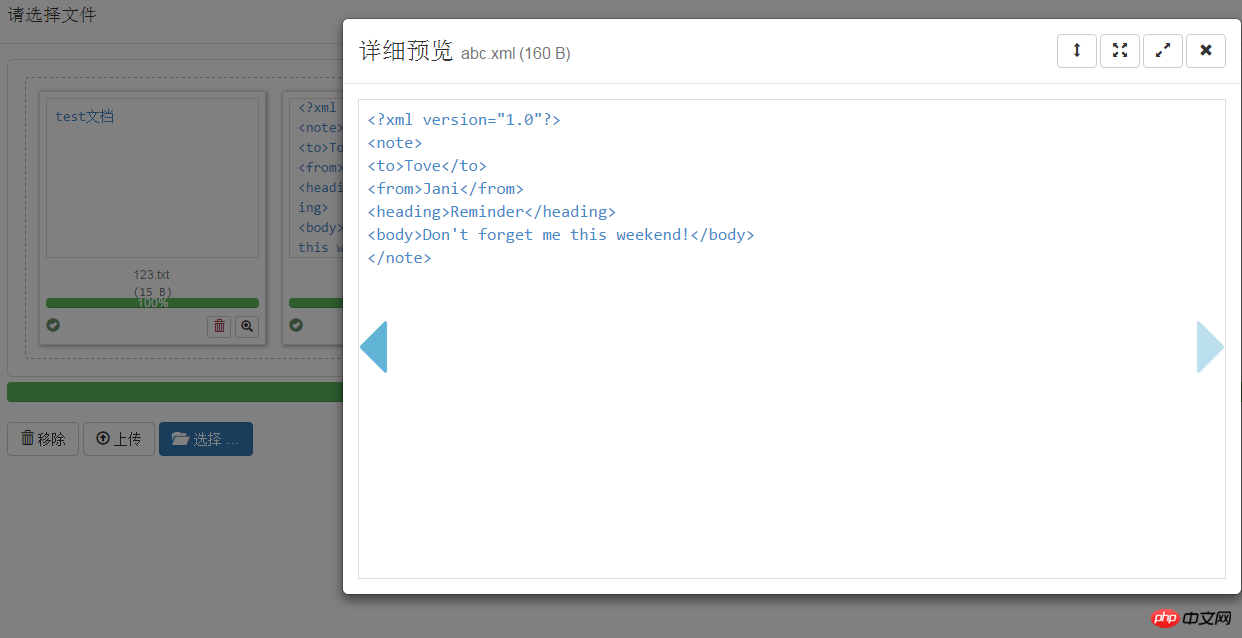
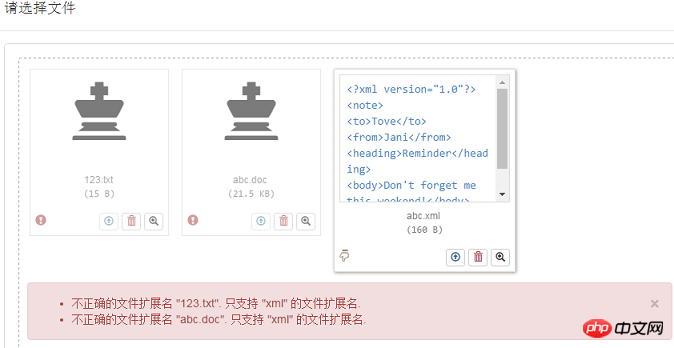
You can filter the file preview and filter it from the client Some files are not applicable, and the interface effect is particularly beautiful
The following is the usage method: Or you can write directly by referring to the code
Usage method:
1.nuget:Install -Package bootstrap-fileinput

@{
Layout = null;
}
<!DOCTYPE html>
<html>
<head>
<meta name="viewport" content="width=device-width" />
<title>Index</title>
<script src="~/scripts/jquery-1.9.1.js"></script>
<script src="~/scripts/bootstrap.js"></script>
<link href="~/Content/bootstrap.css" rel="external nofollow" rel="stylesheet" />
<script src="~/scripts/fileinput.js"></script>
<script src="~/scripts/fileinput_locale_zh.js"></script>
<link href="~/Content/bootstrap-fileinput/css/fileinput.css" rel="external nofollow" rel="stylesheet" />
<script type="text/javascript">
$(function () {
var control = $("#txt_file");
var uploadrul = "/Home/UploadFile";
control.fileinput({
language: 'zh', //设置语言
uploadUrl: uploadrul, //上传的地址
allowedFileExtensions: ['xml','docx'],//接收的文件后缀
showUpload: true, //显示批量上传按钮
showCaption: false,//是否显示标题
browseClass: "btn btn-primary", //按钮样式
dropZoneEnabled: true,//是否显示拖拽区域
//minImageWidth: 50, //图片的最小宽度
//minImageHeight: 50,//图片的最小高度
//maxImageWidth: 1000,//图片的最大宽度
//maxImageHeight: 1000,//图片的最大高度
//maxFileSize: 0,//单位为kb,如果为0表示不限制文件大小
//minFileCount: 0,
maxFileCount: 100,
enctype: 'multipart/form-data',
validateInitialCount: true,
previewFileIcon: "<i class='glyphicon glyphicon-king'></i>",
msgFilesTooMany: "选择上传的文件数量({n}) 超过允许的最大数值{m}!",
});
//导入文件上传完成之后的事件
$("#txt_file").on("fileuploaded", function (event, data, previewId, index) {
});
});
</script>
</head>
<body>
<p>
<form>
<p>
<p class="modal-header">
<h4 class="modal-title" id="myModalLabel">[请选择xml/docx]文件</h4>
</p>
<p class="modal-body">
<input type="file" name="txt_file" id="txt_file" multiple class="file-loading" />
</p>
</p>
</form>
</p>
</body>
</html>using System;
using System.Collections.Generic;
using System.Linq;
using System.Web;
using System.Web.Mvc;
using System.IO;
using System.Xml;
using System.Xml.Schema;
namespace UploadTest.Controllers
{
public class HomeController : Controller
{
//
// GET: /Home/
public ActionResult Index()
{
return View();
}
public JsonResult UploadFile()
{
uploadResult result = new uploadResult();
var oFile = Request.Files["txt_file"];
result.fileName = oFile.FileName;
Stream sm = oFile.InputStream;
byte[] bt= new byte[sm.Length];
sm.Read(bt, 0, (int)sm.Length);
FileStream fs = new FileStream(AppDomain.CurrentDomain.BaseDirectory+oFile.FileName,FileMode.Create);
fs.Write(bt, 0, bt.Length);
fs.Close();
fs.Dispose();
sm.Close();
sm.Dispose();
return Json(result, JsonRequestBehavior.AllowGet);
}
public class uploadResult
{
public string fileName { get; set; }
public string error { get; set; }
}
}
}The above is the detailed content of Code example to implement MVC file upload to support batch upload drag and drop and preview file content verification functions. For more information, please follow other related articles on the PHP Chinese website!


![[Web front-end] Node.js quick start](https://img.php.cn/upload/course/000/000/067/662b5d34ba7c0227.png)


