This article mainly introduces the relevant information on the detailed explanation of the Python crawler verification code implementation function. Friends in need can refer to the following
Main implementation functions:
- Log in to the web page
- Dynamically wait for the web page to load
- Download the verification code
I had an idea very early on , which is to automatically execute a function according to the script, saving a lot of manpower - I am relatively lazy. I spent a few days writing it, with the intention of completing the recognition of the verification code and fundamentally solving the problem, but the difficulty was too high and the recognition accuracy was too low, so the plan came to an end again.
I hope this experience can be shared and communicated with everyone.
Open the browser with Python
Compared with the built-in urllib2 module, the operation is more troublesome. For some web pages, cookies need to be processed. Saving is very inconvenient. Therefore, I am using the selenium module under Python 2.7 to perform operations on the web page.
Test web page: http://graduate.buct.edu.cn
Open the web page: (Need to download chromedriver)
In order to support Chinese character output, we need to call the sys module and change the default encoding to UTF-8
<code class="hljs python">from selenium.webdriver.support.ui import Select, WebDriverWait from selenium import webdriver from selenium import common from PIL import Image import pytesser import sys reload(sys) sys.setdefaultencoding('utf8') broswer = webdriver.Chrome() broswer.maximize_window() username = 'test' password = 'test' url = 'http://graduate.buct.edu.cn' broswer.get(url)</code>
Waiting for the web page to be loaded
The WebDriverWait in selenium is used, and the above code has been loaded
<code class="hljs livecodeserver">url = 'http://graduate.buct.edu.cn' broswer.get(url) wait = WebDriverWait(webdriver,5) #设置超时时间5s # 在这里输入表单填写并加载的代码 elm = wait.until(lambda webdriver: broswer.find_element_by_xpath(xpathMenuCheck))</code> # 在这里输入表单填写并加载的代码 elm = wait.until(lambda webdriver: broswer.find_element_by_xpath(xpathMenuCheck))</code>
Element positioning, character input
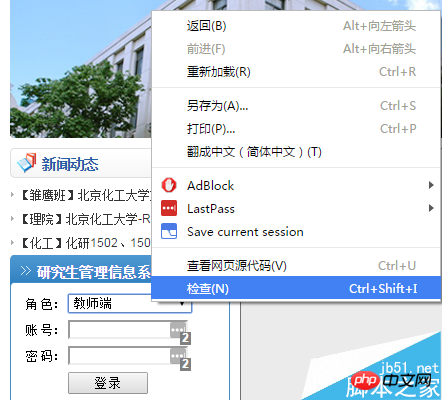
Next we need to log in : Here I am using Chrome, right-click to select the part that needs to be filled in, select Inspect, and it will automatically jump to the developer mode under F12 (this function is needed throughout the process to find relevant resources).

http://www.jb51.net/uploadfile/Collfiles/20160414/20160414092144 893.png " title="\" />
Here we see that there is a value = "1". Considering the properties of the drop-down box, we only need to find a way to assign this value to UserRole. . What is used here is to select through selenium's Select module. The positioning control uses find_element_by_**, which can correspond to one-to-one, which is very convenient.
<code class="hljs sql">select = Select(broswer.find_element_by_id('UserRole')) select.select_by_value('2') name = broswer.find_element_by_id('username') name.send_keys(username) pswd = broswer.find_element_by_id('password') pswd.send_keys(password) btnlg = broswer.find_element_by_id('btnLogin') btnlg.click()</code>


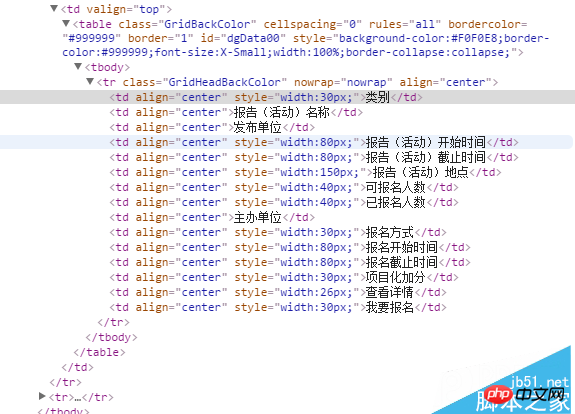
## Right-click on the existing report to find the messages related to this activity. Since there is no report now, only the title is displayed, but there are similarities for the identification of subsequent valid reports.

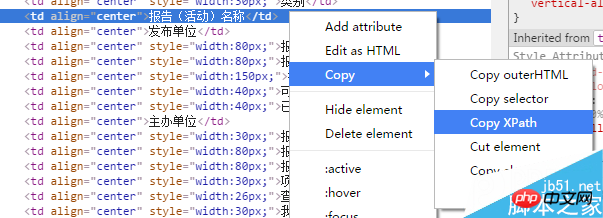
For the positioning of elements, I gave priority to xpath. According to the test, the position of an element can be uniquely positioned, which is very useful.
<code class="hljs perl">//*[@id="dgData00"]/tbody/tr/td[2] (前面是xpath)</code>

The next step we need to take is to crawl existing valid reports:
<code class="hljs axapta"># 寻找有效报告
flag = 1
count = 2
count_valid = 0
while flag:
try:
category = broswer.find_element_by_xpath('//*[@id="dgData00"]/tbody/tr[' + str(count) + ']/td[1]').text
count += 1
except common.exceptions.NoSuchElementException:
break
# 获取报告信息
flag = 1
for currentLecture in range(2, count):
# 类别
category = broswer.find_element_by_xpath('//*[@id="dgData00"]/tbody/tr[' + str(currentLecture) + ']/td[1]').text
# 名称
name = broswer.find_element_by_xpath('//*[@id="dgData00"]/tbody/tr[' + str(currentLecture) + ']/td[2]').text
# 单位
unitsPublish = broswer.find_element_by_xpath('//*[@id="dgData00"]/tbody/tr[' + str(currentLecture) + ']/td[3]').text
# 开始时间
startTime = broswer.find_element_by_xpath('//*[@id="dgData00"]/tbody/tr[' + str(currentLecture) + ']/td[4]').text
# 截止时间
endTime = broswer.find_element_by_xpath('//*[@id="dgData00"]/tbody/tr[' + str(currentLecture) + ']/td[5]').text</code>爬取验证码

对网页中的验证码进行元素审查后,我们发现了其中的一个一个链接,是 IdentifyingCode.apsx,后面我们就对这个页面进行加载,并批量获取验证码。

爬取的思路是用selenium截取当前页面(仅显示部分),并保存到本地——需要翻页并截取特定位置的请研究:
broswer.set_window_position(**)相关函数;然后人工进行验证码的定位,通过PIL模块进行截取并保存。
最后调用谷歌在Python下的pytesser进行字符识别,但这个网站的验证码有很多的干扰,外加字符旋转,仅仅能识别其中的一部分字符。
<code class="hljs livecodeserver"># 获取验证码并验证(仅仅一幅) authCodeURL = broswer.find_element_by_xpath('//*[@id="Table2"]/tbody/tr[2]/td/p/img').get_attribute('src') # 获取验证码地址 broswer.get(authCodeURL) broswer.save_screenshot('text.png') rangle = (0, 0, 64, 28) i = Image.open('text.png') frame4 = i.crop(rangle) frame4.save('authcode.png') qq = Image.open('authcode.png') text = pytesser.image_to_string(qq).strip()</code> <code class="hljs axapta"># 批量获取验证码 authCodeURL = broswer.find_element_by_xpath('//*[@id="Table2"]/tbody/tr[2]/td/p/img').get_attribute('src') # 获取验证码地址 # 获取学习样本 for count in range(10): broswer.get(authCodeURL) broswer.save_screenshot('text.png') rangle = (1, 1, 62, 27) i = Image.open('text.png') frame4 = i.crop(rangle) frame4.save('authcode' + str(count) + '.png') print 'count:' + str(count) broswer.refresh() broswer.quit()</code>
爬取下来的验证码

一部分验证码原图:


从上面的验证码看出,字符是带旋转的,而且因为旋转造成的重叠对于后续的识别也有很大的影响。我曾尝试过使用神经网络进行训练,但因没有进行特征向量的提取,准确率低得离谱。
关于Python爬虫爬验证码实现功能详解就给大家介绍到这里,希望对大家有所帮助!
更多Detailed introduction to the function of Python crawler crawling verification code相关文章请关注PHP中文网!


