In the past few days, the company has launched a new component project, which requires the use of mysql database related technologies. Since I have been using mongodb before, mysql has almost been forgotten, so I can only start again in a Linux virtual machine. study.
Basic addition, deletion, modification and query were fine, but I encountered some problems with data backup. Fortunately, I finally succeeded after some attempts.
The api of Mysql and the backup command mentioned on the Internet are: mysqldump -uroot –p Database name to be backed up > target path/target file name.sql, so I typed it again, but the result was reported A 2002 exception occurred (Additional: When I first used this command, it prompted that mysqldump could not be found. Later, I used a soft link ln to connect the actual address of the mysqldump command to usr/bin):
mysqldump:Got error: 2002: Can't connect to local MySQL server through socket'/tmp/mysql.sock' (2) when trying to connect, 如图1:
Copy after login

After checking the information, I made some modifications, as shown in Figure 2:

But, at this time, 2002 was not available Instead, a 1045 error appeared: mysqldump: Got error: 1045: Access denied for user 'root'@'localhost'(using password: YES) when trying to connect, as shown in Figure 3:

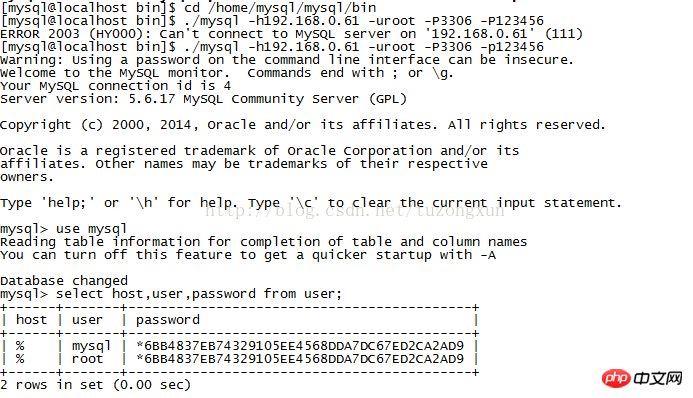
I guess this means there is a problem with the root user and localhost permissions, because I remember that when I set up mysql remote access, I set the host to %, as shown in the figure 4:

##So after searching online again, I found it again Another backup command, after trying it, it was found to be feasible, as shown in Figure 5:

At this point, the mysql database has been successfully backed up in the Linux virtual machine, but this command It was too long, and I thought that the API of MySQL should be correct, so I thought about optimizing it.
So, since the error 1045 occurred, I can probably guess that it is a problem with user permissions, so I will start from here. If there is no root localhost, then add it. Enter the database, use mysql, as shown in Figure 4, and then add the user, as shown in Figure 6:

Check the user table again, you can find that it was added successfully, as shown in Figure 7:

Then the backup command can be changed to the optimized one, as shown in Figure 8:

Obviously, the command has become shorter, but it is still not short enough, so I searched for information again and found a solution. I need to link the actual pointing address of mysql.sock to the address in the 2002 error. My modification is as shown in the figure. 9:

Then finally, it’s probably the moment to witness the miracle. It’s time to verify what the API says: enter the command, press Enter, and successfully back up again. Now you are done, as shown in Figure 10:

#To summarize, the backup can be subdivided into three command methods. If you just barely understand it, you will know In fact, it’s just one kind.
The above is a detailed explanation of the problem of backing up data using the mysql command in Linux. For more related content, please pay attention to the PHP Chinese website (m.sbmmt.com)!


