Most of the current large-scale e-commerce systems use read-write separation technology at the database level, which is a Master database and multiple Slave databases. The Master library is responsible for data update and real-time data query, and the Slave library is of course responsible for non-real-time data query. Because in actual applications, databases read more and write less (the frequency of reading data is high and the frequency of updating data is relatively small), and reading data usually takes a long time and takes up more CPU of the database server, so Affect user experience. Our usual approach is to extract the query from the main database, use multiple slave databases, and use load balancing to reduce the query pressure on each slave database.
The goal of using read-write separation technology: to effectively reduce the pressure on the Master library, and to distribute user requests for data query to different Slave libraries, thereby ensuring the robustness of the system. Let's look at the background of adopting read-write separation.
As the business of the website continues to expand, the data continues to increase, and there are more and more users, the pressure on the database is increasing. Traditional methods, such as database or SQL optimization, basically cannot meet the requirements. This Sometimes you can use the strategy of separation of reading and writing to change the status quo.
Specifically in development, how can we easily achieve separation of reading and writing? There are currently two commonly used methods:
1 The first method is our most commonly used method, which is to define 2 database connections, one is MasterDataSource, and the other is One is SlaveDataSource. When updating data, we read the MasterDataSource, and when querying the data, we read the SlaveDataSource. This method is very simple, so I won’t go into details.
2 The second method of dynamic data source switching is to dynamically weave the data source into the program when the program is running, thereby choosing to read from the main library or the slave library. The main technologies used are: annotation, Spring AOP, reflection. The implementation method will be introduced in detail below.
Before introducing the implementation method, we first prepare some necessary knowledge. Spring's AbstractRoutingDataSource class
AbstractRoutingDataSource is added after spring 2.0. Let's first look at the definition of AbstractRoutingDataSource:
public abstract class AbstractRoutingDataSource extends AbstractDataSource implements InitializingBean {}AbstractRoutingDataSource inherits AbstractDataSource. AbstractDataSource is a subclass of DataSource. DataSource is the data source interface of javax.sql, defined as follows:
public interface DataSource extends CommonDataSource,Wrapper {
/**
* <p>Attempts to establish a connection with the data source that
* this <code>DataSource</code> object represents.
*
* @return a connection to the data source
* @exception SQLException if a database access error occurs
*/
Connection getConnection() throws SQLException;
/**
* <p>Attempts to establish a connection with the data source that
* this <code>DataSource</code> object represents.
*
* @param username the database user on whose behalf the connection is
* being made
* @param password the user's password
* @return a connection to the data source
* @exception SQLException if a database access error occurs
* @since 1.4
*/
Connection getConnection(String username, String password)
throws SQLException;
}The DataSource interface defines 2 methods, both of which obtain database connections. Let's take a look at how AbstractRoutingDataSource implements the DataSource interface:
public Connection getConnection() throws SQLException {
    return determineTargetDataSource().getConnection();
  }

  public Connection getConnection(String username, String password) throws SQLException {
    return determineTargetDataSource().getConnection(username, password);
  }
It is obvious that it calls its own determineTargetDataSource() method to obtain the connection. The determineTargetDataSource method is defined as follows:
protected DataSource determineTargetDataSource() {
    Assert.notNull(this.resolvedDataSources, "DataSource router not initialized");
    Object lookupKey = determineCurrentLookupKey();
    DataSource dataSource = this.resolvedDataSources.get(lookupKey);
    if (dataSource == null && (this.lenientFallback || lookupKey == null)) {
      dataSource = this.resolvedDefaultDataSource;
    }
    if (dataSource == null) {
      throw new IllegalStateException("Cannot determine target DataSource for lookup key [" + lookupKey + "]");
    }
    return dataSource;
  }
What we are most concerned about are the following 2 sentences:
Object lookupKey = determineCurrentLookupKey();
DataSource dataSource = this.resolvedDataSources.get(lookupKey);
determineCurrentLookupKey method returns lookupKey, and the resolvedDataSources method obtains the data source from Map based on lookupKey. resolvedDataSources and determinedCurrentLookupKey are defined as follows:
private Map<Object, DataSource> resolvedDataSources;

protected abstract Object determineCurrentLookupKey()
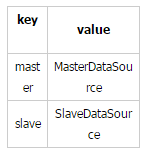
Seeing the above definitions, do we have some ideas? resolvedDataSources is a Map type. We can save MasterDataSource and SlaveDataSource into Map, as follows:

We are here Write a class DynamicDataSource that inherits AbstractRoutingDataSource and implements its determineCurrentLookupKey() method, which returns the Map key, master or slave.
Okay, I’m a little tired after talking so much. Let’s see how to implement it.
The technology we want to use has been mentioned above. Let’s first look at the definition of annotation:
@Retention(RetentionPolicy.RUNTIME)
@Target(ElementType.METHOD)
public @interface DataSource {
  String value();
}
We also need to implement spring’s abstract class AbstractRoutingDataSource, which is to implement the determineCurrentLookupKey method:
public class DynamicDataSource extends AbstractRoutingDataSource {

  @Override
  protected Object determineCurrentLookupKey() {
    // TODO Auto-generated method stub
    return DynamicDataSourceHolder.getDataSouce();
  }

}


public class DynamicDataSourceHolder {
  public static final ThreadLocal<String> holder = new ThreadLocal<String>();

  public static void putDataSource(String name) {
    holder.set(name);
  }

  public static String getDataSouce() {
    return holder.get();
  }
}
From The definition of DynamicDataSource shows that it returns the DynamicDataSourceHolder.getDataSouce() value. We need to call the DynamicDataSourceHolder.putDataSource() method when the program is running to assign a value to it. The following is the core part of our implementation, which is the AOP part. DataSourceAspect is defined as follows:
public class DataSourceAspect {

  public void before(JoinPoint point)
  {
    Object target = point.getTarget();
    String method = point.getSignature().getName();

    Class<?>[] classz = target.getClass().getInterfaces();

    Class<?>[] parameterTypes = ((MethodSignature) point.getSignature())
        .getMethod().getParameterTypes();
    try {
      Method m = classz[0].getMethod(method, parameterTypes);
      if (m != null && m.isAnnotationPresent(DataSource.class)) {
        DataSource data = m
            .getAnnotation(DataSource.class);
        DynamicDataSourceHolder.putDataSource(data.value());
        System.out.println(data.value());
      }

    } catch (Exception e) {
      // TODO: handle exception
    }
  }
}
In order to facilitate testing, I defined 2 databases, shop simulates the Master library, test simulates the Slave library, and the tables of shop and test The structure is the same, but the data is different. The database configuration is as follows:
<bean id="masterdataSource"
    class="org.springframework.jdbc.datasource.DriverManagerDataSource">
    <property name="driverClassName" value="com.mysql.jdbc.Driver" />
    <property name="url" value="jdbc:mysql://127.0.0.1:3306/shop" />
    <property name="username" value="root" />
    <property name="password" value="yangyanping0615" />
  </bean>

  <bean id="slavedataSource"
    class="org.springframework.jdbc.datasource.DriverManagerDataSource">
    <property name="driverClassName" value="com.mysql.jdbc.Driver" />
    <property name="url" value="jdbc:mysql://127.0.0.1:3306/test" />
    <property name="username" value="root" />
    <property name="password" value="yangyanping0615" />
  </bean>

    <beans:bean id="dataSource" class="com.air.shop.common.db.DynamicDataSource">
    <property name="targetDataSources">
       <map key-type="java.lang.String">
         <!-- write -->
         <entry key="master" value-ref="masterdataSource"/>
         <!-- read -->
         <entry key="slave" value-ref="slavedataSource"/>
       </map>

    </property>
    <property name="defaultTargetDataSource" ref="masterdataSource"/>
  </beans:bean>

  <bean id="transactionManager"
    class="org.springframework.jdbc.datasource.DataSourceTransactionManager">
    <property name="dataSource" ref="dataSource" />
  </bean>


  <!-- 配置SqlSessionFactoryBean -->
  <bean id="sqlSessionFactory" class="org.mybatis.spring.SqlSessionFactoryBean">
    <property name="dataSource" ref="dataSource" />
    <property name="configLocation" value="classpath:config/mybatis-config.xml" />
  </bean>
Add aop configuration to the spring configuration
<!-- 配置数据库注解aop -->
  <aop:aspectj-autoproxy></aop:aspectj-autoproxy>
  <beans:bean id="manyDataSourceAspect" class="com.air.shop.proxy.DataSourceAspect" />
  <aop:config>
    <aop:aspect id="c" ref="manyDataSourceAspect">
      <aop:pointcut id="tx" expression="execution(* com.air.shop.mapper.*.*(..))"/>
      <aop:before pointcut-ref="tx" method="before"/>
    </aop:aspect>
  </aop:config>
  <!-- 配置数据库注解aop -->
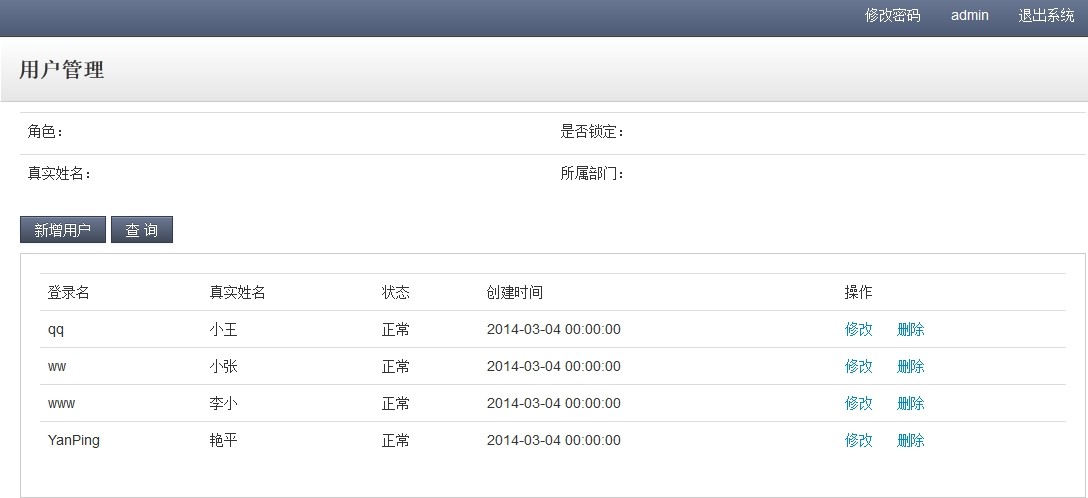
The following is the definition of MyBatis's UserMapper. To facilitate testing, the login read is Master library, user list reads Slave library:
public interface UserMapper {
  @DataSource("master")
  public void add(User user);

  @DataSource("master")
  public void update(User user);

  @DataSource("master")
  public void delete(int id);

  @DataSource("slave")
  public User loadbyid(int id);

  @DataSource("master")
  public User loadbyname(String name);

  @DataSource("slave")
  public List<User> list();
}
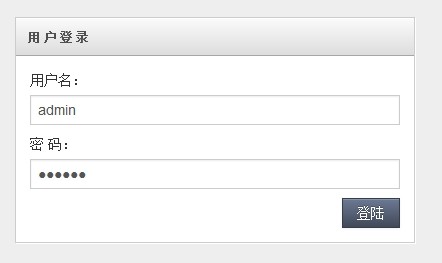
Okay, run our Eclipse to see the effect, enter the user name admin to log in to see the effect


The above is the entire content of this article. I hope it will be helpful to everyone’s learning. I also hope that everyone will support the PHP Chinese website.
For more articles related to examples of Spring implementing database read-write separation, please pay attention to the PHP Chinese website!
 how to hide ip address
 The difference between arrow functions and ordinary functions
 How to enable the same city function on Douyin
 How to open the download permission of Douyin
 How to delete blank pages in word
 How to cast screen from Huawei mobile phone to TV
 How to solve http status 404
 How to connect to database using vb


