This article mainly introduces in detail the use of BootStrapValidator to complete front-end input verification. It has certain reference value. Interested friends can refer to it


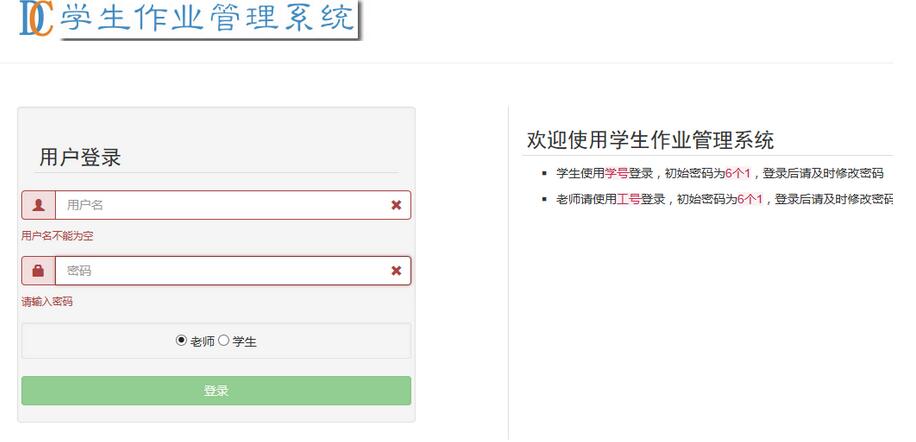
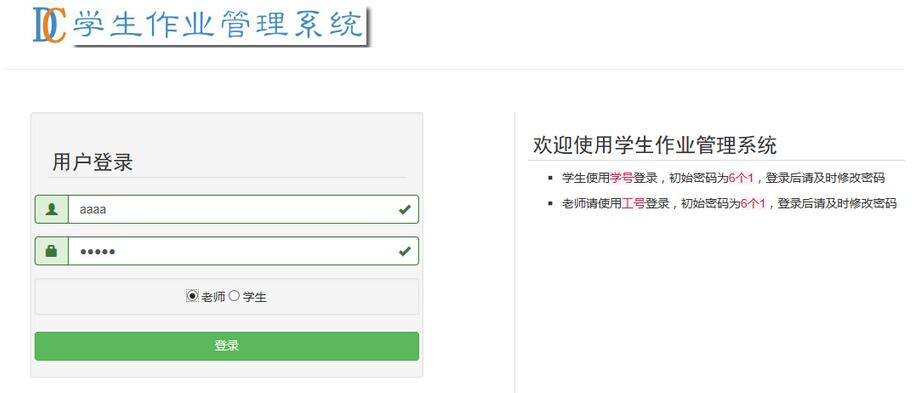
How about it, it is more harmonious. Of course, you can also modify the default style to make it display more beautiful.
Let’s talk about its usage:
1. Download BootStrapValidator
You can click on the official download address of BootStrapValidator to download it.
2. Directory structure after downloading
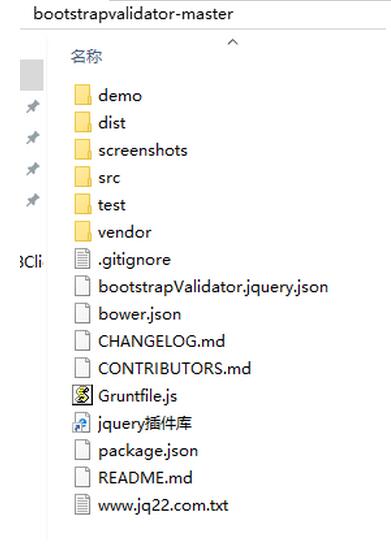
After the download is completed, if all files are converted, the directory structure will be as follows:
 '
'
The files that can be used directly in the project are placed in the dist folder, the examples used are placed in the demo, and the BootStrap and Jquery files it depends on are placed in the Vendor folder. If the BootStrap version of your project is inconsistent with the version it uses, it is recommended to use its BootStrap file, otherwise it may cause display problems (which bothered me for several days, and finally solved it). Let’s see how to use it:
3. Usage
Nothing to say, just go to the code:
(1)Library reference
<link rel="stylesheet" href="../public/static/vendor/bootstrap/css/bootstrap.min.css"/>
<script src="../public/static/js/jquery.min.js"></script>
<script src="../public/static/vendor/bootstrap/js/bootstrap.min.js"></script>
<link rel="stylesheet" href="../public/static/vendor/bootstrapvalidator/css/bootstrapValidator.min.css"/>
<script type="text/javascript" src="../public/static/vendor/bootstrapvalidator/js/bootstrapValidator.min.js"></script>
Mainly refers to BootStrap’s js and css files, and js and CSS files for BootStrapValidator. The above is quoted based on my project structure. Of course, you can create the directory according to your own ideas.
(2)HTML part
<div class="row">
<form action="dologin" method="post" id="loginform">
 <div class="form-group">
 <div class="input-group input-group-md">
 <span class="input-group-addon" id="sizing-addon1"><i class="glyphicon glyphicon-user" aria-hidden="true"></i></span>
 <input type="text" class="form-control" name="username" placeholder="用户名" />
 </div>
 </div>
 <div class="form-group">
 <div class="input-group input-group-md">
 <span class="input-group-addon" id="sizing-addon1"><i class="glyphicon glyphicon-lock"></i></span>
 <input type="password" class="form-control" name="pwd" placeholder="密码" />
 </div>
 </div>
 <div class="well well-sm" style="text-align:center;">

 <input type="radio" name="kind" value="tea"> 老师
 <input type="radio" name="kind" value="stu"> 学生
 </div>
 <button type="submit" class="btn btn-success btn-block">
      登录
 </button>
 </form>
</div>(3)Jquery verification part code
$(document).ready(function(){
 // 在这里写你的代码...
 $('#loginform').bootstrapValidator({
 message:"您的输入值不合法",
 feedbackIcons:{
 valid: 'glyphicon glyphicon-ok',
  invalid: 'glyphicon glyphicon-remove',
  validating: 'glyphicon glyphicon-refresh'
 },
 fields:{
 username:{
 validators:{
 notEmpty:{
 message:'用户名不能为空'
 }
 }
 },
 pwd:{
 validators:{
 notEmpty:{
 message:'请输入密码'
 }
 }
 }
 },
 });
});Okay, I’ve finished writing it here. Of course, here are just some basic usages. There are other more powerful functions, such as asynchronous verification (and server-side communication verification). There are many tutorials on this site, so I won’t go into details here. Hope this article helps you!
For more articles related to using BootStrapValidator to complete front-end input verification, please pay attention to the PHP Chinese website!


