


How to install and configure fail2ban on CentOS?

Installing and configuring fail2ban on CentOS is not complicated, it mainly includes the following steps: 1. Install fail2ban using yum; 2. Manually enable and start the service; 3. Create a jail.local file for custom configuration; 4. Set SSH defense rules, including enabling sshd, specifying the blocking time and retry times; 5. Configure firewalld as an action actuator; 6. Regularly check the blocking IP and logs. Fail2ban detects abnormal login behavior through monitoring logs and automatically blocks suspicious IPs. Its core mechanism relies on the settings of key parameters such as bantime (banned time), findtime (statistic window time) and maxretry (maximum number of failures). When using the default configuration file structure, you should prioritize creating .local files instead of modifying .conf files to avoid configuration loss. For SSH protection, just enable the sshd module in jail.local and adjust the relevant parameters to take effect. At the same time, to ensure that the ban rule is applied correctly, banaction needs to be set to firewallcmd-rich-rules to adapt to firewalld. Users can view the current blocked status through the iptables command or the fail2ban log, and extend the protection rules of other services as needed.
Fail2ban is a very practical intrusion prevention tool that detects abnormal login behavior (such as multiple failed attempts) by monitoring system logs and automatically blocks suspicious IP addresses. Installing and configuring fail2ban on CentOS is not complicated, but requires some basic operations.
Install Fail2ban
The default repository of CentOS usually contains fail2ban, so you can directly install it with yum:
- Run the command:
sudo yum install fail2ban - After the installation is completed, the fail2ban service will not start automatically by default. You need to manually enable and start the service:
-
sudo systemctl enable fail2ban -
sudo systemctl start fail2ban
-
You can use systemctl status fail2ban to check whether the service status is running normally.
Basic configuration file structure
The main configuration file of Fail2ban is /etc/fail2ban/jail.conf , but the official recommendation does not directly modify this file, but create a .local file for custom settings:
- Create or edit configuration file:
sudo vi /etc/fail2ban/jail.local - In this file, you can override the settings in jail.conf, such as changing the ban time, retry times, etc.
Common basic configuration items include:
-
bantime: ban time (unit second) -
findtime: How long does a failed attempt be counted -
maxretry: Maximum number of failed attempts -
ignoreip: You can add whitelist IP to avoid accidentally blocking yourself or other trusted sources
Configure SSH defense rules
SSH is one of the most common attack portals. Fail2ban includes a filtering rule for SSH by default, which only needs to be enabled.
Add or confirm the following in jail.local :
 [sshd]
enabled = true
port = ssh
logpath = %(sshd_log)s
maxretry = 5
bantime = 86400
This configuration means:
- Enable sshd rules
- Use the default SSH log path (usually
/var/log/secure) - If an IP fails more than 5 times within the set time, it will be banned for one day (86400 seconds)
You can also adjust parameters according to your own security needs.
Use Firewalld as Action Actuator
CentOS 7 and above use firewalld as a firewall management tool by default. Fail2ban supports banning IP directly through firewalld.
Make sure that your jail.local has the following configuration:
banaction = firewallcmd-rich-rules
In this way, fail2ban will use rich rules to add temporary blocking rules, and it will take effect without restarting the firewall.
If you want to view the currently blocked IP, you can use the following command:
-
sudo iptables -L -n | grep banned
Or check the fail2ban's own log:
-
sudo cat /var/log/fail2ban.log
Basically that's it. After installation, remember to check the logs and bans regularly. If necessary, you can extend the protection rules of other services, such as preventing FTP or HTTP brute-force cracking. Although there are not many steps, some details are easy to ignore, such as configuration file location and firewalld action settings. If you make a mistake, it may affect the blocking effect.
The above is the detailed content of How to install and configure fail2ban on CentOS?. For more information, please follow other related articles on the PHP Chinese website!

Hot AI Tools

Undress AI Tool
Undress images for free

Undresser.AI Undress
AI-powered app for creating realistic nude photos

AI Clothes Remover
Online AI tool for removing clothes from photos.

Clothoff.io
AI clothes remover

Video Face Swap
Swap faces in any video effortlessly with our completely free AI face swap tool!

Hot Article
Hot Tools

Notepad++7.3.1
Easy-to-use and free code editor

SublimeText3 Chinese version
Chinese version, very easy to use

Zend Studio 13.0.1
Powerful PHP integrated development environment

Dreamweaver CS6
Visual web development tools

SublimeText3 Mac version
God-level code editing software (SublimeText3)


 .NET Core Quick Start Tutorial 1. The beginning: Talking about .NET Core
May 07, 2025 pm 04:54 PM
.NET Core Quick Start Tutorial 1. The beginning: Talking about .NET Core
May 07, 2025 pm 04:54 PM
1. The Origin of .NETCore When talking about .NETCore, we must not mention its predecessor .NET. Java was in the limelight at that time, and Microsoft also favored Java. The Java virtual machine on the Windows platform was developed by Microsoft based on JVM standards. It is said to be the best performance Java virtual machine at that time. However, Microsoft has its own little abacus, trying to bundle Java with the Windows platform and add some Windows-specific features. Sun's dissatisfaction with this led to a breakdown of the relationship between the two parties, and Microsoft then launched .NET. .NET has borrowed many features of Java since its inception and gradually surpassed Java in language features and form development. Java in version 1.6
 Hadoop pseudo-distributed cluster construction
May 07, 2025 pm 04:45 PM
Hadoop pseudo-distributed cluster construction
May 07, 2025 pm 04:45 PM
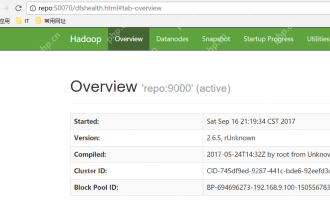
Software preparation I am using a virtual machine with CentOS-6.6, with the host name repo. Refer to the steps to install a Linux virtual machine in Windows, I installed JDK in that virtual machine, refer to the guide to installing JDK in Linux. In addition, the virtual machine is configured with a key-free login itself, and the settings for configuring key-free login between each virtual machine are referenced. The download address of Hadoop installation package is: https://mirrors.aliyun.com/apache/hadoop/common/. I am using hadoop 2.6.5 version. Upload the Hadoop installation package to the server and unzip [root@repo~]#tarzxv
 Postman Integrated Application on CentOS
May 19, 2025 pm 08:00 PM
Postman Integrated Application on CentOS
May 19, 2025 pm 08:00 PM
Integrating Postman applications on CentOS can be achieved through a variety of methods. The following are the detailed steps and suggestions: Install Postman by downloading the installation package to download Postman's Linux version installation package: Visit Postman's official website and select the version suitable for Linux to download. Unzip the installation package: Use the following command to unzip the installation package to the specified directory, for example /opt: sudotar-xzfpostman-linux-x64-xx.xx.xx.tar.gz-C/opt Please note that "postman-linux-x64-xx.xx.xx.tar.gz" is replaced by the file name you actually downloaded. Create symbols
 CentOS: What Led to the Decision to End Support
Apr 23, 2025 am 12:10 AM
CentOS: What Led to the Decision to End Support
Apr 23, 2025 am 12:10 AM
RedHatendedsupportforCentOStoshifttowardsacommerciallyfocusedmodelwithCentOSStream.1)CentOStransitionedtoCentOSStreamforRHELdevelopment.2)ThisencourageduserstomovetoRHEL.3)AlternativeslikeAlmaLinux,RockyLinux,andOracleLinuxemergedasreplacements.
 How to optimize HDFS configuration on CentOS
May 19, 2025 pm 08:18 PM
How to optimize HDFS configuration on CentOS
May 19, 2025 pm 08:18 PM
Optimizing the performance of Hadoop distributed file system (HDFS) on CentOS systems can be achieved through a variety of methods, including adjusting system kernel parameters, optimizing HDFS configuration files, and improving hardware resources. The following are detailed optimization steps and suggestions: Adjust the system kernel parameters to increase the limit on the number of files opened by a single process: Use the ulimit-n65535 command to temporarily adjust. If it needs to take effect permanently, please edit the /etc/security/limits.conf and /etc/pam.d/login files. Optimize TCP parameters: Edit /etc/sysctl.conf file, add or modify the following content: net.ipv4.tcp_tw
 CentOS: A Community-Driven Linux Distribution
Apr 17, 2025 am 12:03 AM
CentOS: A Community-Driven Linux Distribution
Apr 17, 2025 am 12:03 AM
CentOS is a stable, enterprise-grade Linux distribution suitable for server and enterprise environments. 1) It is based on RedHatEnterpriseLinux and provides a free, open source and compatible operating system. 2) CentOS uses the Yum package management system to simplify software installation and updates. 3) Support advanced automation management, such as using Ansible. 4) Common errors include package dependency and service startup issues, which can be solved through log files. 5) Performance optimization suggestions include the use of lightweight software, regular cleaning of the system and optimization of kernel parameters.
 CentOS: Security, Stability, and Performance
Apr 21, 2025 am 12:11 AM
CentOS: Security, Stability, and Performance
Apr 21, 2025 am 12:11 AM
CentOS is the first choice for server and enterprise environments for its superior security, stability and performance. 1) Security provides forced access control through SELinux to improve system security. 2) Stability is supported by the LTS version for up to 10 years to ensure the stability of the system. 3) Performance significantly improves system response speed and resource utilization by optimizing kernel and system configuration.
 How to customize the interface of GitLab on CentOS
May 19, 2025 pm 08:03 PM
How to customize the interface of GitLab on CentOS
May 19, 2025 pm 08:03 PM
Customize the GitLab interface on CentOS system to easily create a personalized workspace! The following steps will guide you how to change the interface language and customize the homepage style: Interface language settings Log in to GitLab: Access your GitLab server address in your browser and log in. Access settings: Click on your user avatar in the upper right corner and select "Settings". Go to User Interface Settings: In the menu on the left, find "Preferences" and select "UserInterface". Select language: In the "User Interface" drop-down menu, select "Chinese(Simplified)",
