


How to Install Linux on Windows with WSL - Make Tech Easier

For a complete Linux experience, nothing beats a full installation. However, if you're a Windows user looking to experiment with Linux, the Windows Subsystem for Linux (WSL) provides an excellent starting point. Setting up a Linux distribution on your Windows system is straightforward, whether you're new to Linux or aiming to use it for development purposes. It's definitely worth trying if you're curious about Linux. This guide will show you how to install Linux on Windows using WSL.
Table of Contents
- What is the Windows Subsystem for Linux (WSL)?
- Linux Distributions Compatible with WSL
- Advantages of Using WSL: What You'll Gain
- Setting Up WSL on Windows 10
- Integrating WSL with Windows
- Running Linux GUI Applications on Windows 11
- Frequently Asked Questions
What is the Windows Subsystem for Linux (WSL)?
The Windows Subsystem for Linux (WSL) is a feature you can install on Windows that enables you to run a Linux distribution supported by the Microsoft Store on a Windows 10 or Windows 11 machine. Microsoft has collaborated with Canonical, the company behind Ubuntu, to bring Ubuntu's Bash command line capabilities to Windows desktops, allowing for seamless integration of Linux and Windows workflows.
WSL supports Linux file systems through Bash commands but does not provide a full Linux desktop experience, which requires a virtual machine or dual-boot setup. Starting with Windows 11, WSL can run native Linux GUI applications like Gedit, GIMP, and Nautilus alongside Bash.
For Linux users accustomed to command line tools, WSL feels intuitive and familiar. It's also beneficial for Windows developers looking to deploy applications to Linux servers.
Linux Distributions Compatible with WSL
To use your preferred Linux distribution with WSL, ensure it's available for download from the Microsoft Store. Compatible distributions include:
- Ubuntu
- Debian
- Kali Linux
- SUSE Linux Enterprise Server
- Fedora Remix for WSL (Paid version)
- openSUSE Leap
- Alpine Linux
Advantages of Using WSL: What You'll Gain
Using WSL on your Windows device offers several key benefits:
- Running Linux on Windows: You can have a Linux virtual machine operating on your Windows system, allowing you to run your favorite Linux distribution simultaneously.
- Launch Linux Apps as Standalone Windows Applications: You can start Linux applications directly from the Windows Start menu or pin them to the taskbar, accessing them from your Windows desktop.
- Seamless Switching Between Windows and Linux: You can switch effortlessly between Linux and Windows, and importantly, access your Windows files and applications from within the Linux shell. WSL is unique in enabling cut and paste operations between Windows and Linux applications.
- Support for Cross-Platform Languages and Services: With WSL, you can run sophisticated programs across both operating systems, including vim, emacs, NodeJS, Python, Ruby, C/C , Rust, Go, MySQL, Apache, and MongoDB.
- Adapting Windows Applications to Linux User Habits: If you're a frequent Linux user, you can bring your favorite Linux commands to a Windows desktop without dealing with its interface. Whether editing a Word document or running Notepad , you can do so using Linux methods.
However, if you're a Windows user new to Linux, you'll need to learn some basic Linux commands to start. Don't worry; there aren't too many for a Windows user's needs.
Setting Up WSL on Windows 10
To set up WSL, you'll need a recent version of Windows 10 and basic knowledge of using Windows PowerShell or Command Prompt.
The following instructions will help you install the latest version of Windows Subsystem for Linux (WSL2, Build 21354 as of September 2021).
- On your Windows 10 device, search for the Control Panel feature named "turn Windows features on or off."

- In the Windows Features menu, select the options for "Windows Subsystem for Linux" and "Windows PowerShell."

- Launch PowerShell or Command Prompt as an administrator.
- Enter the following command:
<code>dism.exe /online /enable-feature /featurename:Microsoft-Windows-Subsystem-Linux /all /norestart</code>

- Restart your computer if prompted; otherwise, continue.
- Open the Microsoft Store and search for "Linux" to view available distributions. For this example, we'll install Ubuntu.

- Click the "Install" button within the Store app to download your chosen Linux distribution.

- You'll receive a notification once the Linux distribution is installed on your Windows 10 desktop. You can open it directly from the Start Menu in the future.

- When the Linux Bash window opens, choose a username. It doesn't need to match your Windows login.

- Enter and confirm a password. Note that the password won't be visible, so store it securely. If you forget your password, you'll need to uninstall the Linux distribution, which will delete all your Linux files.

- Update your installation by running:
<code>sudo apt update</code>

- Wait for the updates to finish, then check for any upgradable versions in your Linux distribution with:
<code>apt list --upgradable</code>

- Once you've identified available upgrades, apply them to your system using:
<code>sudo apt upgrade</code>

- The update process involves extracting templates from Linux packages, followed by pre-configuration and applying settings. Be patient as this is automatic.

- If you need to install specific Ubuntu packages like npm, groovy, impish, or hirsute, use:
<code>sudo apt install [package_name]</code>

- Wait for the updates to complete, indicated by the green progress bar reaching 100 percent. If there are errors due to misconfiguration, the progress bar will turn red and suggest fixes.

Integrating WSL with Windows
You can use your Linux installation as a separate system on Windows, with its own files and programs. You might prefer storing some files on Linux for performance benefits, but one of WSL's significant advantages is the ability to interact with your Windows files and folders by mounting the drive in your Linux system. This setup allows you to use Linux alongside your Windows content, keeping everything in one place.
Now that you've learned how to install Linux using WSL on your Windows 10 device, it's time to get familiar with its basic commands.
Basic Linux Commands
If you're already comfortable with Linux command line navigation, you can skip ahead. Otherwise, here are some essential commands for navigating the Linux command line.
Using Linux commands in a Windows shell like PowerShell or Command Prompt is simple. Just use:
<code>wsl [the command you want to use]</code>
- For example, to display the current directory path from the root, use:
<code>wsl pwd</code>
- To list the contents of your current directory, enter:
<code>wsl ls</code>
This will execute the Linux command on Windows without opening the actual operating system.
- To create directories in Linux, use:
<code>wsl mkdir "give a name to the directory"</code>
- To change the default path to your newly created directory, use:
<code>cd "created directory name"</code>
See the screenshot below for these commands in action.

- To start the entire Linux operating system from within PowerShell or Command Prompt, run:
<code>wsl.exe</code>
or
<code>bash.exe</code>

You might also want to know how to access Windows directories from within your Linux system. Windows is essentially mounted as an external drive to the Linux system, allowing Linux to use it for storage, similar to editing files on a flash drive.
- Open your Linux terminal (Ubuntu, in this case) as a Windows administrator.

- Access your Windows C: drive by entering:
<code>cd /mnt/c</code>

- To see editing in action, create a folder using:
<code>mkdir [your_directory_name]</code>

- Open File Explorer and check your C: drive to confirm that Ubuntu created a folder there.

- Navigate to the directory path by typing:
<code>cd /mnt/c/[your_directory_name]</code>

- Create a file using:
<code>touch [your_file_name]</code>

- Verify that the new text file appears in the chosen directory.

- To edit the file, use:
<code>nano [your_file_name]</code>

- Add some dummy text to test the command screen. This will modify the file created by Bash.

Press Ctrl O to save, then Ctrl X to exit.
- Check your Windows file system again to see the text file with your entered content.

You can navigate to any other folder or document on your Windows drive and edit it using Ubuntu.
- To access your Linux files in Windows or view a GUI representation of your filesystem, navigate to the desired Linux directory and enter:
<code>explorer.exe .</code>

The period at the end represents the current directory, and including it will launch a Windows Explorer window displaying your Linux files.
- You can also launch other Windows apps and run Windows commands from Linux. For example:
<code>Notepad.exe</code>
will start Notepad.

Running Linux GUI Applications on Windows 11
So far, we've focused on running Linux via the command line on Windows 10. With Windows 11, you can now experience a limited GUI with Windows Subsystem for Linux (WSL).
To enjoy GUI applications for Ubuntu or other supported distributions, you need at least Windows 11 build 22000 or higher.
- Upgrade from Windows 10 to Windows 11 by following the steps outlined in this guide.
- On your Windows 11 device, open PowerShell in Administrator mode. To install Ubuntu, enter:
<code>wsl --install -d Ubuntu</code>

- You might also want to update WSL on your device with:
<code>wsl --update</code>
- Wait for the distribution download to complete, then reboot your system to apply the changes.

- After restarting, the feature updates will take effect, and the new distribution will be installed on your Windows 11 device. It will launch automatically.

- Once the target distribution is running in the Windows 11 Bash window, you can install GUI applications like Gedit, a text editor, using:
<code>sudo apt install gedit -y</code>

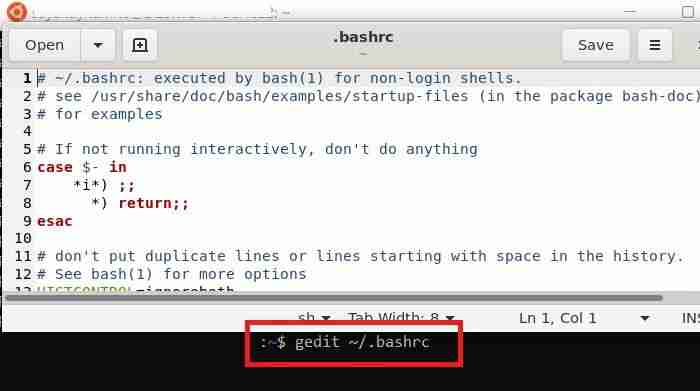
- After installing Gedit, launch it with:
<code>gedit ~/.bashrc</code>
We've demonstrated how to install and launch GUI applications in your Linux Bash terminal. If you're familiar with Linux commands, you can start experimenting with them on Windows.
Frequently Asked Questions
1. How do I uninstall WSL or Linux distributions from my Windows PC?
You can uninstall WSL and its distributions using PowerShell/Command Prompt or from "Add or remove programs" in Windows 10/"Apps and Features" in Windows 11.
To uninstall any configured Linux distribution using PowerShell in Admin mode, use:
<code>wslconfig /u "distro name"</code>

To confirm the distribution has been uninstalled, use:
<code>wsl -l</code>

To distinguish WSL from PowerShell, enter the following command, which will list installed applications. You can then use wsl --help for guidance on uninstallation.
<code>Get-WmiObject -Class Win32_Product | Select-Object -Property Name</code>

Alternatively, the easiest way to uninstall WSL is to find it in your list of apps and click the Uninstall button. The following screenshot is for Windows 11.

2. Where are my WSL files stored on a Windows device?
To access WSL files on a Windows 10/11 device for any installed distribution, search for the %LOCALAPPDATA% hidden folder on the C drive.
3. Is Windows Linux Subsystem safe to use?
Yes. The host Windows system maintains full control over the guest Linux subsystem. As long as you've enabled security features in Windows with Windows Defender and corrected any settings errors in Defender, your virtual Linux subsystem is safe to use.
What Else Can You Do?
Now that you understand how to install Linux on Windows 10 and 11 and how it integrates with Windows, you can explore numerous possibilities. You can run programming languages, operate local servers, use a Windows IDE within the Linux shell, run multiple Linux distributions simultaneously, or simply experiment with Linux to become more comfortable with the command line. The risk of making mistakes is low; resetting or reinstalling your Linux distribution is easy.
To work with Bash prompts, explore the best available options. While running a Linux subsystem on Windows, check out some of the best Linux games you can play on your Windows PC.
The above is the detailed content of How to Install Linux on Windows with WSL - Make Tech Easier. For more information, please follow other related articles on the PHP Chinese website!

Hot AI Tools

Undress AI Tool
Undress images for free

Undresser.AI Undress
AI-powered app for creating realistic nude photos

AI Clothes Remover
Online AI tool for removing clothes from photos.

Clothoff.io
AI clothes remover

Video Face Swap
Swap faces in any video effortlessly with our completely free AI face swap tool!

Hot Article
Hot Tools

Notepad++7.3.1
Easy-to-use and free code editor

SublimeText3 Chinese version
Chinese version, very easy to use

Zend Studio 13.0.1
Powerful PHP integrated development environment

Dreamweaver CS6
Visual web development tools

SublimeText3 Mac version
God-level code editing software (SublimeText3)


 How to Change ChatGPT Personality in Settings (Cynic, Robot, Listener, Nerd)
Aug 08, 2025 am 09:33 AM
How to Change ChatGPT Personality in Settings (Cynic, Robot, Listener, Nerd)
Aug 08, 2025 am 09:33 AM
Visit our disclosure page to learn how you can support MSPoweruser in maintaining the editorial team Read moreWant ChatGPT to reflect your mood or communication style? With the launch of ChatGPT 5, OpenAI introduces five distinct personalities – choo
 How to manage notifications and actions in Windows
Aug 15, 2025 am 11:31 AM
How to manage notifications and actions in Windows
Aug 15, 2025 am 11:31 AM
You can manage notifications and actions in Windows through settings to stay focused and track important reminders. 1. Open "Settings" (Win I), enter "System>Notifications", and you can turn off notifications globally or manage notification permissions one by one, including banners, sounds and lock screen displays. 2. Select "Off", "Priority Only" or "Alarm Only" mode in "Focus Assist", and customize the priority apps and contacts. You can also set the automatic activation time or turn it on when projecting screens or playing games. 3. Open the Operation Center (Windows10) or Notification Center (Windows11) through the taskbar icon or swipe right, and clear all or individual notifications, and edit common shortcut buttons in "Quick Action". 4. Other prompts include closing notifications
 How to fix a '0x800f0954' error when installing optional features in Windows
Aug 05, 2025 am 09:30 AM
How to fix a '0x800f0954' error when installing optional features in Windows
Aug 05, 2025 am 09:30 AM
First, run Windows Update troubleshooter to automatically repair common problems, 1. Run Windows Update troubleshooter; 2. Check network connection and proxy settings to ensure that you can access the Windows Update Server; 3. Use DISM command to repair component storage, and specify the local Windows ISO source if necessary; 4. Manually specify the ISO source path when installing optional functions through PowerShell; 5. Reset Windows Update component services and clear cache; 6. Run sfc/scannow and chkdsk to check system and disk errors; finally ensure that the system is updated to the latest and use official ISO first to solve the problem of missing files, and in most cases, you can successfully repair 0x800f0954 errors
 Windows permanently stops system update
Aug 12, 2025 pm 08:24 PM
Windows permanently stops system update
Aug 12, 2025 pm 08:24 PM
Permanently stop Windows system updates: Use the Group Policy Editor: Double-click "Auto Update" settings and select "Disabled". Using the Registry Editor: Set the data value of "NoAutoUpdate" to "1". Advantages: Completely stop future updates and free up storage space. Disadvantages: Increased security risks, loss of functions, and incompatibility problems. Note: Use only after understanding the risks, you will be responsible for the consequences.
 Fixed: Windows Update Failed to Install
Aug 08, 2025 pm 04:16 PM
Fixed: Windows Update Failed to Install
Aug 08, 2025 pm 04:16 PM
RuntheWindowsUpdateTroubleshooterviaSettings>Update&Security>Troubleshoottoautomaticallyfixcommonissues.2.ResetWindowsUpdatecomponentsbystoppingrelatedservices,renamingtheSoftwareDistributionandCatroot2folders,thenrestartingtheservicestocle
 How to fix mouse lag or stuttering in Windows 11
Aug 13, 2025 am 11:45 AM
How to fix mouse lag or stuttering in Windows 11
Aug 13, 2025 am 11:45 AM
First check the hardware and connection, replace the mouse, use different USB ports, replace the wireless mouse battery, avoid using the USB hub and reduce wireless interference; 2. Update or reinstall the mouse driver, automatically update through the device manager or download the latest driver from the manufacturer's official website, uninstall if necessary and restart the system to reinstall; 3. Adjust the mouse and power settings, turn off the "Improve pointer accuracy" option, and disable all USB root hubs in the device manager to enable the computer to turn off this device to save power; 4. Turn off the high-occupancy applications and services in the background, troubleshoot programs with high resource occupancy through the task manager, manage startup items or perform clean boots to troubleshoot conflicting software; 5. Update the Windows system and BIOS, and install the latest system supplement
 How to restore the original system font in Windows
Aug 04, 2025 am 08:46 AM
How to restore the original system font in Windows
Aug 04, 2025 am 08:46 AM
To restore Windows system fonts, please first check whether you have modified the font using a third-party tool. If so, reset the "Restore Default" option of the tool; if no tool is available, you can manually locate HKEY_LOCAL_MACHINE\SOFTWARE\Microsoft\WindowsNT\CurrentVersion\Fonts through the registry editor to ensure that the font value of SegoeUI is correctly pointed to segoeui.ttf and other files, and back up the registry if necessary; then run the command prompt as an administrator and execute the sfc/scannow command to repair the system files; finally go to Settings → Personalization → Theme, and select Windows to light it by default.
 How to set up multiple monitors on Windows 11
Aug 05, 2025 pm 07:25 PM
How to set up multiple monitors on Windows 11
Aug 05, 2025 pm 07:25 PM
Connectyourmonitorsusingappropriatecablesandpowerthemon.2.OpenDisplaysettingsbyright-clickingthedesktopandselect"Displaysettings"todetectmonitors.3.Arrangedisplayiconstomatchyourphysicalsetup,setaprimarydisplay,andadjustresolutionandscaling
