We started working on the accounts app in the previous articles, this article will build on it. It will cover
I'll try to cover as many details as possible without boring you, but I still expect you to be familiar with some aspects of Python and Django.
the final version of the source code can be found at https://github.com/saad4software/alive-diary-backend
Check previous articles if interested!
How does forgetting password request work? the process should follow the steps
So, we need an API that takes the email address, creates an activation code, and sends it to the user, the same as the resend code API.
We also need another API that takes the email, activation code, and the new password to reset the password.
Starting with resend code API sounds like a good idea now.
As always, let's start with the serializer
class SendCodeSerializer(serializers.Serializer):
    username = serializers.CharField(required=True)

    def validate_username(self, value):
        if not is_valid_email(value):
            raise serializers.ValidationError("invalid_email")

        verification_query = get_user_model().objects.filter(username=value).exists()
        if not verification_query:
            raise serializers.ValidationError("invalid_username")

        return value
app_account/serializers.py
This is a generic serializer, with one field, the username, we are checking to make sure it is a valid email address, and the user is registered in the system.
now for the views
class AccountSendCodeView(APIView):
    permission_classes = ()
    renderer_classes = [CustomRenderer, BrowsableAPIRenderer]


    @swagger_auto_schema(request_body=SendCodeSerializer)
    def post(self, request, *args, **kwargs):
        serializer = SendCodeSerializer(data=request.data)

        if not serializer.is_valid():
            raise APIException(serializer.errors)

        user = get_user_model().objects.filter(username=serializer.validated_data.get("username")).first()
        code = VerificationCode(user=user, email=user.username)
        code.save()

        send_mail(
            'Password Reset Code',
            'Your password reset code is ' + str(code.code),
            f'AliveDiary<{settings.EMAIL_SENDER}>',
            [user.username],
            fail_silently=False,
        )

        return Response("success")
app_account/views.py
The view starts by validating the request, then fetching the user and creating a code instant for it. and finally sends the code via email to the user.
And finally, the URLs
urlpatterns = [
    path('register/', AccountRegisterView.as_view()),
    path('activate/', AccountActivateView.as_view()),

    path('login/', AccountLoginView.as_view()),
    path('refresh/', AccountRefreshTokenView.as_view()),

    path('code/', AccountSendCodeView.as_view()), #new

    path('password/', AccountChangePasswordView.as_view()),
]
app_account/urls.py
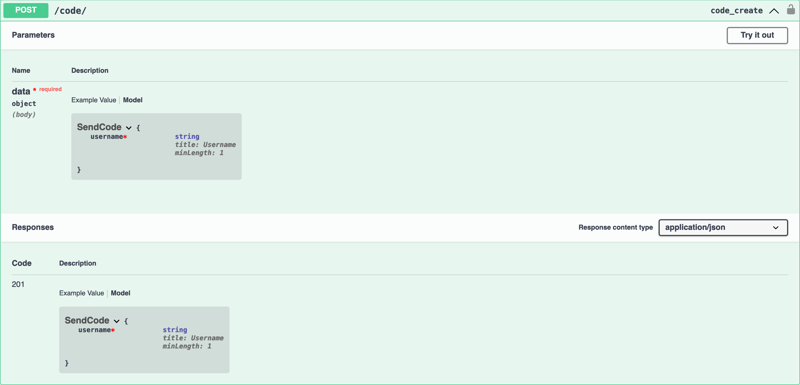
we can test it on swagger now

The serializer should contain the username, the sent code, and the new password; it should check to make sure it is a valid username and code, somewhat like
class ForgotPasswordSerializer(serializers.Serializer):
    username = serializers.CharField(required=True)
    code = serializers.CharField(required=True)
    new_password = serializers.CharField(required=True)

    def validate(self, data):
        verification_query = VerificationCode.objects.filter(
            user__username=data['username'],
        ).order_by('-id')

        if not verification_query.exists():
            raise serializers.ValidationError("no_code")

        code = verification_query[0]
        if str(code.code) != str(data['code']):
            raise serializers.ValidationError("invalid_code")

        return data
app_account/serializers.py
all fields are required, we used the validate function in order to validate both username and code together. if there are no code instants for this user, we raise a validation error, and if the sent code doesn't match the instant code value, we inform the user by raising "invalid_code" validation error.
for the view, we need to validate the serializer at first
class SendCodeSerializer(serializers.Serializer):
    username = serializers.CharField(required=True)

    def validate_username(self, value):
        if not is_valid_email(value):
            raise serializers.ValidationError("invalid_email")

        verification_query = get_user_model().objects.filter(username=value).exists()
        if not verification_query:
            raise serializers.ValidationError("invalid_username")

        return value
app_account/views.py
if the serializer is not valid, we raise an API exception with the serializer errors, if valid, we are querying the verification instant using the serializer data. Notice that this query always exists, and the sent code is the same as the verification instant code value since this query already passed the serializer check.
Then we delete the verification instance from the database and update the user password with the "new_password" value from the serializer
finally, let's update the URLs file
class AccountSendCodeView(APIView):
    permission_classes = ()
    renderer_classes = [CustomRenderer, BrowsableAPIRenderer]


    @swagger_auto_schema(request_body=SendCodeSerializer)
    def post(self, request, *args, **kwargs):
        serializer = SendCodeSerializer(data=request.data)

        if not serializer.is_valid():
            raise APIException(serializer.errors)

        user = get_user_model().objects.filter(username=serializer.validated_data.get("username")).first()
        code = VerificationCode(user=user, email=user.username)
        code.save()

        send_mail(
            'Password Reset Code',
            'Your password reset code is ' + str(code.code),
            f'AliveDiary<{settings.EMAIL_SENDER}>',
            [user.username],
            fail_silently=False,
        )

        return Response("success")
app_account/urls.py
Let's start by creating a serializer for the user model, it would look like this
urlpatterns = [
    path('register/', AccountRegisterView.as_view()),
    path('activate/', AccountActivateView.as_view()),

    path('login/', AccountLoginView.as_view()),
    path('refresh/', AccountRefreshTokenView.as_view()),

    path('code/', AccountSendCodeView.as_view()), #new

    path('password/', AccountChangePasswordView.as_view()),
]
app_account/serializers.py
it is a model serializer, we selected the user model and listed the fields to serialize.
moving to the view, we need a view that allows users to get user details with a GET request and update user details with a POST request, it would look somewhat like
class ForgotPasswordSerializer(serializers.Serializer):
    username = serializers.CharField(required=True)
    code = serializers.CharField(required=True)
    new_password = serializers.CharField(required=True)

    def validate(self, data):
        verification_query = VerificationCode.objects.filter(
            user__username=data['username'],
        ).order_by('-id')

        if not verification_query.exists():
            raise serializers.ValidationError("no_code")

        code = verification_query[0]
        if str(code.code) != str(data['code']):
            raise serializers.ValidationError("invalid_code")

        return data
app_account/views.py
and the urls
class AccountForgotPasswordView(APIView):
    permission_classes = ()
    renderer_classes = [CustomRenderer, BrowsableAPIRenderer]

    @swagger_auto_schema(request_body=ForgotPasswordSerializer)
    def post(self, request, *args, **kwargs):
        serializer = ForgotPasswordSerializer(data=request.data)
        if not serializer.is_valid():
            raise APIException(serializer.errors)

        verification_query = VerificationCode.objects.filter(
            user__username=serializer.validated_data.get('username'),
            code=serializer.validated_data.get('code')
        ).order_by('-id')

        verification_query.delete()

        user = get_user_model().objects.filter(
            username=serializer.validated_data.get('username'),
        ).first()
        user.set_password(serializer.validated_data.get('new_password'))
        user.save()
        return Response("success")
app_account/urls.py
that is it! let's test this with Swagger, opening http://localhost:8555/swagger/ and using the login allows us to get a valid token. In order to test any authorized requests, we have to click on the lock ? icon, any lock icon in swagger, and provide the token with "Bearer" prefix, somewhat like "Bearer eyJhbGc..."

now testing the details API should return the account details as shown

That is it! congrats, you have a fully functional account management app that can be used in any Django app with minimal modifications
Do you believe it requires other functionalities? please make a suggestion!
We will move back to the main app in our next article, so
Stay tuned ?
The above is the detailed content of Django accounts management app ( forgot password and account details. For more information, please follow other related articles on the PHP Chinese website!


