

 Software Tutorial
Computer Software
How to set the nine-square grid view mode in Tencent Conference. Tutorial on how to use the nine-square grid view in Tencent Conference.
Software Tutorial
Computer Software
How to set the nine-square grid view mode in Tencent Conference. Tutorial on how to use the nine-square grid view in Tencent Conference.
How to set the nine-square grid view mode in Tencent Conference. Tutorial on how to use the nine-square grid view in Tencent Conference.

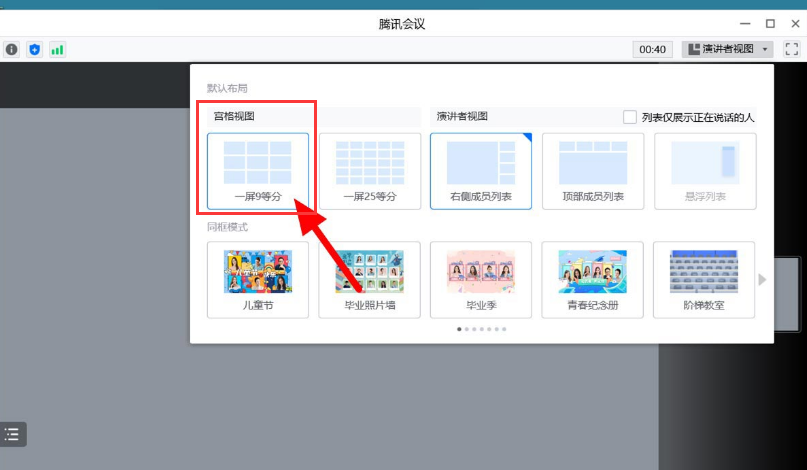
Nine-square grid view mode setting guide Tencent Meeting provides a nine-square grid view mode, allowing users to display participants in a nine-square grid format. For users who are not familiar with this function, how to set the Jiugongge view mode has always been a problem. This guide will introduce in detail how to set up the Jiugongge view mode, allowing you to easily master this practical function. Setup steps: Start Tencent Meeting and click the "Start Video" button in the lower left corner.
2. Click to open the speaker view function in the upper right corner of the page.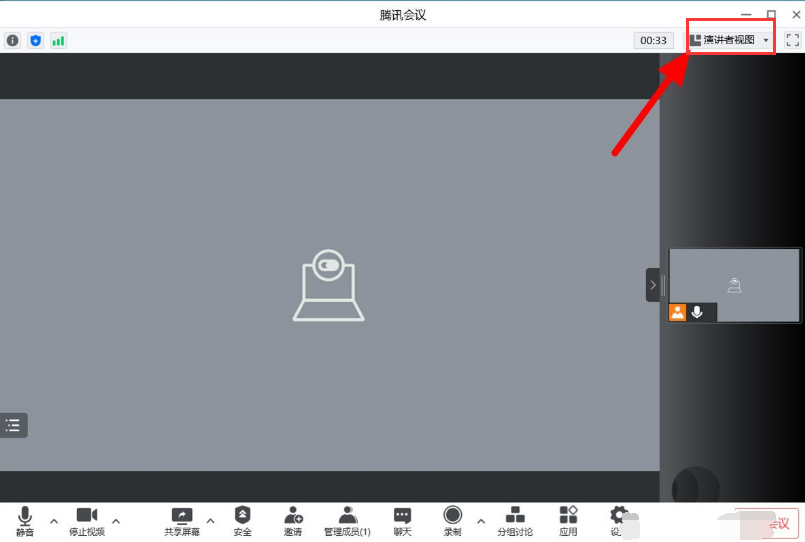
The above is the detailed content of How to set the nine-square grid view mode in Tencent Conference. Tutorial on how to use the nine-square grid view in Tencent Conference.. For more information, please follow other related articles on the PHP Chinese website!

Hot AI Tools

Undress AI Tool
Undress images for free

Undresser.AI Undress
AI-powered app for creating realistic nude photos

AI Clothes Remover
Online AI tool for removing clothes from photos.

Clothoff.io
AI clothes remover

Video Face Swap
Swap faces in any video effortlessly with our completely free AI face swap tool!

Hot Article
Hot Tools

Notepad++7.3.1
Easy-to-use and free code editor

SublimeText3 Chinese version
Chinese version, very easy to use

Zend Studio 13.0.1
Powerful PHP integrated development environment

Dreamweaver CS6
Visual web development tools

SublimeText3 Mac version
God-level code editing software (SublimeText3)


 How to find which disk is which in diskpart's 'list disk' command
Aug 21, 2025 am 02:07 AM
How to find which disk is which in diskpart's 'list disk' command
Aug 21, 2025 am 02:07 AM
Usedisksizefromlistdiskoutputtomatchknowndrivecapacities,asDisk0(238GB)likelycorrespondstoa256GBSSD,Disk1(931GB)toa1TBHDD,andDisk2(14GB)toaUSBdrive.2.Cross-referencewithDiskManagement(diskmgmt.msc)toverifydiskhealth,partitionlayout,andvolumelabelsmat
 Fresh doubts raised about Windows 11's Recall are more reasons I wouldn't go near Microsoft's cornerstone AI feature
Aug 05, 2025 am 08:09 AM
Fresh doubts raised about Windows 11's Recall are more reasons I wouldn't go near Microsoft's cornerstone AI feature
Aug 05, 2025 am 08:09 AM
Windows 11's Recall feature has just been put through its pacesIt did better than when it was first released in preview, but still made slips with its sensitive info filterIn some scenarios, this filter simply isn't keeping vital data - like credit c
 How to set up a vacation responder in Gmail
Aug 04, 2025 am 02:18 AM
How to set up a vacation responder in Gmail
Aug 04, 2025 am 02:18 AM
TosetupavacationresponderinGmail,login,clickthegearicon,goto“Seeallsettings,”thenthe“General”tab,andenablethevacationresponder.First,toggleon“Turnonvacationresponder”toactivatethefeature.Next,setyourstartandenddates,whichGmailauto-fillsbutyoucanadjus
 How to fix a disk that is stuck in a 'Read-only' state with diskpart
Aug 06, 2025 am 04:15 AM
How to fix a disk that is stuck in a 'Read-only' state with diskpart
Aug 06, 2025 am 04:15 AM
RunDiskPartasAdministratorbyopeningCommandPrompt(Admin)andtypingdiskpart.2.Identifytheaffecteddiskusinglistdisk,selectitwithselectdiskX,andcheckitsread-onlystatusviaattributesdisk.3.Cleartheread-onlyflagusingattributesdiskclearreadonlyandconfirmthech
![Does Facebook Messenger Notify of Screenshots [2025 Guide]](https://img.php.cn/upload/article/001/242/473/175545702252760.png?x-oss-process=image/resize,m_fill,h_207,w_330) Does Facebook Messenger Notify of Screenshots [2025 Guide]
Aug 18, 2025 am 02:57 AM
Does Facebook Messenger Notify of Screenshots [2025 Guide]
Aug 18, 2025 am 02:57 AM
If you've ever wondered, "Does Messenger notify of screenshots?", you're not alone. People ask this all the time, especially since apps like Snapchat and Instagram, when you screenshot Instagram disappearing photo, it sends alerts. Privacy
![How to force delete a stubborn partition with diskpart? [Using the 'override' parameter]](https://img.php.cn/upload/article/001/431/639/175458798182003.jpg?x-oss-process=image/resize,m_fill,h_207,w_330) How to force delete a stubborn partition with diskpart? [Using the 'override' parameter]
Aug 08, 2025 am 01:33 AM
How to force delete a stubborn partition with diskpart? [Using the 'override' parameter]
Aug 08, 2025 am 01:33 AM
Toforcedeleteastubbornpartitionusingdiskpart,rundiskpartasadministrator,selectthetargetdiskandpartition,clearprotectiveattributes(readonly,hidden,active),removethedriveletter,thenuse"deletepartitionoverride"tobypassrestrictions;ifitstillfai
 There is no sound on the win10 HDMI external monitor
Aug 14, 2025 pm 07:09 PM
There is no sound on the win10 HDMI external monitor
Aug 14, 2025 pm 07:09 PM
**Computer model information: **Brand model: HP Shadow Blade, System version: Windows 10 encounters the situation where the Win10 system connects to an external monitor through HDMI? Don't worry, check the following two points first: Whether the audio device is connected normally: Make sure the external monitor itself is functioning properly, and check whether the audio output settings of Windows 10 computer are correct. HDMI connection cable and interface: If there is no problem with audio settings, it is recommended to try changing the HDMI cable or adjusting the connection method. Common reasons and solutions for silent external display of Win10HDMI: Under Win10 system, silent external display of HDMI is usually caused by the following two reasons: Audio setting error: The computer's audio output device is not set correctly
 How to add desktop clock
Aug 14, 2025 pm 08:24 PM
How to add desktop clock
Aug 14, 2025 pm 08:24 PM
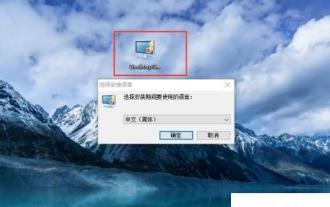
1. First, download and install a tool called GadgetsRevived, which can restore the system's desktop gadgets functions. 2. After the installation is completed, return to the desktop and select the "Widgets" option through the right-click menu. 3. At this time, the widget panel will open, find the clock component, click and hold to drag it to any position on the desktop. 4. After releasing the mouse, the desktop clock is successfully added and the time is displayed in real time.
