


Lighttpd is an open source web server software. Lighttpd is secure, fast, industry-standard, adaptable and optimized for high-configuration environments. Compared with other web servers, Lighttpd takes up less memory; it stands out from many web servers in terms of efficiency and speed because of its small CPU usage and optimization of processing speed. And Lighttpd's advanced features such as FastCGI, CGI, authentication, output compression, URL rewriting and other advanced features are even better news for servers facing performance pressure.
Here is our brief process for installing Lighttpd web server on a machine running Ubuntu 15.04 or CentOS 7 Linux distribution.
Here we install Lighttpd in the simplest way using the package manager. Just enter the following command in the terminal or console in sudo mode.
CentOS 7
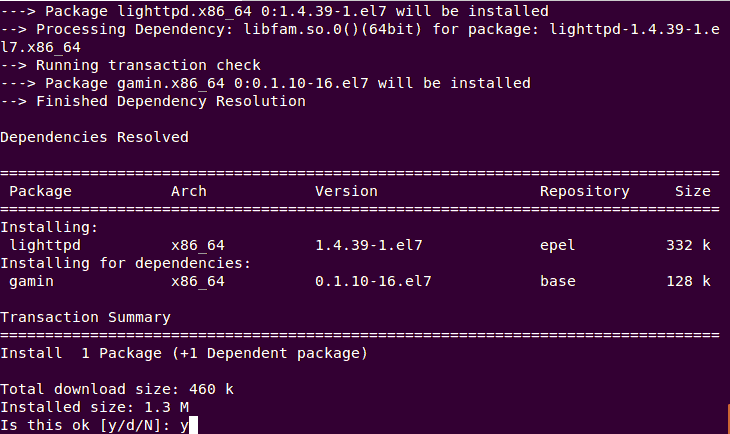
Since Lighttpd is not provided in the official CentOS 7.0 repository, we need to install additional software source epel repository in the system. Use the yum command below to install epel.
# yum install epel-release
Then, we need to update the system and prepare for the installation of Lighttpd.
# yum update # yum install lighttpd
Ubuntu 15.04
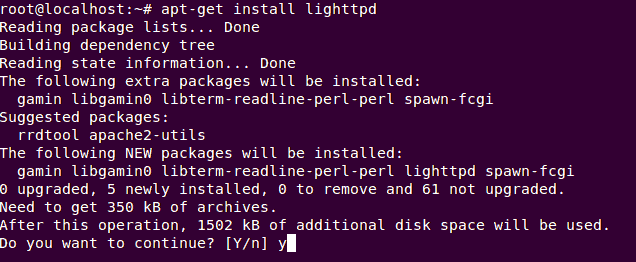
Lighttpd is included in the official Ubuntu 15.04 repository, so just update your local repository index and use the apt-get command to install Lighttpd.
# apt-get update # apt-get install lighttpd
If you want to install the latest version (for example 1.4.39) from the Lighttpd source code, we need to compile the source code locally and install it. First we need to install the dependency packages required to compile the source code.
# cd /tmp/ # wget http://download.lighttpd.net/lighttpd/releases-1.4.x/lighttpd-1.4.39.tar.gz
After the download is completed, execute the following instructions to decompress it.
# tar -zxvf lighttpd-1.4.39.tar.gz
Then use the following instructions to compile.
# cd lighttpd-1.4.39 # ./configure # make
Note:In this tutorial, we installed Lighttpd with the default configuration. Other extended functions, such as support for SSL, modrewrite, modredirect, etc., need to be configured by yourself.
When the compilation is completed, we can install it into the system.
# make install
If there are higher requirements, we can further set up Lighttpd by modifying the default settings file, such as /etc/lighttpd/lighttpd.conf. In this tutorial we will use the default settings and not modify the settings file. If you have made changes and want to check whether there are errors in the settings file, you can execute the following command.
# lighttpd -t -f /etc/lighttpd/lighttpd.conf
In CentOS 7, we need to create a webroot folder set in the Lighttpd default configuration file, such as /src/www/htdocs.
# mkdir -p /srv/www/htdocs/
Then copy the default welcome page from /var/www/lighttpd to the newly created directory:
# cp -r /var/www/lighttpd/* /srv/www/htdocs/
Now, restart the web service by executing the systemctl command.
# systemctl start lighttpd
Then we set it to run automatically on system startup.
# systemctl enable lighttpd
如要让我们运行在 Lighttpd 上的网页或网站能在 Internet 或同一个网络内被访问,我们需要在防火墙程序中设置打开 80 端口。由于 CentOS 7 和 Ubuntu15.04 都附带 Systemd 作为默认初始化系统,所以我们默认用的都是 firewalld。如果要打开 80 端口或 http 服务,我们只需执行下面的命令:
# firewall-cmd --permanent --add-service=http success # firewall-cmd --reload success
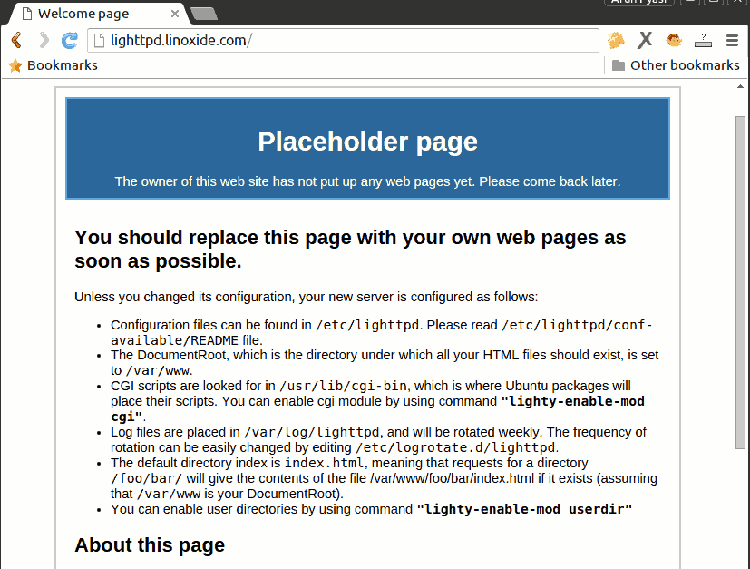
在将 80 端口设置为默认端口后,我们就可以直接访问 Lighttpd 的默认欢迎页了。我们需要根据运行 Lighttpd 的设备来设置浏览器的 IP 地址和域名。在本教程中,我们令浏览器访问 http://lighttpd.linoxide.com/ ,同时将该子域名指向上述 IP 地址。如此一来,我们就可以在浏览器中看到如下的欢迎页面了。
此外,我们可以将网站的文件添加到 webroot 目录下,并删除 Lighttpd 的默认索引文件,使我们的静态网站可以在互联网上访问。
如果想在 Lighttpd Web 服务器中运行 PHP 应用,请参考下面的步骤:
在 Lighttpd 成功安装后,我们需要安装 PHP 及相关模块,以在 Lighttpd 中运行 PHP5 脚本。
# apt-get install php5 php5-cgi php5-fpm php5-mysql php5-curl php5-gd php5-intl php5-imagick php5-mcrypt php5-memcache php-pear
# yum install php php-cgi php-fpm php-mysql php-curl php-gd php-intl php-pecl-imagick php-mcrypt php-memcache php-pear lighttpd-fastcgi
如要让 PHP 与 Lighttpd 协同工作,我们只要根据所使用的发行版执行如下对应的指令即可。
首先要做的便是使用文件编辑器编辑 php 设置文件(例如/etc/php.ini)并取消掉对cgi.fix_pathinfo=1这一行的注释。
# nano /etc/php.ini
完成上面的步骤之后,我们需要把 PHP-FPM 进程的所有权从 Apache 转移至 Lighttpd。要完成这些,首先用文件编辑器打开/etc/php-fpm.d/www.conf文件。
# nano /etc/php-fpm.d/www.conf
然后在文件中增加下面的语句:
user = lighttpd group = lighttpd
做完这些,我们保存并退出文本编辑器。然后从/etc/lighttpd/modules.conf设置文件中添加 FastCGI 模块。
# nano /etc/lighttpd/modules.conf
然后,去掉下面语句前面的#来取消对它的注释。
include "conf.d/fastcgi.conf"
最后我们还需在文本编辑器设置 FastCGI 的设置文件。
# nano /etc/lighttpd/conf.d/fastcgi.conf
在文件尾部添加以下代码:
fastcgi.server += ( ".php" => (( "host" => "127.0.0.1", "port" => "9000", "broken-scriptfilename" => "enable" )) )
在编辑完成后保存并退出文本编辑器即可。
如需启用 Lighttpd 的 FastCGI,只需执行下列代码:
# lighttpd-enable-mod fastcgi Enabling fastcgi: ok Run /etc/init.d/lighttpd force-reload to enable changes # lighttpd-enable-mod fastcgi-php Enabling fastcgi-php: ok Run `/etc/init.d/lighttpd` force-reload to enable changes
然后,执行下列命令来重启 Lighttpd。
# systemctl force-reload lighttpd
如需检测 PHP 是否按预期工作,我们需在 Lighttpd 的 webroot 目录下新建一个 php 文件。本教程中,在 Ubuntu 下 /var/www/html 目录,CentOS 下 /src/www/htdocs 目录下使用文本编辑器创建并打开 info.php。
# nano /var/www/info.php
# nano /srv/www/htdocs/info.php
然后只需将下面的语句添加到文件里即可。
在编辑完成后保存并推出文本编辑器即可。
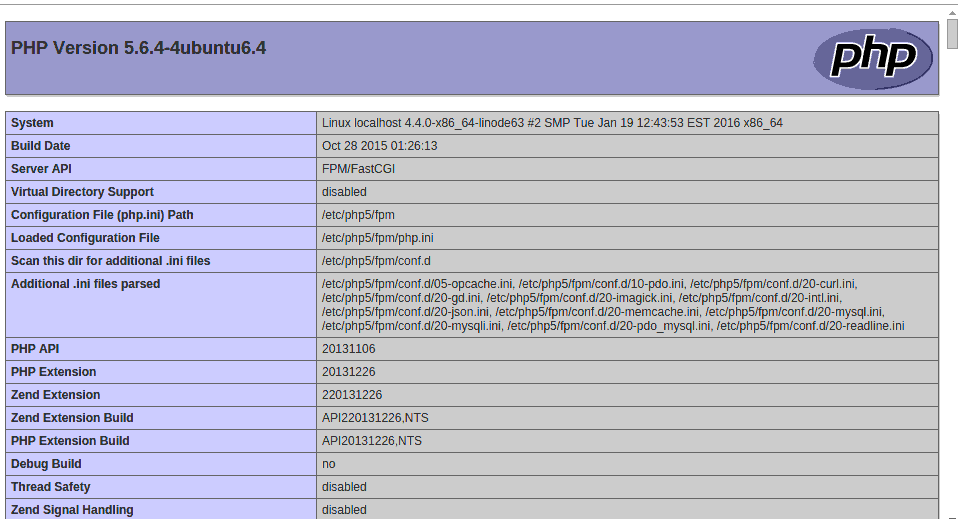
现在,我们需根据路径 http://lighttpd.linoxide.com/info.php 下的 info.php 文件的 IP 地址或域名,来让我们的网页浏览器指向系统上运行的 Lighttpd。如果一切都按照以上说明进行,我们将看到如下图所示的 PHP 页面信息。
至此,我们已经在 CentOS 7 和 Ubuntu 15.04 Linux 发行版上成功安装了轻巧快捷并且安全的 Lighttpd Web 服务器。现在,我们已经可以上传网站文件到网站根目录、配置虚拟主机、启用 SSL、连接数据库,在我们的 Lighttpd Web 服务器上运行 Web 应用等功能了。
The above is the detailed content of Installing the Lighttpd web server in Linux. For more information, please follow other related articles on the PHP Chinese website!


![[Web front-end] Node.js quick start](https://img.php.cn/upload/course/000/000/067/662b5d34ba7c0227.png)


