
This article mainly introduces the detailed steps for publishing a .NET website, including web website publishing, IIS6 installation method, and ASP.NET v4.0 installation method. It has certain reference value and interested friends can refer to it. Let’s take a look
This article is divided into three parts: web website publishing, IIS6 installation method, ASP.NET v4.0 installation method
1. Web website publishing
1. Open the Visual Studio 2013 compilation environment

#2. Right-click on the solution to pop up the regenerated solution to see if there are any errors

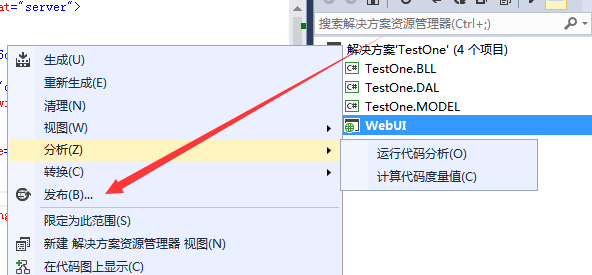
3. If there is no error in the project, right-click the WebUI layer to publish
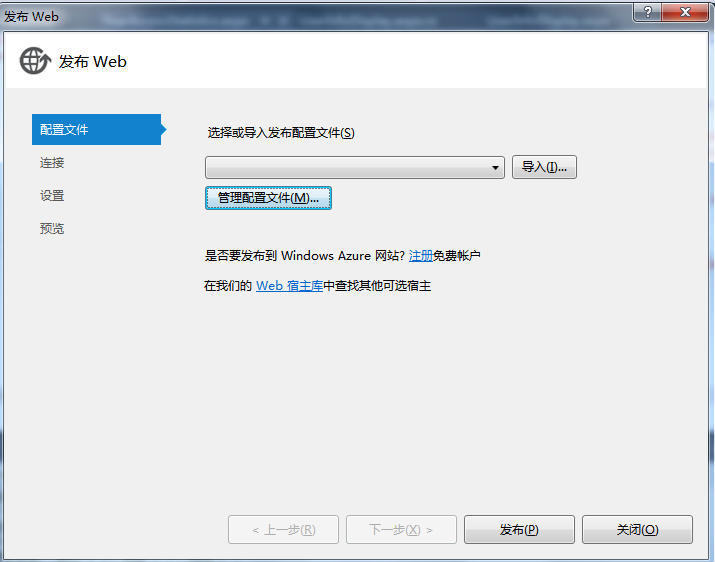
4. You will see the following interface
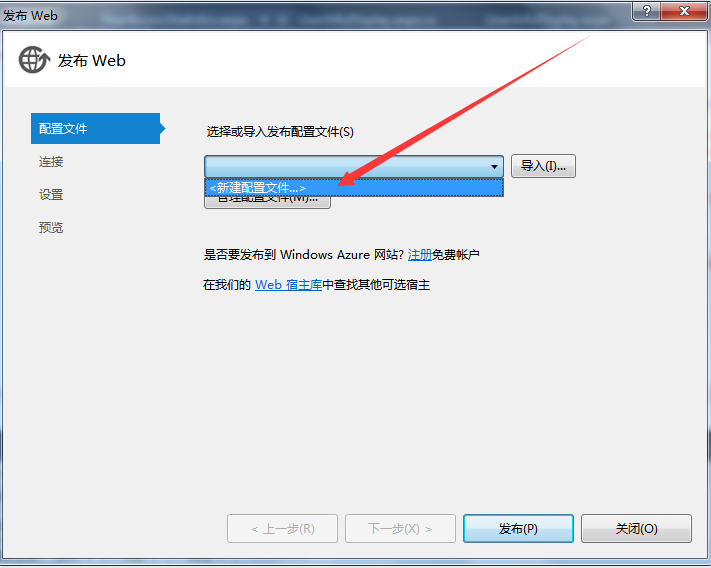
5. Create a new configuration file in the configuration file
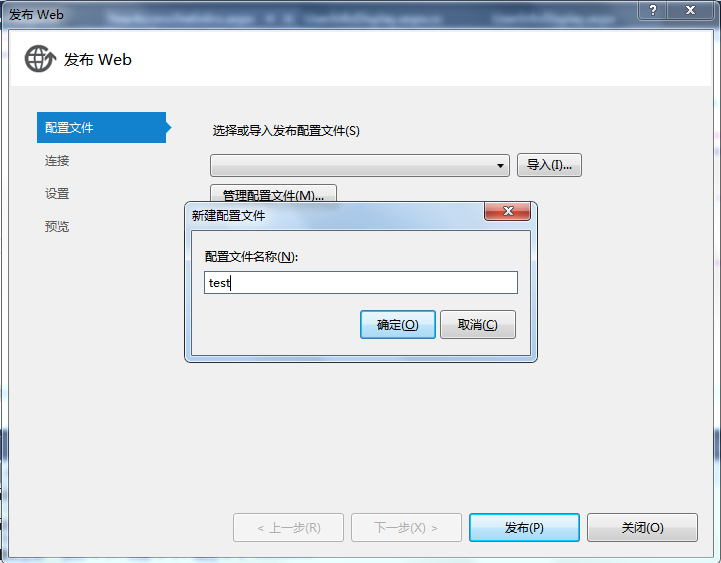
7. In the configuration file name dialog box, you can enter the website name, for example :test
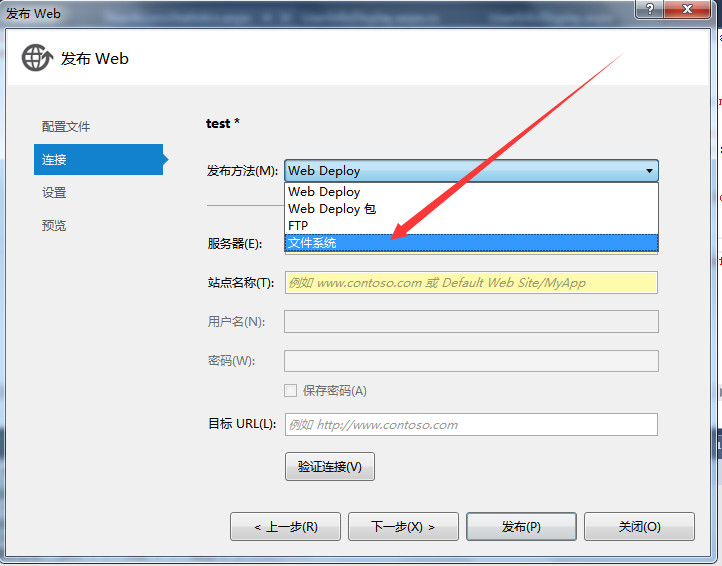
8. The connection publishing method should select the file system
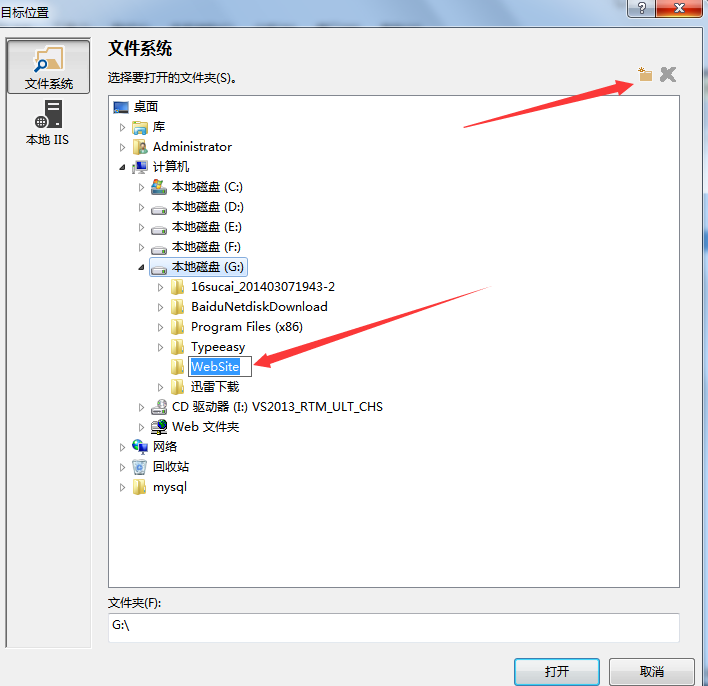
9. Select the website you want to publish Place the disk, and then click the new folder icon in the upper right corner. Be sure to place the project under the WebSite folder!
#10. In the settings, select the Release version and do not select the Debug administrator test version!
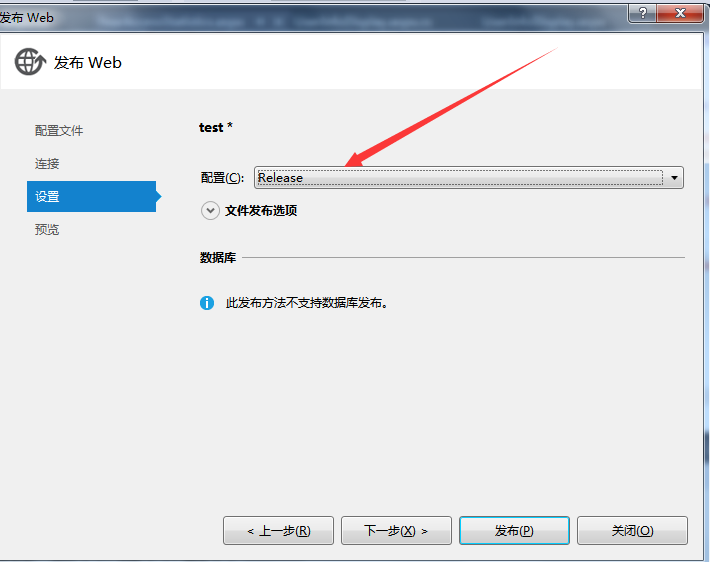
11. Just publish it in the next step.
12. Then open the Internet Information Services (IIS) Manager
1).Open cmd and enter IIS to open the Internet Information Services (IIS) Manager
2).Control Panel-->Administrative Tools-->Internet Information Services (IIS) Manager
13. After opening it, check whether there is ASP.NET 4.0 or above in the application pool, and check whether the status is not enabled.
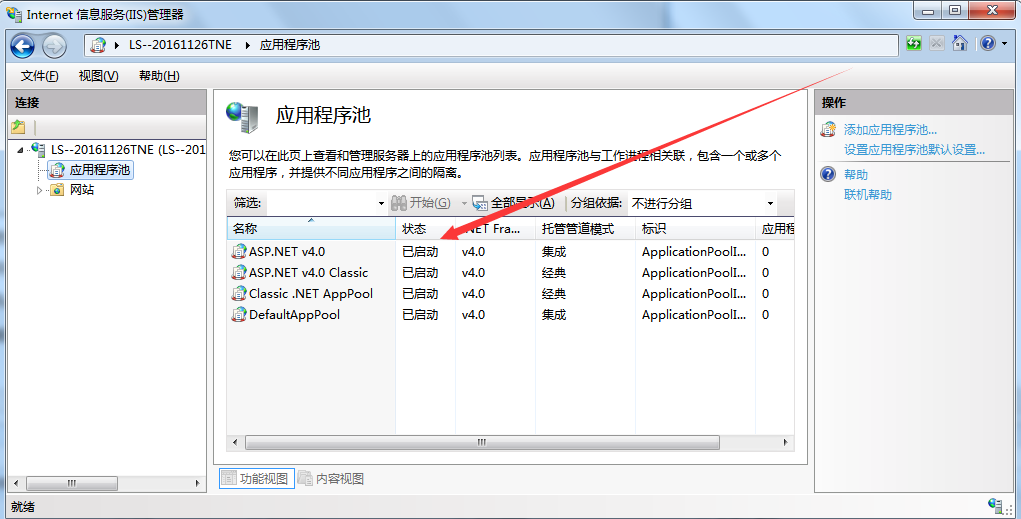
14. Start adding the website
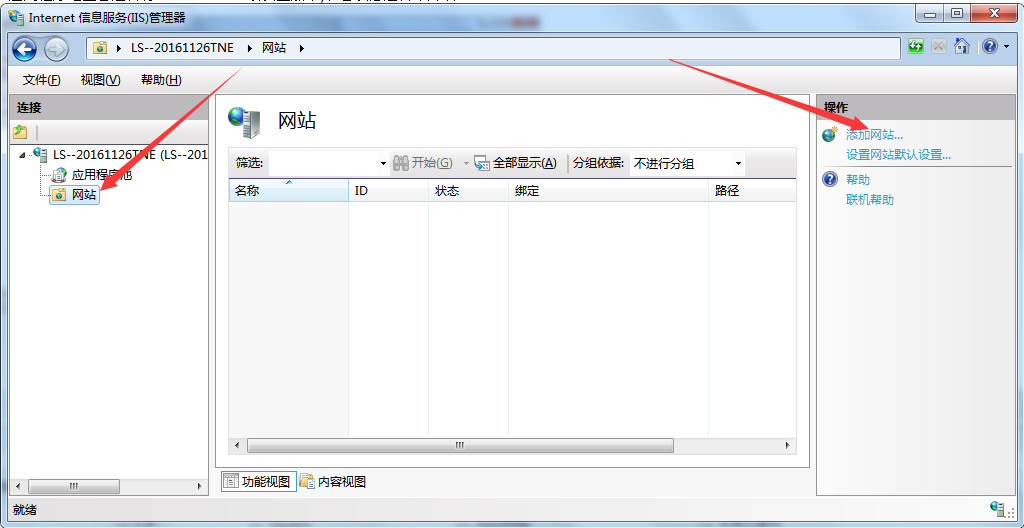
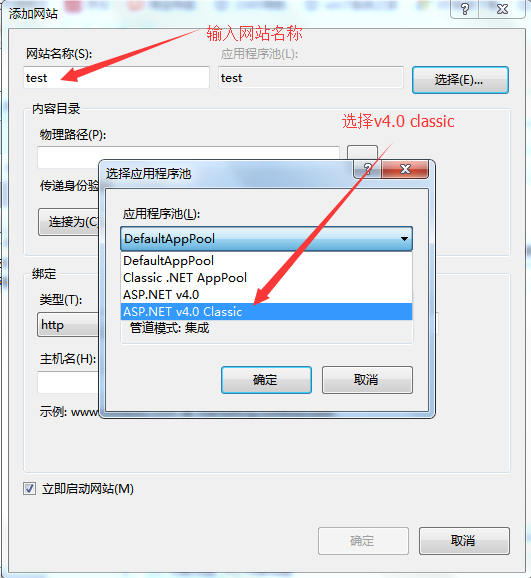
15. Fill in the website name and select v4.0 in the application pool Classic
16. Select the physical path
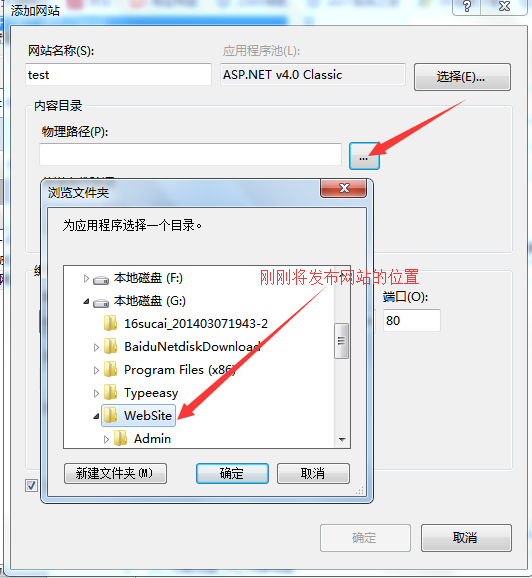
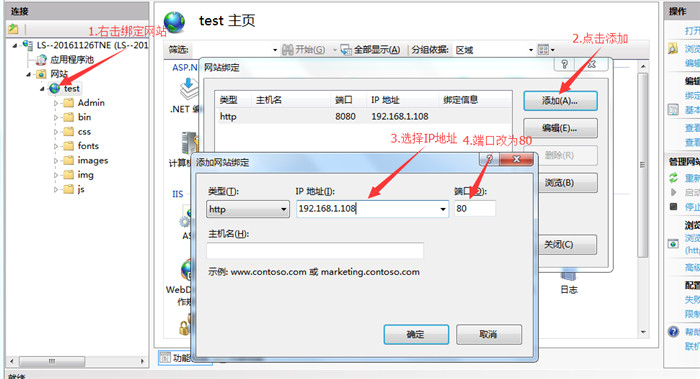
17. Select the type, IP address, port

18. The host name can be empty and then confirmed, so that a test site will appear in the website directory
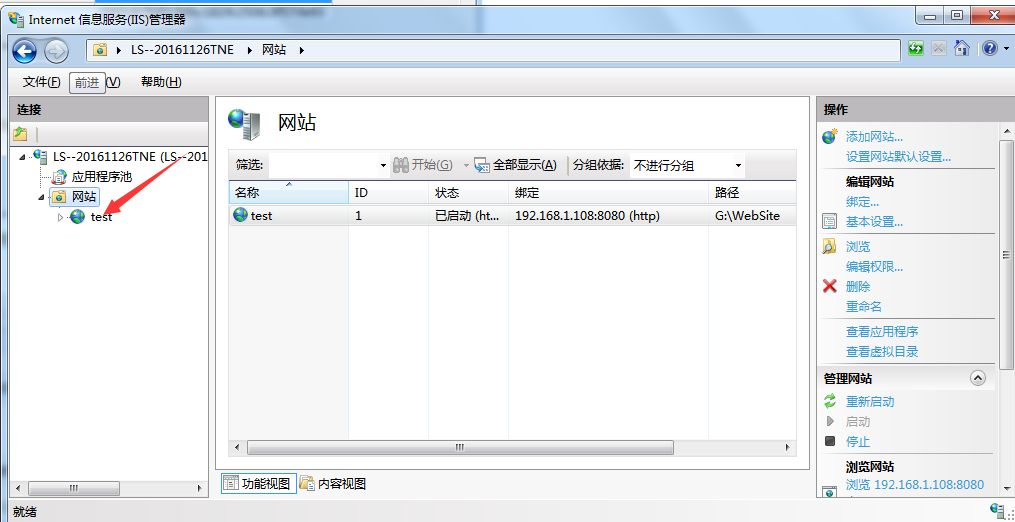
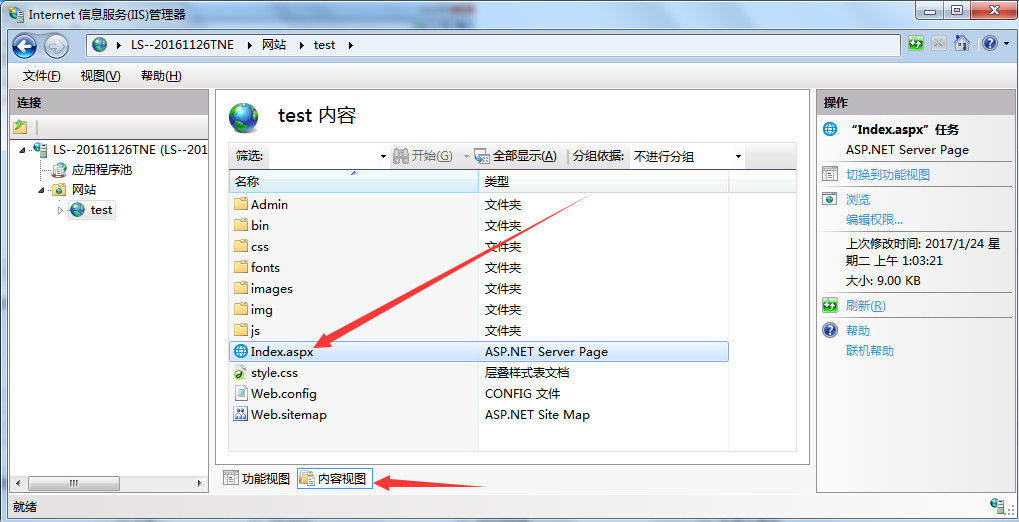
19. Select the test site to switch to the content view, then select the index page and right-click to browse to see if the release is successful
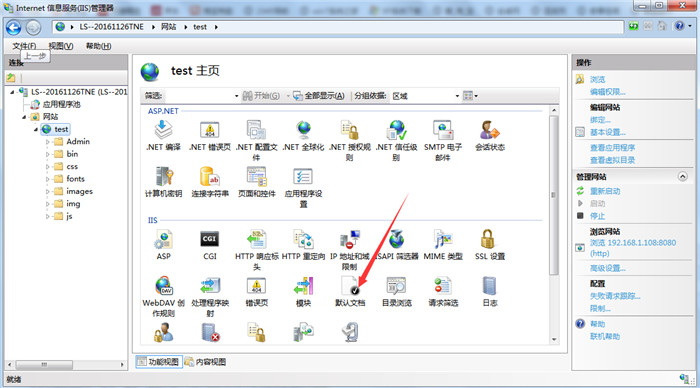
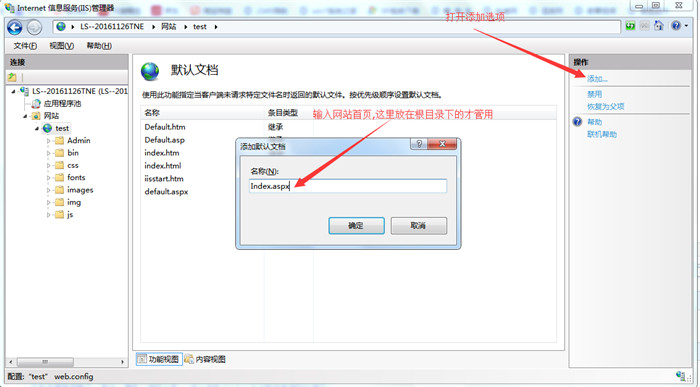
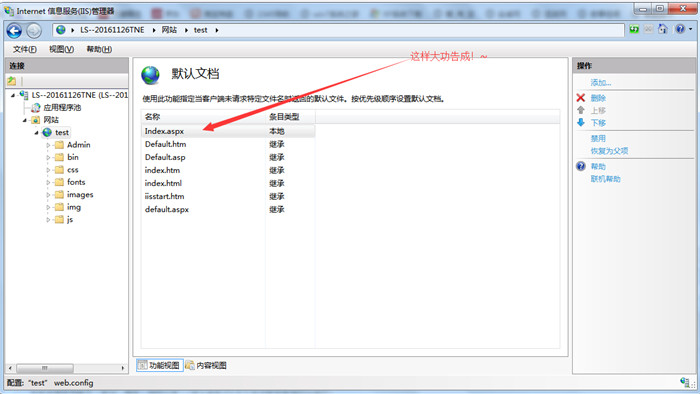
20. Sometimes we want to enter the IP address in the URL to access the homepage of the website. We can do this
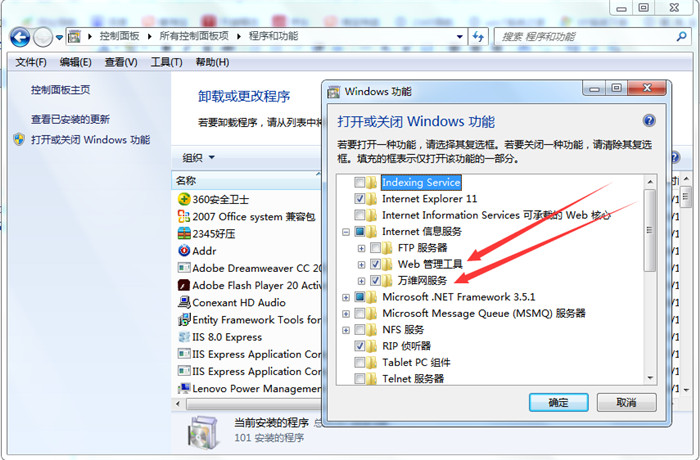
Control Panel ==> Programs and Features ==> Turn Windows features on or off ==> Select Internet Information Services ==> Check all subdirectories of Web Management Tools and World Wide Web Services (check all subdirectories The check mark [√] will be displayed on the root directory only after the root directory has been installed. ) ==> OK
3. ASP.NET V4.0 installation methodFind the path: C:\Windows\Microsoft.NET\Framework64\v4.0.30319 ==> Copy its path==> Open cmd ==> Enter the command: cd C:\Windows\Microsoft.NET\Framework64\v4.0.30319 (right-click and paste) ==> Press Enter ==> Then enter: aspnet_regiis.exe -i ==> Press Enter to install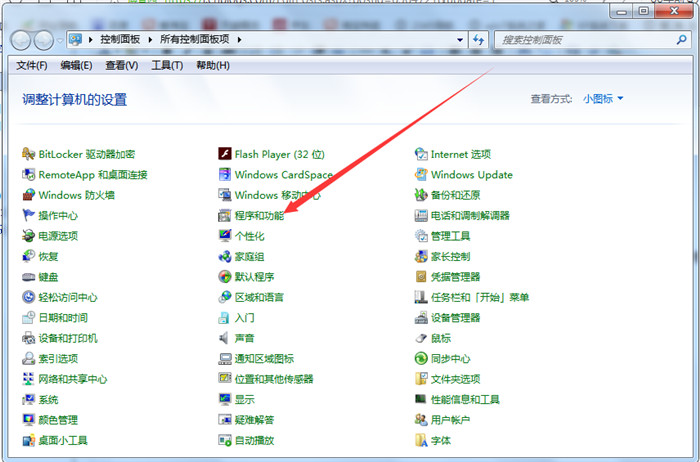

## Note: If If there are any omissions or errors in the article, I hope readers will leave a message for easy correction! ~
The above is the entire content of this article. I hope it will be helpful to everyone's learning. I also hope that everyone will support the PHP Chinese website. 


