photoshop使用渐变工具和图层样式设计制作出简单薄雾效
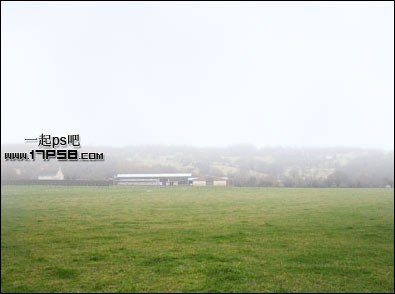
先看效果图。

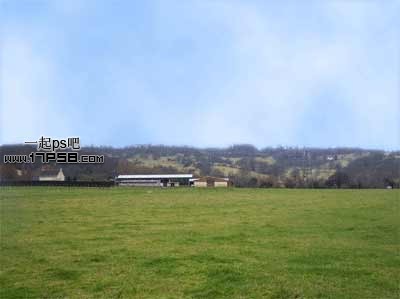
首先打开蓝天绿地图片。
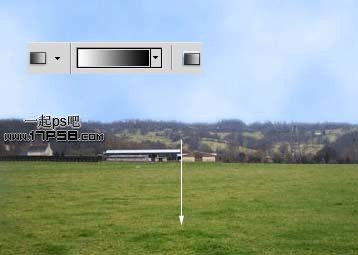
新建图层,箭头位置白黑直线渐变。
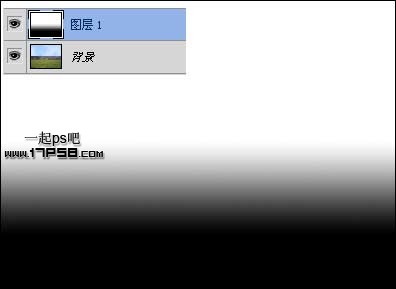
会得到下图效果。
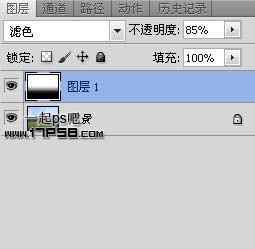
图层模式改为滤色,不透明度改为85%。
最终效果如下,本ps教程结束。
本站声明
本文内容由网友自发贡献,版权归原作者所有,本站不承担相应法律责任。如您发现有涉嫌抄袭侵权的内容,请联系admin@php.cn
作者最新文章
-
2024-12-12 11:03:15
-
2024-12-12 11:01:15
-
2024-12-12 10:59:13
-
2024-12-12 10:58:16
-
2024-12-12 10:57:14
-
2024-12-12 10:56:12
-
2024-12-12 10:55:13
-
2024-12-12 10:54:17
-
2024-12-12 10:53:16
-
2024-12-12 10:51:16