
教程推荐:bootstrap教程
Vue.js 是一个流行的 JavaScript 库,用于在短时间内开发原型。这包括用户界面、前端应用、静态网页和本机移动应用。它以易用的语法和简单的数据绑定功能而闻名。
最近,Vue.js 生态系统发布了一个新的软件包。它是流行的 Bootstrap 框架与 Vue.js 的集成。这个包称为 BootstrapVue。它允许我们使用与 Bootstrap(v4)集成的自定义组件。
它还支持自定义 Bootstrap 组件、网格系统,还支持 Vue.js 指令。
在本文中,我们将介绍 BootstrapVue 的基础知识,解释一般概念,演示设置过程,并通过它构建一个迷你 Vue.js 项目,以便为你提供更多的实践经验。
鉴于 Bootstrap是最受欢迎的独立 CSS 框架(在我看来),很多已经或有意向从Vanilla JavaScript 的框架转移到 Vue.js 的开发人员总是发现迁移有点困难,因为 Bootstrap 对 jQuery 的依赖性很大。
使用 BootstrapVue,任何人都可以从 Vanilla.js 或 jQuery 切换到 Vue.js,而无需担心 Bootstrap 对 jQuery 的严重依赖,甚至无法找到解决方法。这就是 BootstrapVue 的救援方式。它有助于弥补这一差距,并允许 Vue 开发人员能够轻松地在他们的项目中使用 Bootstrap。
使用 webpack、babel 等模块捆绑包时,最好直接把这些包包含到项目中。为了给你演示并提供了解和使用 BootstrapVue 的实践方法,我们将用 BootstrapVue 设置一个 Vue.js 项目,并把它构建到一个功能性的 Vue.js 应用中。
先决条件
首先必须创建一个 Vue.js 项目,我们将会用它来演示 BootstrapVue 组件的实现。在首选目录上打开一个终端窗口,然后运行以下命令:
vue create bootstrapvue-demo
如果你没有全局安装 Vue CLI,请按照此安装指南进行操作后再继续本教程。
上面的命令会显示一个预设的选择对话框,如下所示:
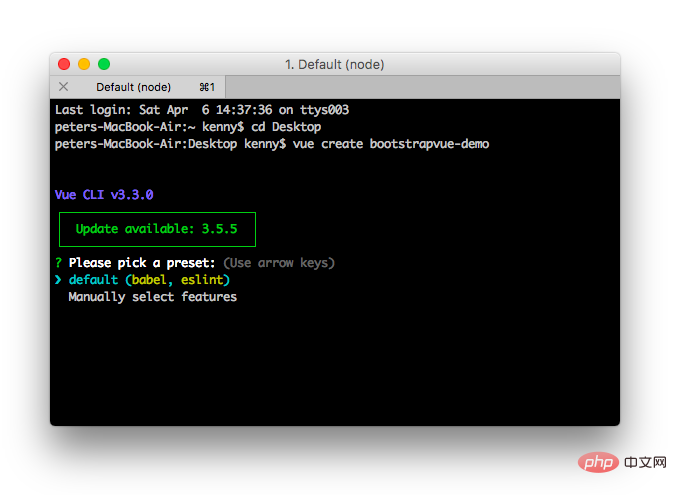
选择 default,然后单击Enter继续:
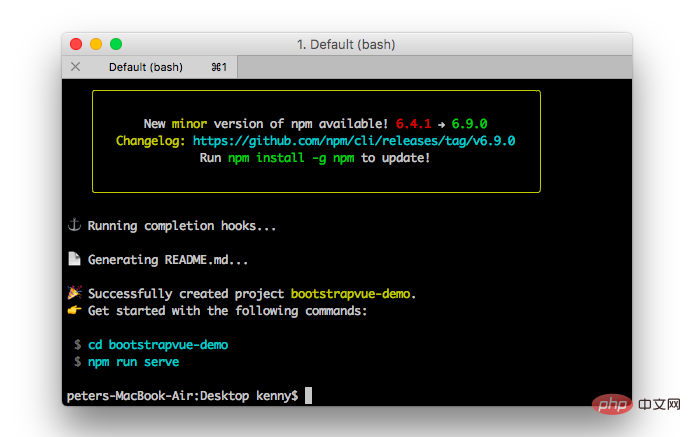
现在,你创建了一个 Vue 程序,下面转到新的 Vue 项目目录,并使用以下命令启动开发服务器:
cd bootstrapvue-demo
npm run serve
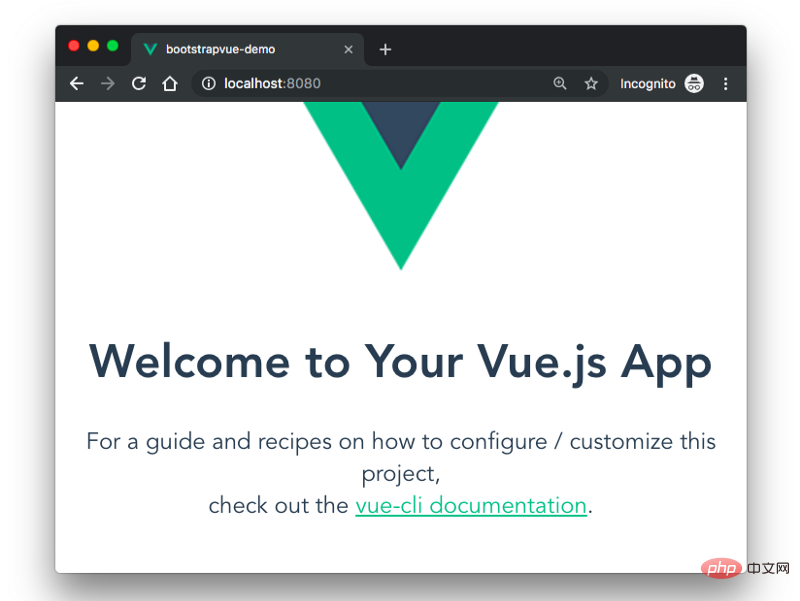
你的 Vue 应用程序将会在 localhost:8080 上提供服务。在浏览器中打开它,你将看到自己的Vue应用程序:
有两种方法可以做到这一点,可以用npm和yarn这样的包管理器或者用CDN链接。
使用npm或yarn
我们将使用npm或yarn安装之前提到的包。切换到项目的根目录并运行下面的任一命令,具体取决于你首选的包管理器:
# With npm
npm install bootstrap-vue bootstrap axios

# With yarn
yarn add bootstrap-vue bootstrap axios
上面的命令将会安装BootstrapVue和Bootstrap包。 BoostrapVue包中包含所有BootstrapVue组件,常规Bootstrap包含CSS文件。另外还安装了Axios来帮助我们从themealdb API获取程序所需的数据。
要通过CDN将Bootstrap和BootstrapVue添加到Vue项目,请打开项目公共文件夹中的index.html文件,并将此代码添加到适当的位置:
<!-- public/index.html-->

<!-- Add Bootstrap and Bootstrap-Vue CSS to the <head> section -->
<link type="text/css" rel="stylesheet"
        href="https://unpkg.com/bootstrap/dist/css/bootstrap.min.css"/>
<link type="text/css" rel="stylesheet"
               href="https://unpkg.com/bootstrap-vue@latest/dist/bootstrap-vue.min.css"/>

<!-- Add Vue and BootstrapVue scripts just before the closing </body> tag -->
<script src="https://unpkg.com/vue/dist/vue.min.js"></script>
<script src="https://unpkg.com/bootstrap-vue@latest/dist/bootstrap-vue.min.js"></script>这将把每个库的缩小版和最新版本引入我们的项目中,非常简单!但是出于本文的目的,我们将使用第一个方法中的包管理器。下面继续设置BootstrapVue包。
接下来,让我们设置刚刚安装的BootstrapVue包。转到你的main.js文件并将这行代码添加到顶部:
//src/main.js
import BootstrapVue from 'bootstrap-vue'
Vue.use(BootstrapVue)
在这里做的事情非常简单,我们导入了BoostrapVue包,然后用Vue.use()函数在程序中注册它,以便Vue程序可以识别。
我们还需要将Bootstrap CSS文件导入到项目中。将这段代码段添加到main.js文件中:
//src/main.js
import 'bootstrap/dist/css/bootstrap.css'
import 'bootstrap-vue/dist/bootstrap-vue.css'
在将必要的模块导入Vue程序后,你的main.js文件应该和下面的代码段类似:
//src/main.js
import Vue from 'vue'
import App from './App.vue'
import BootstrapVue from 'bootstrap-vue'
import 'bootstrap/dist/css/bootstrap.css'
import 'bootstrap-vue/dist/bootstrap-vue.css'

Vue.use(BootstrapVue)
Vue.config.productionTip = false

new Vue({
  render: h => h(App),
}).$mount('#app')下面开始创建我们的第一个组件,第一个组件是Navbar组件。转到组件目录,创建一个名为Navbar.vue的文件,并使用以下代码更新它:
//src/components/Navbar.vue
<template>
<div>
<b-navbar toggleable="lg" type="dark" variant="success">
<b-container>
<b-navbar-brand href="#">Mealzers</b-navbar-brand>
<b-navbar-toggle target="nav-collapse"></b-navbar-toggle>
<b-collapse id="nav-collapse" is-nav>
<!-- Right aligned nav items -->
<b-navbar-nav class="ml-auto">
<b-nav-form>
<b-form-input
size="sm"
class="mr-sm-2"
placeholder="Search for a meal"
v-model="meal"
></b-form-input>
<b-button
size="sm"
class="my-2 my-sm-0"
type="submit"
@click.prevent="getMeal"
>Search</b-button>
</b-nav-form>
<b-nav-item-dropdown right>
<!-- Using 'button-content' slot -->
<template slot="button-content"><em>User</em></template>
<b-dropdown-item href="#">Profile</b-dropdown-item>
<b-dropdown-item href="#">Sign Out</b-dropdown-item>
</b-nav-item-dropdown>
</b-navbar-nav>
</b-collapse>
</b-container>
</b-navbar>
</div>
</template>
<script>
export default {
data() {
return {
meal: ''
}
},
methods: {
getMeal() {
...
}
}
}
</script>Navbar组件中包含几个BootstrapVue组件,其中一个是b-navbar组件。它是Navbar中其他组件的父组件。如果没有这个组件,Navbar中的所有其他组件将无法正确呈现。
可以用type 属性更改Navbar上的文本颜色。 Navbar的background-color也可以用variant 属性来改变。这些颜色可以是任何正常的Bootstrap默认颜色 —— info、primary、success 等。
另一个是b-navbar-brand组件。这是可以呈现网站徽标的地方。它还包含variant和type属性,它们可以分别用于改变background-color和text-color。
其他BootstrapVue组件是:
BootstrapVue组件的一个美妙之处在于它们默认是响应式的。所以你无需编写额外的代码或用外部库来使其实现响应式。
还有一个组件是Card组件。card 组件允许我们在卡中显示图像、文本等。它写做b-card 。为了演示它,让我们在组件目录中创建一个Cards.vue文件。然后用下面的代码更新其内容:
//src/components/Cards.vue
<template>
  <b-container>
    <div v-if="meals.length">
      <b-row>
        <div v-bind:key="data.index" v-for="data in meals">
          <b-col l="4">
            <b-card
                    v-bind:title="data.strCategory"
                    v-bind:img-src="data.strCategoryThumb"
                    img-alt="Image"
                    img-top
                    tag="article"
                    style="max-width: 20rem;"
                    class="mb-2">
              <b-card-text>{{ `${data.strCategoryDescription.slice(0,100)}...` }}</b-card-text>
              <b-button href="#" variant="primary">View food</b-button>
            </b-card>
          </b-col>
        </div>
      </b-row>
    </div>
    <div v-else>
      <h5>No meals available yet</h5>
    </div>
  </b-container>
</template>

<script>
  import axios from "axios";
  export default {
    data() {
      return {
        meals: []
      };
    },
    mounted() {
      axios
        .get("https://www.themealdb.com/api/json/v1/1/categories.php")
        .then(response => {
        this.meals = response.data.categories;
      })
        .catch(err => {
        console.log(err);
      });
    }
  };
</script>为了渲染刚刚创建的Cards组件,需要修改HelloWorld.vue文件。打开它并使用以下代码更新:
//src/components/HelloWorld.vue
<template>
<div>
<Cards />
</div>
</template>
<script>
import Cards from './Cards.vue'
export default {
name:'cards',
components: {
Cards
},
data() {
return {
};
},
};
</script>
<style scoped>
</style>在这里做的是创建一个Cards组件并将其嵌入到HelloWorld.vue文件中。请注意,在Cards组件中,有一个生命周期hook来修改数据。数据在被渲染到浏览器之前被填充到b-card组件中。
接下来,更新App.vue文件,用来捕获最近的更改并将正确的组件呈现给浏览器。打开它并使用下面的代码更新:
//App.vue
<template>
<div id="app">
<Navbar />
<HelloWorld/>
</div>
</template>
<script>
import HelloWorld from './components/HelloWorld.vue'
import Navbar from './components/Navbar.vue';
export default {
name: 'navbar',
components: {
Navbar,
HelloWorld
}
}
</script>这是在浏览器上可以看到我们的餐饮程序运行如下:
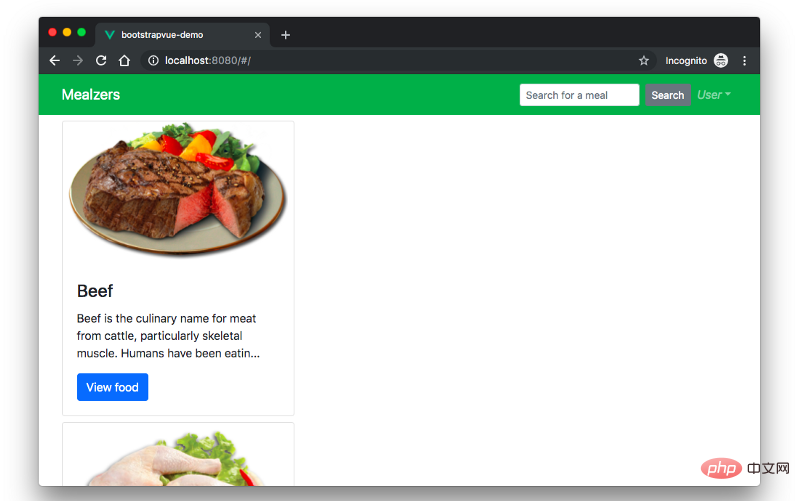
正如你所看到的,card 没有被正确的布局,所以必须纠正这一点。幸运的是,BootstrapVue有一些可以将我们的card放在网格中的内置组件。
它们是:
修改Cards.vue文件中的代码,使用上面提到的BootstrapVue组件在网格中呈现内容。打开Cards.vue文件并使用下面的代码片段更新:
//src/components/HelloWorld.vue
<template>
  <b-container>
    <div v-if="meals.length">
      <b-row>
        <div v-bind:key="data.index" v-for="data in meals">
          <b-col l="4">
            <b-card
              v-bind:title="data.strCategory"
              v-bind:img-src="data.strCategoryThumb"
              img-alt="Image"
              img-top
              tag="article"
              style="max-width: 20rem;"
              class="mb-2">
              <b-card-text>{{ `${data.strCategoryDescription.slice(0,100)}...` }}</b-card-text>
              <b-button href="#" variant="primary">View food</b-button>
            </b-card>
          </b-col>
        </div>
      </b-row>
    </div>
    <div v-else>
      <h5>No meals available yet</h5>
    </div>
  </b-container>
</template>
<script>
import axios from "axios";
export default {
  data() {
    return {
      meals: []
    };
  },
  mounted() {
    axios
      .get("https://www.themealdb.com/api/json/v1/1/categories.php")
      .then(response => {
        this.meals = response.data.categories;
      })
      .catch(err => {
        console.log(err);
      });
  }
};
</script>现在刷新浏览器,应该看到一个正确布局的卡片,其中包含渲染内容。
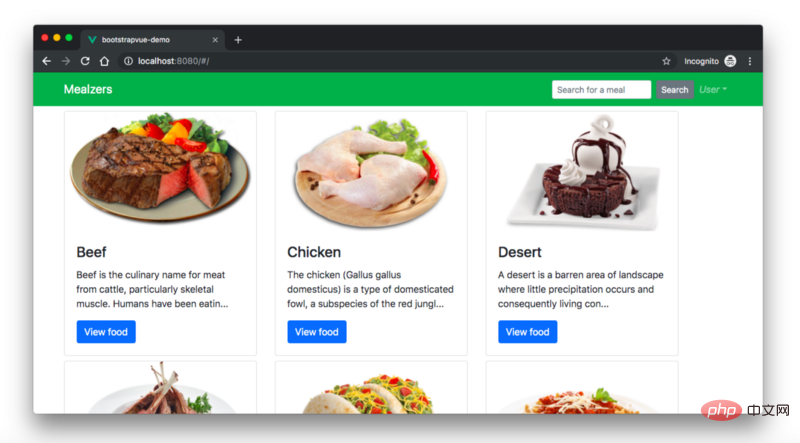
现在有了一个排列工整的餐饮程序。我们用了一些BootstrapVue的组件构建了所有这些。要了解有关BootstrapVue的更多信息,请查看官方文档(https://bootstrap-vue.js.org/docs/)。
如果你想把现有项目从常规Bootstrap4迁移到BootstrapVue该怎么办?这将是一件轻而易举的事。这就是你需要做的:
bootstrap.js文件jQuery,BootstrapVue能独立工作就是这些!通过这三个步骤,你可以将现有项目从依赖jQuery的常规Bootstrap迁移到更简单的独立BootstrapVue包,而不会破坏任何现有代码。
本文通过示例演示了怎样使用BootstrapVue。我们从安装开始,在Vue项目中进行设置,最后使用其自定义组件构建Mealzers程序的一部分。可以看到,BootstrapVue模块简单易用。如果你有常规Bootstrap包的知识,那么使用BootstrapVue将是轻而易举的一件事。
英文地址原文:https://blog.logrocket.com/getting-started-with-bootstrapvue-2d8bf907ef11
更多编程相关知识,请访问:编程入门!!
以上是快速入门BootstrapVue的详细内容。更多信息请关注PHP中文网其他相关文章!
