这次给大家带来VueJs父子组件通讯方法汇总,VueJs父子组件通讯的注意事项有哪些,下面就是实战案例,一起来看一下。
组件(父子通讯)
一、概括
在一个组件内定义另一个组件,称之为父子组件。
但是要注意的是:1.子组件只能在父组件内部使用(写在父组件tempalte中);
2.默认情况下,子组件无法访问父组件上的数据,每个组件实例的作用域是独立的;
那如何完成父子如何完成通讯,简单一句话:props down, events up :父组件通过 props 向下传递数据给子组件,子组件通过 events 给父组件发送
父传子:Props
子传父:子:$emit(eventName) 父$on(eventName)
父访问子:ref
下面对三个进行案例讲解:
二、父传子:Props
组件实例的作用域是孤立的。这意味着不能 (也不应该) 在子组件的模板内直接引用父组件的数据。要让子组件使用父组件的数据,需要通过子组件的 props 选项
使用Prop传递数据包括静态和动态两种形式,下面先介绍静态props
1、静态props
<script src="https://unpkg.com/vue"></script>
<p id="example">
 <parent></parent>
</p>
<script>
 //要想子组件能够获取父组件的,那么在子组件必须申明:props
 var childNode = {
  template: '<p>{{message}}</p>',
  props: ['message']
 }
 //这里的message要和上面props中值一致
 var parentNode = {
  template: `
   <p class="parent">
   <child message="我是"></child>
   <child message="徐小小"></child>
   </p>`,
  components: {
   'child': childNode
  }
 };
 // 创建根实例
 new Vue({
  el: '#example',
  components: {
   'parent': parentNode
  }
 })
</script>效果:

命名约定:
对于props声明的属性来说,在父级HTML模板中,属性名需要使用中划线写法
子级props属性声明时,使用小驼峰或者中划线写法都可以;而子级模板使用从父级传来的变量时,需要使用对应的小驼峰写法
上面这句话什么意思呢?
<script>
 //这里需要注意的是props可以写成['my-message']或者['myMessage']都是可以的
 //但是template里的属性名,只能是驼峰式{{myMessage}},如果也写成{{my-message}}那么是无效的
 var childNode = {
  template: '<p>{{myMessage}}</p>',
  props: ['myMessage']
 }
 //这里的属性名为my-message
 var parentNode = {
  template: `
   <p class="parent">
   <child my-message="我是"></child>
   <child my-message="徐小小"></child>
   </p>`,
  components: {
   'child': childNode
  }
 };
</script>如果我们childNode中的myMessage改成{{my-message}}看运行结果:

2.动态props
在模板中,要动态地绑定父组件的数据到子模板的 props,与绑定到任何普通的HTML特性相类似,就是用 v-bind。每当父组件的数据变化时,该变化也会传导给子组件
 var childNode = {
  template: '<p>{{myMessage}}</p>',
  props: ['my-message']
    }
 var parentNode = {
  template: `
 <p class="parent">
 <child :my-message="data1"></child>
 <child :my-message="data2"></child>
 </p>`,
  components: {
   'child': childNode
  },
  data() {
   return {
    'data1': '111',
    'data2': '222'
   }
  }
};3、传递数字
初学者常犯的一个错误是使用字面量语法传递数值
<script src="https://unpkg.com/vue"></script>
<p id="example">
 <parent></parent>
</p>
<script>
 var childNode = {
  template: '<p>{{myMessage}}的类型是{{type}}</p>',
  props: ['myMessage'],
  computed: {
   type() {
    return typeof this.myMessage
   }
  }
 }
 var parentNode = {
  template: `
 <p class="parent">
 <my-child my-message="1"></my-child>
 </p>`,
  components: {
   'myChild': childNode
  }
 };
 // 创建根实例
 new Vue({
  el: '#example',
  components: {
   'parent': parentNode
  }
 })
</script>结果:

因为它是一个字面 prop,它的值是字符串 "1" 而不是 number。如果想传递一个实际的 number,需要使用 v-bind,从而让它的值被当作JS表达式计算
如何把String转成number呢,其实只要改一个地方。
 var parentNode = {
  template: `
 <p class="parent">
 //只要把父组件my-message="1"改成:my-message="1"结果就变成number类型
 <my-child :my-message="1"></my-child>
 </p>`,
};当然你如果想通过v-bind想传一个string类型,那该怎么做呢?
我们可以使用动态props,在data属性中设置对应的数字1
var parentNode = {
 template: `
 <p class="parent">
 <my-child :my-message="data"></my-child>
 </p>`,
 components: {
 'myChild': childNode
 },
 //这里'data': 1代表就是number类型,'data': "1"那就代表String类型
 data(){
 return {
  'data': 1
 }
 }
};三、子转父 :$emit
关于$emit的用法
1、父组件可以使用 props 把数据传给子组件。
2、子组件可以使用 $emit 触发父组件的自定义事件。
子主键
<template>
<p class="train-city">
<span @click='select(`大连`)'>大连</span>
</p>
</template>
<script>
export default {
name:'trainCity',
methods:{
select(val) {
let data = {
cityname: val
};
this.$emit('showCityName',data);//select事件触发后,自动触发showCityName事件
}
}
}
</script>父组件
<template>
 <trainCity @showCityName="updateCity" :index="goOrtoCity"></trainCity> //监听子组件的showCityName事件。
<template>
<script>
export default {
 name:'index',
 data () {
 return {
  toCity:"北京"
 }
 }
 methods:{
 updateCity(data){//触发子组件城市选择-选择城市的事件
  this.toCity = data.cityname;//改变了父组件的值
  console.log('toCity:'+this.toCity)
 }
 }
}
</script>结果为:toCity: 大连
第二个案例
<script src="https://unpkg.com/vue"></script>
 <p id="counter-event-example">
  <p>{{ total }}</p>
  <button-counter v-on:increment1="incrementTotal"></button-counter>
  <button-counter v-on:increment2="incrementTotal"></button-counter>
 </p>
<script>
 Vue.component('button-counter', {
  template: '<button v-on:click="increment">{{ counter }}</button>',
  //组件数据就是需要函数式,这样的目的就是让每个button-counter不共享一个counter
  data: function() {
   return {
    counter: 0
   }
  },
  methods: {
   increment: function() {
   //这里+1只对button的值加1,如果要父组件加一,那么就需要$emit事件
    this.counter += 1;
    this.$emit('increment1', [12, 'kkk']);
   }
  }
 });
 new Vue({
  el: '#counter-event-example',
  data: {
   total: 0
  },
  methods: {
   incrementTotal: function(e) {
    this.total += 1;
    console.log(e);
   }
  }
 });
</script>详细讲解:
1:button-counter作为父主键,父主键里有个button按钮。
2:两个button都绑定了click事件,方法里: this.$emit('increment1', [12, 'kkk']);,那么就会去调用父类v-on所监听的increment1事件。
3:当increment1事件被监听到,那么执行incrementTotal,这个时候才会把值传到父组件中,并且调用父类的方法。
4:这里要注意第二个button-counter所对应的v-on:'increment2,而它里面的button所对应是this.$emit('increment1', [12, 'kkk']);所以第二个button按钮是无法把值传给他的父主键的。
示例:一个按钮点击一次那么它自身和上面都会自增1,而第二个按钮只会自己自增,并不影响上面这个。

还有就是第一个按钮每点击一次,后台就会打印一次如下:

四、ref ($refs)用法
ref 有三种用法
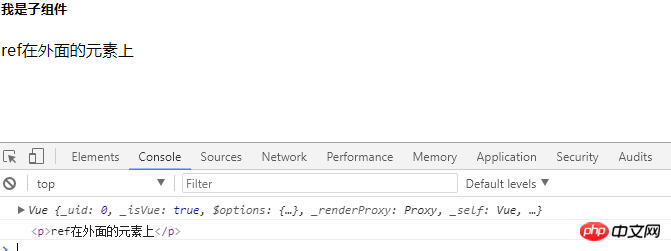
1.ref 加在普通的元素上,用this.ref.name 获取到的是dom元素
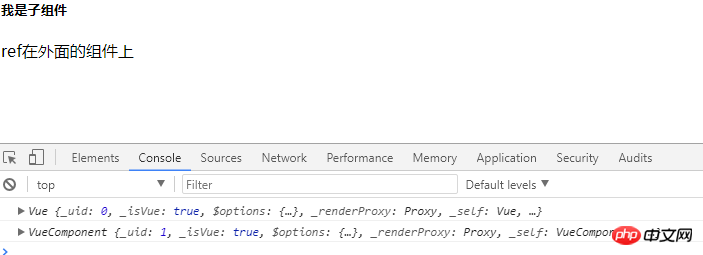
2.ref 加在子组件上,用this.ref.name 获取到的是组件实例,可以使用组件的所有方法。
3.如何利用v-for 和ref 获取一组数组或者dom 节点
1.ref 加在普通的元素上,用this.ref.name 获取到的是dom元素
<script src="https://unpkg.com/vue"></script>
<p id="ref-outside-component" v-on:click="consoleRef">
<component-father ref="outsideComponentRef">
</component-father>
<p>ref在外面的组件上</p>
</p>
<script>
var refoutsidecomponentTem = {
template: "<p class='childComp'><h5>我是子组件</h5></p>"
};
var refoutsidecomponent = new Vue({
el: "#ref-outside-component",
components: {
"component-father": refoutsidecomponentTem
},
methods: {
consoleRef: function() {
console.log(this.); // #ref-outside-component vue实例
console.log(this.$refs.outsideComponentRef); // p.childComp vue实例
}
}
});
</script>效果:当在p访问内点击一次:

2.ref使用在外面的元素上
<script src="https://unpkg.com/vue"></script>
<!--ref在外面的元素上-->
<p id="ref-outside-dom" v-on:click="consoleRef">
<component-father>
</component-father>
<p ref="outsideDomRef">ref在外面的元素上</p>
</p>
<script>
var refoutsidedomTem = {
template: "<p class='childComp'><h5>我是子组件</h5></p>"
};
var refoutsidedom = new Vue({
el: "#ref-outside-dom",
components: {
"component-father": refoutsidedomTem
},
methods: {
consoleRef: function() {
console.log(this); // #ref-outside-dom vue实例
console.log(this.$refs.outsideDomRef); // <p> ref在外面的元素上</p>
}
}
});
</script>效果:当在p访问内点击一次:

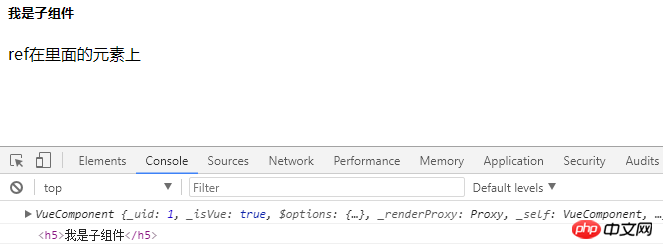
3.ref使用在里面的元素上---局部注册组件
<script src="https://unpkg.com/vue"></script>
<!--ref在里面的元素上-->
<p id="ref-inside-dom">
<component-father>
</component-father>
<p>ref在里面的元素上</p>
</p>
<script>
var refinsidedomTem = {
template: "<p class='childComp' v-on:click='consoleRef'>" +
"<h5 ref='insideDomRef'>我是子组件</h5>" +
"</p>",
methods: {
consoleRef: function() {
console.log(this); // p.childComp vue实例
console.log(this.$refs.insideDomRef); // <h5 >我是子组件</h5>
}
}
};
var refinsidedom = new Vue({
el: "#ref-inside-dom",
components: {
"component-father": refinsidedomTem
}
});
</script>效果:当在click范围内点击一次:

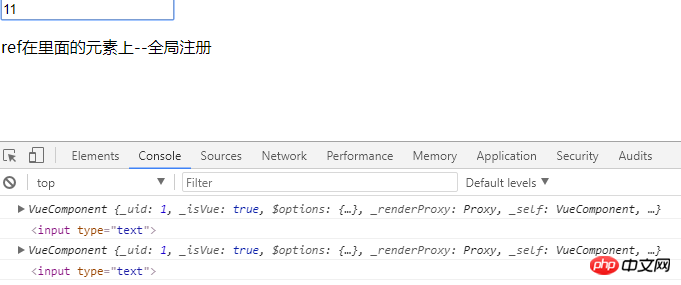
4.ref使用在里面的元素上---全局注册组件
<script src="https://unpkg.com/vue"></script>
<!--ref在里面的元素上--全局注册-->
<p id="ref-inside-dom-all">
<ref-inside-dom-quanjv></ref-inside-dom-quanjv>
</p>
<script>
//v-on:input指当input里值发生改变触发showinsideDomRef事件
Vue.component("ref-inside-dom-quanjv", {
template: "<p class='insideFather'> " +
"<input type='text' ref='insideDomRefAll' v-on:input='showinsideDomRef'>" +
" <p>ref在里面的元素上--全局注册 </p> " +
"</p>",
methods: {
showinsideDomRef: function() {
console.log(this); //这里的this其实还是p.insideFather
console.log(this.$refs.insideDomRefAll); // <input type="text">
}
}
});
var refinsidedomall = new Vue({
el: "#ref-inside-dom-all"
});
</script>效果:当我第一次输入1时,值已改变出发事件,当我第二次在输入时在触发一次事件,所以后台应该打印两次

相信看了本文案例你已经掌握了方法,更多精彩请关注php中文网其它相关文章!
推荐阅读:
以上是VueJs父子组件通讯方法汇总的详细内容。更多信息请关注PHP中文网其他相关文章!


