作者:卡洛斯·穆库霍✏️
倒计时器是许多网站上的热门功能,可增强活动、销售和用户参与度的功能。虽然 JavaScript 通常用于网络上的动态行为,但也可以仅使用 CSS 创建功能强大且视觉上吸引人的倒计时器。
在本教程中,我们将探索这两种方法,从基本的 JavaScript 倒计时器开始,然后转向纯 CSS 倒计时器。最后,我们将使用 Chrome DevTools 比较两种方法的性能,并讨论它们各自的优缺点。
我们将首先创建一个每秒更新一次的简单倒计时器。计时器将包括一个开始和暂停按钮来控制其操作。
在创建 JavaScript 倒计时器之前,我们需要创建一个目录来存储我们将在本教程中构建的应用程序。
打开终端窗口,导航到适合您的项目的目录,然后使用以下命令创建名为 countdown-timer 的目录:
然后,导航到此目录:
创建两个名为 javascript-countdown 和 css-only-countdown 的子目录,并在每个子目录中创建一个名为 public 的子目录:
接下来,导航到 javascript-countdown 子目录,使用默认设置初始化一个新的节点项目,并安装 Express 包:
打开您最喜欢的文本编辑器,创建一个名为 server.js 的文件,并向其中添加以下代码:
上面的代码创建了一个 Express 服务器,用于为端口 3001 中的 JavaScript 倒计时应用程序提供服务。
仍在文本编辑器中,在 javascript-countdown 目录内的 public 子目录中创建以下文件:
将以下代码添加到index.html:
此 HTML 文件设置了一个基本结构,其中包含一个包含控制按钮的容器和一个倒计时显示区域。
接下来,我们将添加 JavaScript 来管理倒计时逻辑。在index.js中添加以下代码:
在此代码块中,我们通过各自的 ID 和类来初始化 startBtn、pauseBtn 和 countdownView 元素。我们还设置了一些初始变量:totalTime、timeLeft、countDownIntervalID 和 isPaused。此外,我们将暂停按钮设置为最初隐藏。
现在,让我们为开始和暂停按钮添加事件侦听器:
这些行将单击事件侦听器附加到开始和暂停按钮。稍后定义函数startOrStopTimer 和pauseOrResumeTimer 来处理按钮单击。
添加以下代码来定义startOrStopTimer函数:
在此函数中,我们在“开始”和“停止”之间切换开始按钮文本。如果倒计时未运行且未暂停,我们将 timeLeft 初始化为totalTime 并启动计时器。否则,我们停止计时器并重置视图。
现在,定义 startTimer 函数:
该函数设置每秒更新倒计时的间隔。如果 timeLeft 达到零,我们将停止计时器,重置开始按钮文本,并隐藏暂停按钮。
接下来,添加stopTimer函数:
此函数清除倒计时间隔并重置 countDownIntervalID。最后添加pauseOrResumeTimer函数:
在此函数中,我们在“暂停”和“恢复”之间切换暂停状态和按钮文本。如果倒计时正在运行,我们就停止计时器;否则,我们重新开始。
现在,让我们使用 CSS 设置倒计时器的样式。将以下代码添加到 styles.css:
此 CSS 定义了倒计时器界面的样式。正文背景设置为黑色,我们使用 Arial 作为主要字体。 .container 类的样式使其内容居中并在元素之间提供间距。 .controls 类设置用于启动和暂停计时器的按钮的样式,确保它们均匀分布且响应灵敏。 .countdown-container 类定义倒计时显示的大小和外观,包括边框和边距。
返回终端并运行以下命令以开始提供 JavaScript 倒计时应用程序:
node server.js
Open a new tab in your browser, navigate to http://localhost:3001, and you should see something similar to the following: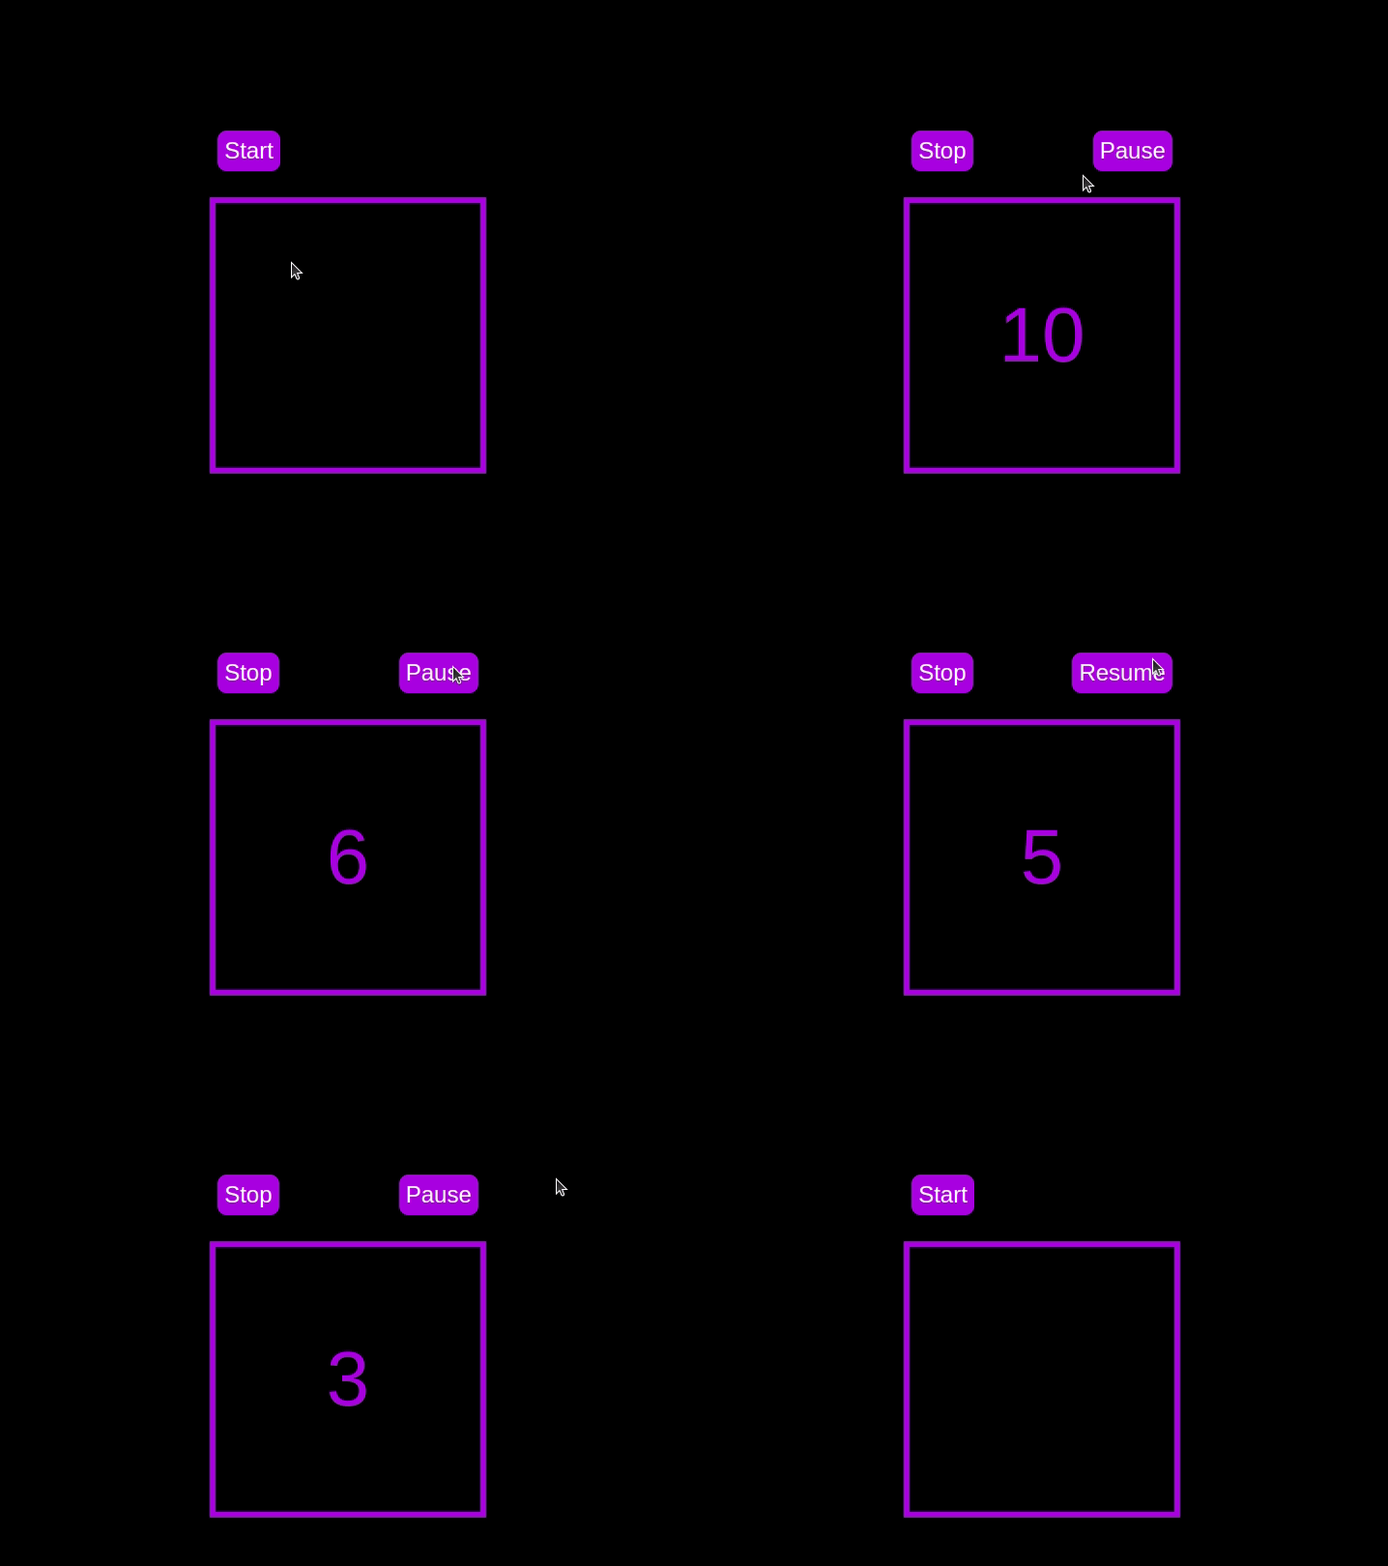 Test out the countdown timer and once you are done, terminate the server application and move to the next step.
To enhance the user experience of our countdown timer, let’s add a circular progress indicator to give the user a visual representation of the time remaining.
First, we need to modify our HTML code to include the circular progress element. In index.html, we add a span element with a class of circular-progress inside the countdown-container div. This span element will be used to create the circular progress indicator:
Next, we need to define the CSS for the circular progress indicator. In styles.css, we add the following code:
.countdown-container { ... /* border : 0.4em solid #9b51e0; */ } .circular-progress { width: 20vw; height: 20vw; border-radius: 50%; display: flex; justify-content: center; align-items: center; position: absolute; transition: 0.5s; background-color: #13171f; } .circular-progress::before { width: 18.5vw; height: 18.5vw; content: ""; position: absolute; border-radius: 50%; background-color: black; }
This code first removes the border from the countdown-container div, then sets the dimensions and shape of the circular progress indicator, as well as its position and background color. We also add a ::before pseudo-element to create the inner circle of the progress indicator.
Now we need to add the JavaScript code to animate the circular progress indicator.
Add the following code in the variables initialization block:
const circularProgressEl = document.getElementsByClassName("circular-progress")[0]; let circularProgress; let circularProgressIntervalID;
This code initializes the circularProgressEl variable to target the circular progress element and creates two new variables, circularProgress and circularProgressIntervalID, that will be used to animate the progress indicator.
Add the following code below the pauseOrResumeTimer() function:
function startCircularProgressAnimation() { let start = totalTime - timeLeft; let degreesPerSecond = 360 / totalTime; let degreesPerInterval = degreesPerSecond / 20; circularProgress = degreesPerSecond * start; circularProgressIntervalID = setInterval(() => { if (Math.round(circularProgress) === 360) { clearInterval(circularProgressIntervalID); } else { circularProgress = circularProgress + degreesPerInterval; circularProgressEl.style.background = `conic-gradient(#9b51e0 ${circularProgress}deg, #13171f 0deg)`; } }, 50); }
This code defines the startCircularProgressAnimation function, which calculates the starting point and degree of rotation for the circular progress indicator, and sets up an interval to animate the progress indicator.
Add the following code below the startCircularProgressAnimation:
function resumeCircularProgressAnimation() { startCircularProgressAnimation(); } function pauseCircularProgressAnimation() { clearInterval(circularProgressIntervalID); } function stopCircularProgressAnimation() { clearInterval(circularProgressIntervalID); circularProgressEl.style.background = `conic-gradient(#9b51e0 0deg, #13171f 0deg)`; }
This code defines the resumeCircularProgressAnimation, pauseCircularProgressAnimation, and stopCircularProgressAnimation functions, which are used to start, pause, and stop the circular progress animation.
Finally, we need to modify the startOrStopTimer and pauseOrResumeTimer functions to start and stop the circular progress animation along with the timer:
function startOrStopTimer() { // ... if (countDownIntervalID === undefined && !isPaused) { // ... startCircularProgressAnimation(); } else { // ... stopCircularProgressAnimation(); } } function pauseOrResumeTimer() { // ... if (countDownIntervalID !== undefined) { stopTimer(); pauseCircularProgressAnimation(); } else { startTimer(); resumeCircularProgressAnimation(); } }
With these modifications, our countdown timer now includes a circular progress indicator that animates along with the timer.
Return to your terminal and run the following command to start serving the JavaScript countdown application:
node server.js
Go back to the tab in your browser where you visited the http://localhost:3001 URL, refresh the page, and you should see something similar to the following: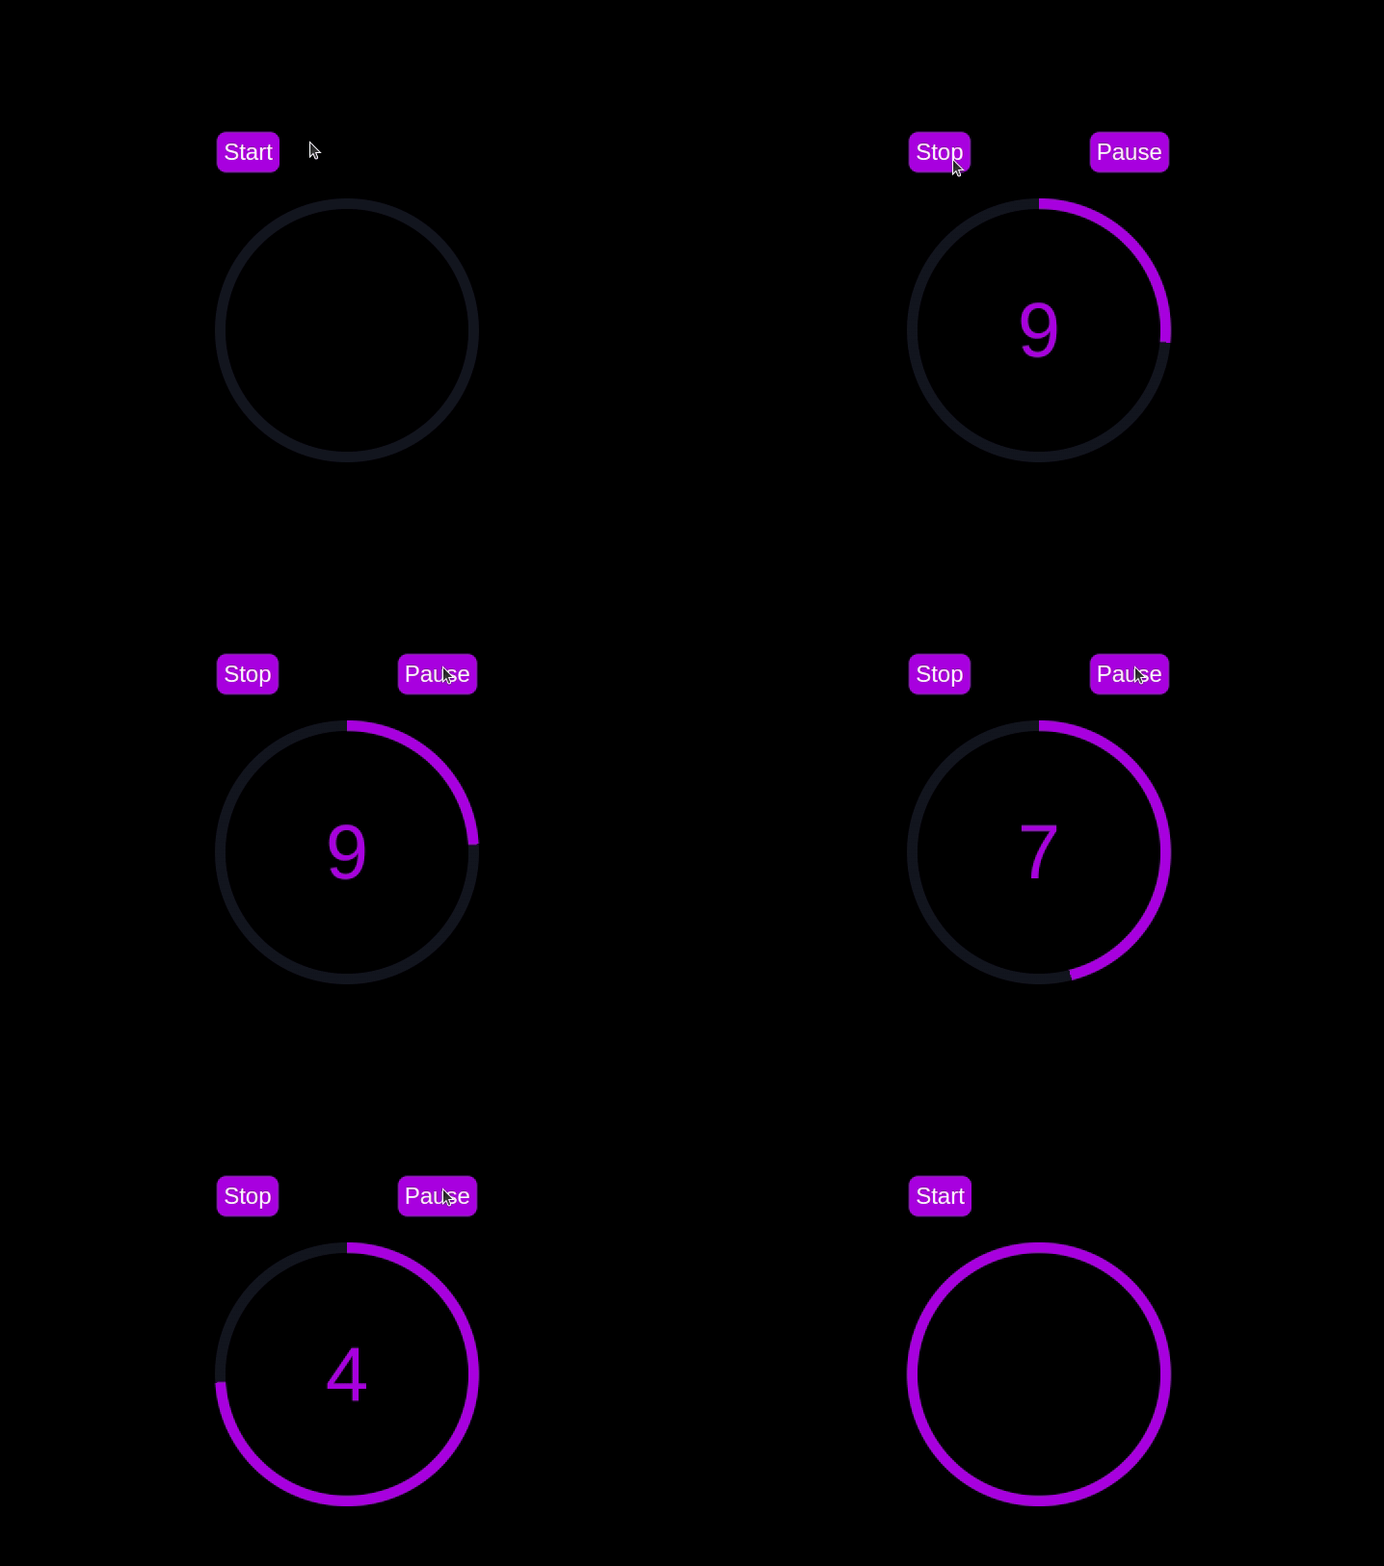
In this section, we'll dive into creating a countdown timer that updates every second and is made using only CSS. Our timer will be simple yet functional, featuring start and pause buttons to control its operation.
Navigate to the css-only-countdown subdirectory, initialize a new node project, and install the express package:
cd ../css-only-countdown npm init -y npm install express
Then, return to your text editor, create a file named server.js, and add the following code to it:
const express = require('express'); const app = express(); const port = 3002 app.use(express.static('public')); app.listen(port, () => { console.log(`Css-only countdown app server started on port ${port}`); });
The code above creates an express server that will be used to serve the JavaScript countdown application in port 3002.
Still in your text editor, create the following files in the public subdirectory:
Add the following code to the index.html file:
This code sets up the basic structure of our countdown timer. It includes a container div that holds the controls for starting and pausing the timer, as well as the countdown display itself. The controls div contains two checkboxes with labels that will serve as our start and pause buttons. These buttons toggle their respective states using CSS, thanks to the checkbox hack.
The countdown-container div holds an unordered list (ul) of list items (li) representing the countdown numbers from 10 to one. These numbers will be displayed one by one as the timer counts down.
Now, let's style the countdown timer using CSS. Add the following code to styles.css:
body { background-color: black; font-family: Arial, sans-serif; height: 100%; } .container { display: flex; flex-direction: column; justify-content: center; align-items: center; } .controls { width: 20%; margin-top: 10%; display: flex; justify-content: space-between; flex-direction: row; flex-wrap: wrap; } .countdown-container { position: relative; width: 20vw; height: 20vw; margin-top: 12%; border : 0.4em solid #9b51e0; } #startLabel span { display: none; } label { cursor: pointer; font-size: 1.5em; padding: 0.3em; background-color: #9b51e0; border-radius: 0.4em; color: white; } #startBtn:checked~#startLabel span:nth-child(1) { display: inline; } #startBtn:not(:checked)~#startLabel span:nth-child(2) { display: inline; } #startBtn:not(:checked)~#pauseLabel, #pauseBtn { display: none; } #pauseLabel span { display: none; } #pauseBtn:checked~#pauseLabel span:nth-child(1) { display: inline; } #pauseBtn:not(:checked)~#pauseLabel span:nth-child(2) { display: inline; } .checkbox-wrapper { display: none; }
In this CSS file, we start by setting some basic styles for the body and container. The body has a black background and uses the Arial font. The container is centered using flexbox and has a margin to push it down from the top of the viewport.
The controls div is styled to be responsive and to ensure that the buttons are spaced out evenly. The countdown-container div is styled with a border, which will later be replaced by the circular progress indicator.
We use the checkbox hack to toggle the visibility of the labels for the start and pause buttons. Depending on whether the checkboxes are checked or not, different spans within the labels are displayed. This allows the labels to show different text (Start or Stop, Pause or Resume) based on the state of the checkboxes.
Now, add the following code to the bottom of the styles.css file:
.countdown { position: relative; width: 100%; height: 100%; list-style: none; padding: 0; margin: 0; display: flex; justify-content: center; align-items: center; font-size: 5em; color: #9b51e0; } .countdown li { position: absolute; opacity: 0; transition: opacity 1s linear; } #startBtn:checked~.countdown-container .countdown li:nth-child(1) { animation-delay: 0s; } #startBtn:checked~.countdown-container .countdown li:nth-child(2) { animation-delay: 1s; } #startBtn:checked~.countdown-container .countdown li:nth-child(3) { animation-delay: 2s; } #startBtn:checked~.countdown-container .countdown li:nth-child(4) { animation-delay: 3s; } #startBtn:checked~.countdown-container .countdown li:nth-child(5) { animation-delay: 4s; } #startBtn:checked~.countdown-container .countdown li:nth-child(6) { animation-delay: 5s; } #startBtn:checked~.countdown-container .countdown li:nth-child(7) { animation-delay: 6s; } #startBtn:checked~.countdown-container .countdown li:nth-child(8) { animation-delay: 7s; } #startBtn:checked~.countdown-container .countdown li:nth-child(9) { animation-delay: 8s; } #startBtn:checked~.countdown-container .countdown li:nth-child(10) { animation-delay: 9s; } @keyframes countdownAnimation { 0%, 10% { opacity: 1; } 11%, 100% { opacity: 0; } } #startBtn:checked~.countdown-container .countdown li { animation: countdownAnimation 10s steps(10) forwards; } #pauseBtn:checked~.countdown-container .countdown li { animation-play-state: paused; }
With this code, we style the countdown list. The countdown class is positioned absolutely within the countdown-container, and its list items are initially hidden with opacity: 0.
We then use keyframes and the animation property to create the countdown effect. The list items are displayed one by one with a delay using the animation-delay property. The countdownAnimation keyframes control the visibility of each list item, making them visible for a short period before hiding them again.
We also pause the animation when the pause button is checked, using the animation-play-state property.
Go back to your terminal and run the following command to start serving the CSS-only countdown application:
node server.js
Open a new tab in your browser, navigate to http://localhost:3002 URL, and you should see something similar to the following: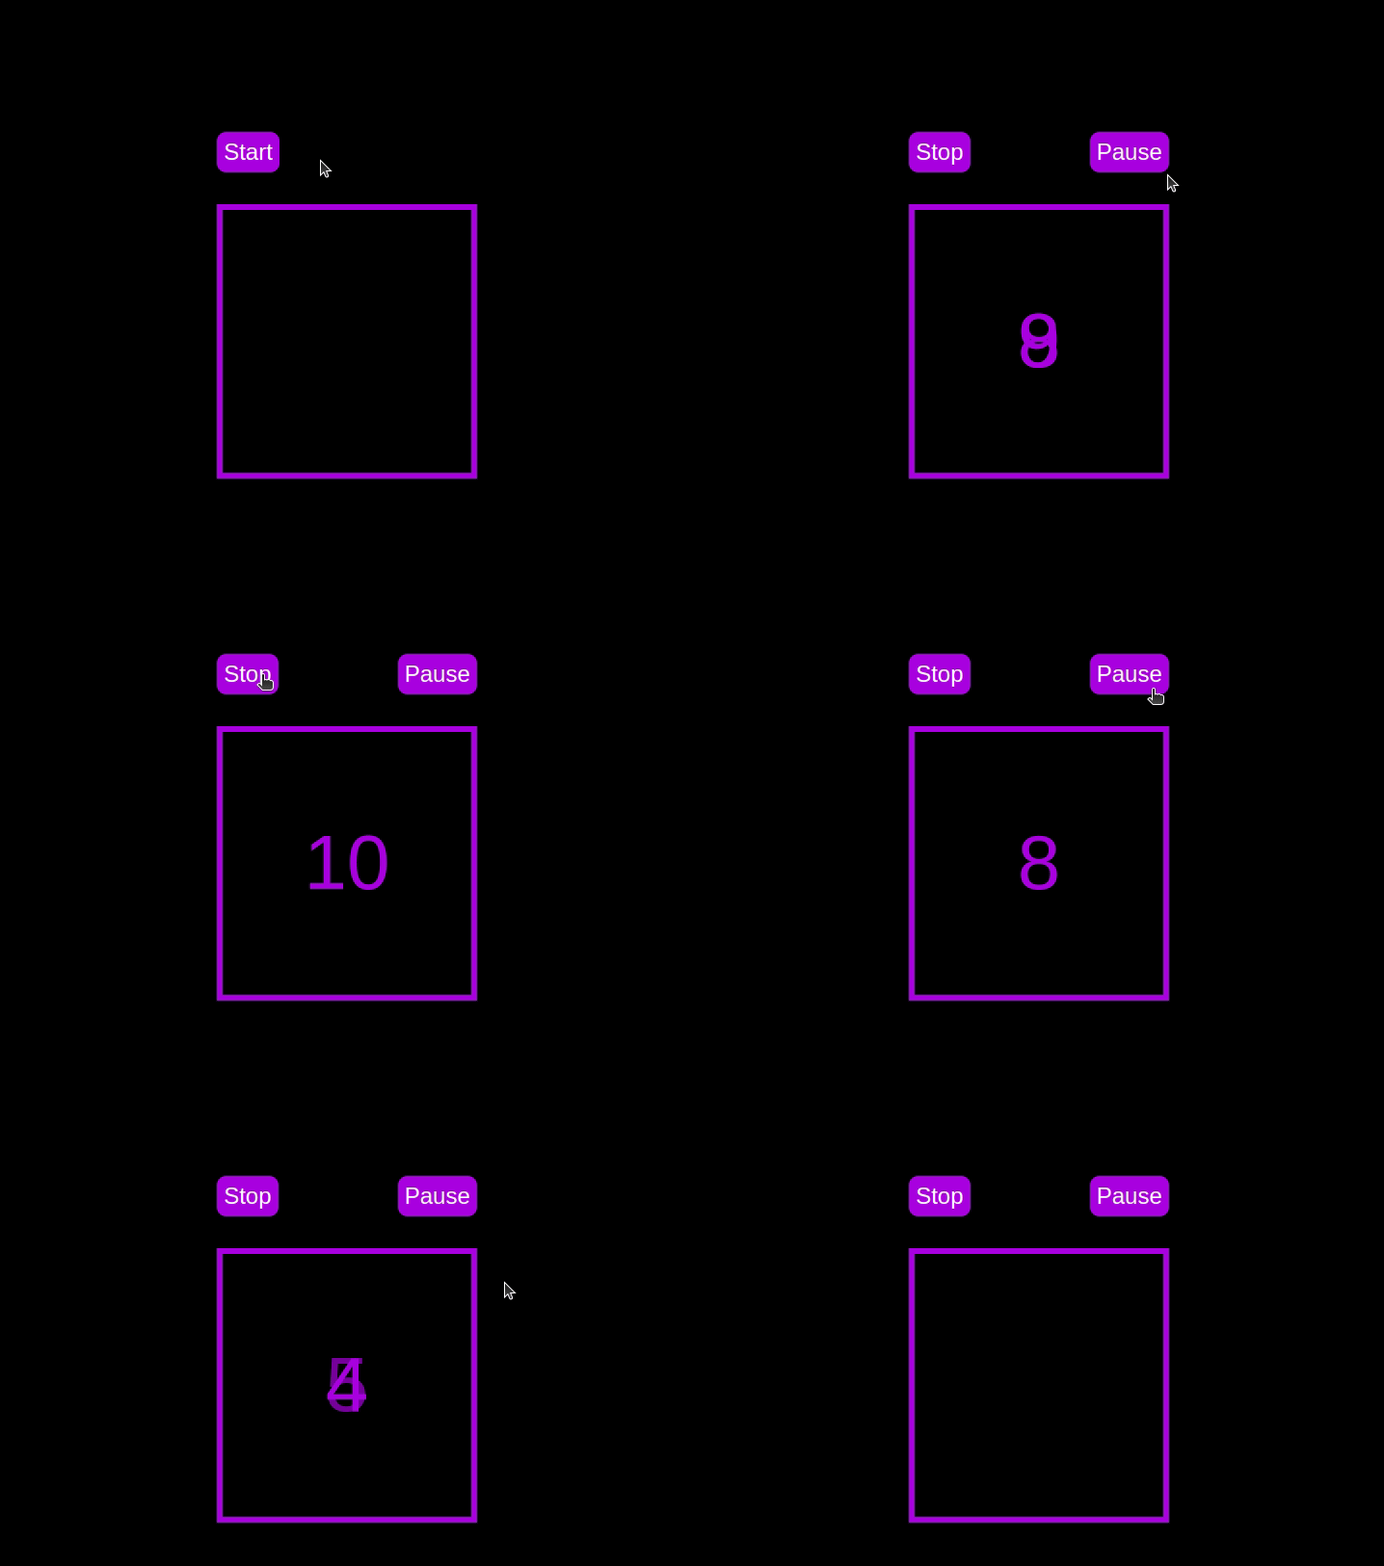 Test out the countdown timer and once you are done, terminate the server application and move to the next step.
To make the countdown timer more visually appealing, we can add a circular progress indicator that shows the remaining time. To do this, we will modify the HTML and CSS code as follows:
First, replace the countdown-container div in the index.html file with the following code:
- 10
- 9
- 8
- 7
- 6
- 5
- 4
- 3
- 2
- 1
In this code, we add a span element with a class of circular-progress inside the countdown-container div.
Next, add the following code to the styles.css file:
.countdown-container { ... /* border : 0.4em solid #9b51e0; */ } .circular-progress { width: 20vw; height: 20vw; border-radius: 50%; display: flex; justify-content: center; align-items: center; position: absolute; transition: 0.5s; background: conic-gradient(#9b51e0 var(--angle), #13171f 0deg); } .circular-progress::before { width: 18.5vw; height: 18.5vw; content: ""; position: absolute; border-radius: 50%; background-color: black; } @keyframes circularProgressAnimation { to { --angle: 360deg; } } @property --angle { syntax: ""; initial-value: 0deg; inherits: false; } #startBtn:checked~.countdown-container .circular-progress { opacity: 1; animation: circularProgressAnimation 10s linear; } #pauseBtn:checked~.countdown-container .circular-progress { animation-play-state: paused; }
In this code, we first remove the border from the countdown-container div, and then add styles for the circular-progress class. The circular progress indicator is a span element that is absolutely positioned within the countdown-container. It uses a conic gradient to create the circular progress effect.
We also define a keyframe animation, circularProgressAnimation, that animates the progress indicator from 0 to 360 degrees over the duration of the countdown. The --angle CSS property is used to control the angle of the gradient.
Finally, we use the checkbox hack to start and pause the circular progress animation along with the countdown numbers. The animation is applied to the circular-progress span when the start button is checked and paused when the pause button is checked.
With these modifications, our countdown timer now includes a circular progress indicator that animates along with the timer.
Go back to your terminal and run the following command to start serving the CSS-only countdown application:
node server.js
Return to the tab in your browser where you visited the http://localhost:3002 URL, refresh the page, and you should see something similar to the following: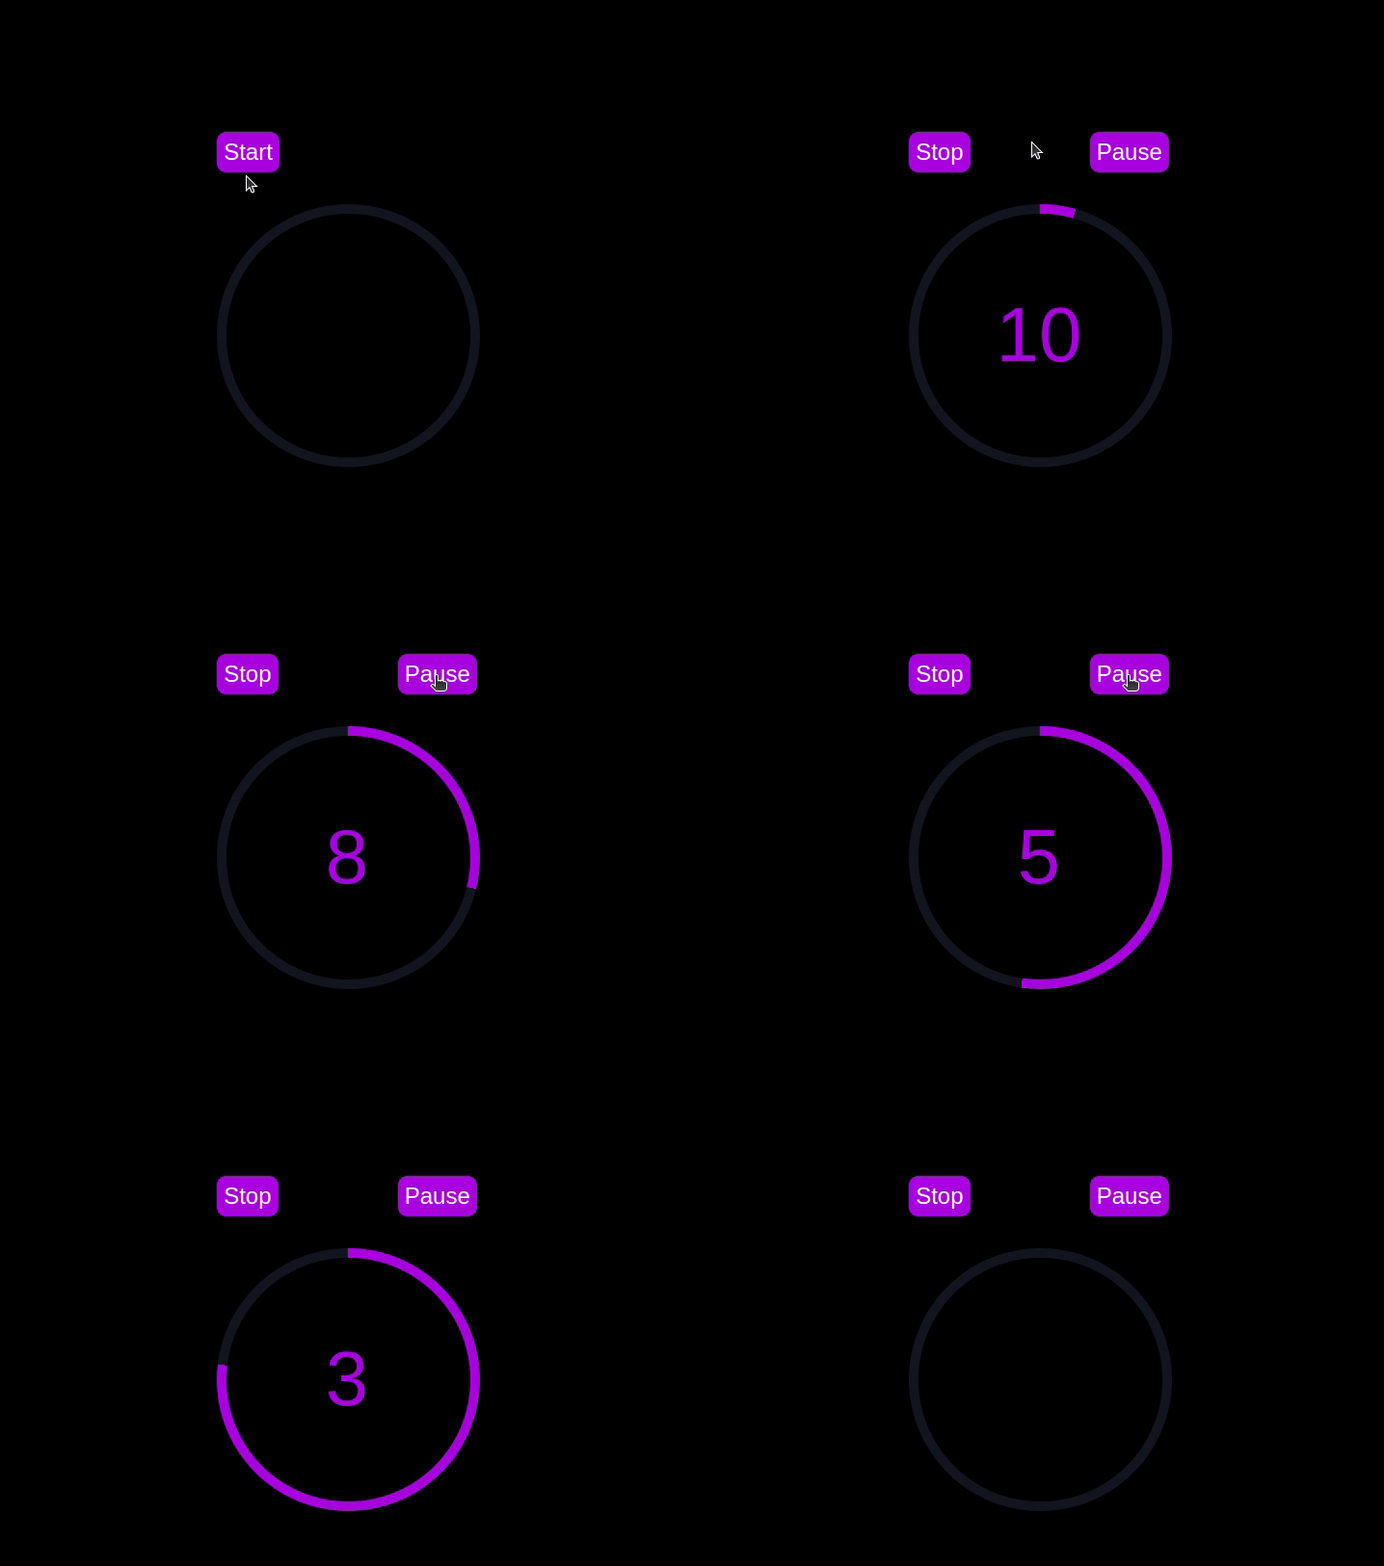
Now that we have implemented both the CSS-only and JavaScript countdown timers, let's compare their performance using Chrome DevTools.
To get started, open the Chrome browser and navigate to the webpage containing the countdown timers. Right-click anywhere on the page and selectInspectto open Chrome DevTools.
In the DevTools window, click on theNetworktab and then refresh both the JavaScript and CSS-only countdown pages. This tab allows you to monitor all network requests made by the page, including HTML, CSS, JavaScript, and other resources:
By analyzing the requests, you can determine how many resources are being loaded, their sizes, and the overall impact on page load time:
| CSS-only countdowntimer | JavaScript countdowntimer | |
|---|---|---|
| Number of requests | 2 | 3 |
| Total size | 4.5 KB | 4.7 KB |
| Page load | 24 ms | 27 ms |
これらの結果から、CSS のみのカウントダウン タイマーは、JavaScript カウントダウン タイマーと比較して必要なリクエストが少なく、合計サイズがわずかに小さいことがわかります。これにより、CSS のみのバージョンのページ読み込み時間がわずかに速くなり、初期読み込みの点でより効率的になります。
DevTools ウィンドウで、パフォーマンスタブに移動し、記録ボタンをクリックして記録セッションを開始します。 JavaScript カウントダウン タイマーを評価するには、それぞれのページにあるStartボタンをクリックし、タイマーがコースを実行できるようにします。タイマーが停止したら、パフォーマンスタブで録音を停止します。
JS と CSS のみのカウントダウン ページの両方に対してこのプロセスを実行して、各実装のパフォーマンス データを収集します。パフォーマンスタブでは、スクリプト、レンダリング、ペイント時間を含む、ページの実行時のパフォーマンスの包括的な分析が提供されます。これらのメトリクスを分析することで、Web アプリケーションのパフォーマンスを向上させるために最適化が必要な領域を特定できます。
| CSS-only countdowntimer | JavaScript countdowntimer | |
|---|---|---|
| Scripting | 2 ms | 49 ms |
| Rendering | 510 ms | 103 ms |
| Painting | 275 ms | 55 ms |
これらの結果を解釈すると、CSS のみのカウントダウン タイマーのスクリプト時間は JavaScript カウントダウン タイマーよりも大幅に短く、実行オーバーヘッドが最小限であることがわかります。ただし、CSS のみのカウントダウン タイマーでは、レンダリングとペイントに時間がかかります。これは、CSS アニメーションのレンダリングには、特に複雑なスタイルやトランジションの場合、ブラウザーにより多くの労力が必要になる場合があるためです。
対照的に、JavaScript カウントダウン タイマーでは、カウントダウンの更新に含まれるロジックによりスクリプト時間が長くなりますが、レンダリングとペイントの時間が短縮されるという利点があります。これは、JavaScript はスクリプトの実行に関してオーバーヘッドを追加しますが、DOM の更新と変更のレンダリングに関してはより効率的である可能性があることを示唆しています。
全体的に、スクリプトの実行時間を最小限に抑えることが重要なシナリオでは、CSS のみのカウントダウン タイマーの方が効率的ですが、レンダリングとペイントの時間が最も重要な場合には、JavaScript タイマーの方がパフォーマンスが向上する可能性があります。
CSS のみのカウントダウン タイマーと JavaScript のカウントダウン タイマーの両方を調べたので、それぞれの長所と短所を比較検討して、どちらのアプローチがニーズに最も適しているかを判断してみましょう。
CSS のみのカウントダウン タイマーは、純粋な CSS を利用してカウントダウン効果を実現し、軽量で簡単なソリューションを提供します。
その利点は次のとおりです:
このアプローチの短所は次のとおりです。
一方、JavaScript カウントダウン タイマーは、JavaScript を使用してカウントダウン ロジックと DOM 更新を管理します。このアプローチにより、より優れた制御と柔軟性が提供されます。
このアプローチの長所は次のとおりです。
短所は次のとおりです:
CSS のみのタイマーは軽量で理解しやすいため、スクリプトを最小限に抑えたシンプルなカウントダウンに適しています。ただし、より複雑なアニメーションやインタラクティブな機能では問題が発生する可能性があります。一方、JavaScript タイマーはより優れた制御と柔軟性を提供し、より動的な対話を可能にします。これには、スクリプトのオーバーヘッドが増加し、複雑さが増します。
最終的に、2 つのアプローチのどちらを選択するかは、プロジェクトの具体的なニーズと、受け入れられるトレードオフによって決まります。
このチュートリアルでは、カウントダウン タイマーを作成するための 2 つの方法 (JavaScript を使用する方法と CSS のみを使用する方法) を検討しました。基本的な JavaScript カウントダウン タイマーから始めて、機能とスタイルを追加して、使いやすく視覚的に魅力的なものにしました。次に、CSS のみのカウントダウン タイマーを実装し、シンプルでありながら効果的なアニメーションを作成するための CSS の力を示しました。
シンプルさのために CSS のみのアプローチを選択するか、柔軟性のために JavaScript アプローチを選択するかに関係なく、プロジェクトのニーズに合ったカウントダウン タイマーを実装するためのツールと知識が得られます。
Web フロントエンドがますます複雑になるにつれて、リソースを貪欲な機能がブラウザーに要求します。実稼働環境のすべてのユーザーのクライアント側の CPU 使用率、メモリ使用量などを監視および追跡することに興味がある場合は、LogRocket を試してください。
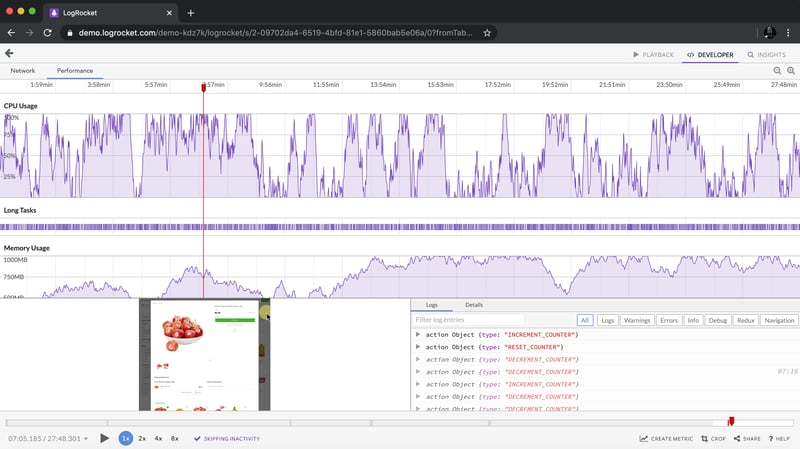
LogRocket は Web アプリやモバイル アプリ用の DVR のようなもので、Web アプリ、モバイル アプリ、または Web サイトで発生するすべてを記録します。問題が発生する原因を推測する代わりに、主要なフロントエンド パフォーマンス メトリクスを集計してレポートし、アプリケーションの状態とともにユーザー セッションを再生し、ネットワーク リクエストをログに記録し、すべてのエラーを自動的に明らかにすることができます。
Web アプリとモバイル アプリのデバッグ方法を最新化します。無料でモニタリングを始めましょう。
以上是如何使用 CSS 构建倒计时器的详细内容。更多信息请关注PHP中文网其他相关文章!


