

我最近使用 Golang 构建了一个名为 GenCLI 的 AI 支持的 CLI,您可以从中以文本格式提出问题,也可以为其提供图像并从终端询问有关它的详细信息。如果您觉得这很有趣,那么这个博客适合您。在此,我们完全从头开始构建 CLI,并使用 Google 的 Gemini API 为其赋予 AI 功能。如果您想查看我的 GenCLI,请点击链接是的,它是开源的。
让我们一步一步来了解每个过程。
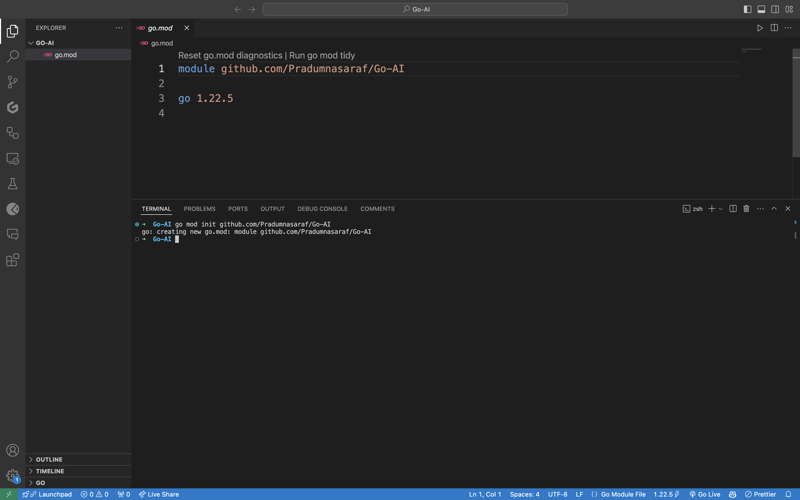
创建一个文件夹并在您最喜欢的 IDE/编辑器中打开它。我正在使用 VS Code 并将文件夹命名为 go-ai。现在通过运行命令 go mod init
go mod init github.com/Pradumnasaraf/go-ai
完成后,将会创建一个 go.mod。
尽管我们可以手动创建并完成构建 CLI 的所有操作。但 Cobra Package 的伟大之处在于它有 CLI,可以为 CLI 生成结构、生成文件和安装包。这将帮助我们加快流程并减少错误。要安装 Cobra CLI 工具,请使用以下命令:
go install github.com/spf13/cobra-cli@latest
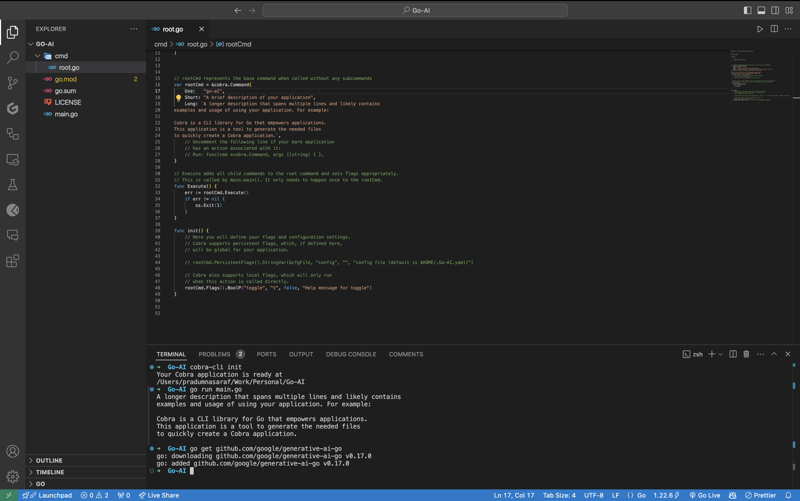
完成此操作后,您可以通过在终端中绑定 cobra-cli 来检查该工具是否已安装,您将获得可用列表。现在运行 cobra-cli init 来设置项目。运行后会自动创建cmd文件夹、go.sum和main.go文件。要测试它是否正常运行,请运行 main.go。您将在终端中看到有关 CLI 的输出(如下面的屏幕截图)
要通信和使用 Google 的 Gemini API,首先我们需要安装 Gemini Golang SKD 包,为此请执行以下命令。
go get github.com/google/generative-ai-go
现在像其他 API 一样,我们需要一个 API 密钥。要得到这个头在这里 https://aistudio.google.com/app/apikey 并得到它。它是免费的,您可以在 30 秒内获得它。一旦你获得了 API 密钥集,就可以通过执行以下命令来设置环境变量:
export GEMINI_API_KEY=<YOUR_API_KEY>
此方法的问题是环境变量仅在当前会话中存在,当您关闭终端时它就会消失。为了避免此问题,请将 export 命令添加到 shell 配置文件中,例如 .bashrc、.bash_profile 或 .zshrc(取决于您的 shell)。这样,您就可以从系统中的任何位置访问 CLI。
现在,是时候为 CLI 创建一个子命令,而不是直接将逻辑写入 root.go。这样做的原因是,如果将来我们想要包含更多功能和更多子命令,我们可以简单地通过添加更多子命令来添加,而不是阻止根命令。如果你不明白这一点,别担心,继续往下看,事情就会清楚的。
要创建子命令,Cobra CLI 提供了一个 add 命令来创建它。为此,请执行以下命令。这里search将成为一个子命令。你可以选择任何你喜欢的。
cobra-cli add search
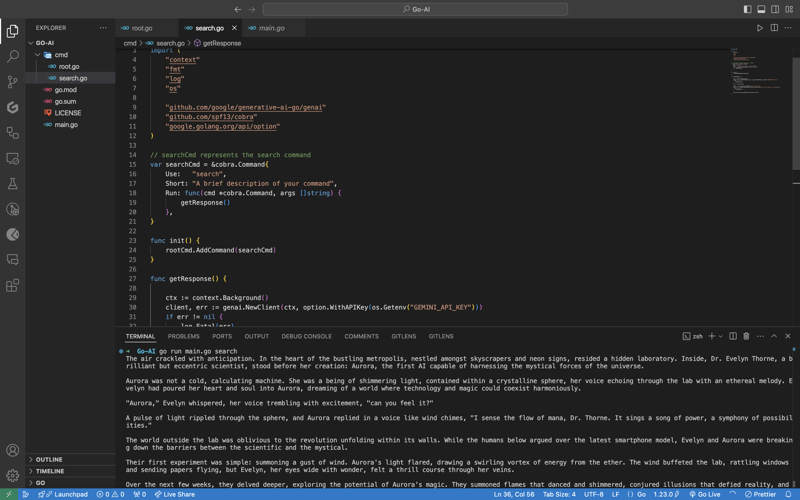
执行后,将在 cmd 目录下创建一个新文件,其中包含所有这些预先填充的代码。在代码中,我们将变量 searchCmd 初始化为指向 cobra.Command 结构的指针,并为子命令名称、用途等字段提供值。每当我们执行子命令时,Run: 中的函数就会被触发。命令。另外,如果您看到我们在 init 函数中为 root 命令添加了一个命令(子命令)。完整的代码应该是这样的。
package cmd

import (
    "fmt"

    "github.com/spf13/cobra"
)

// searchCmd represents the search command
var searchCmd = &cobra.Command{
    Use:   "search",
    Short: "A brief description of your command",
    Long: `A longer description that spans multiple lines and likely contains examples`,
    Run: func(cmd *cobra.Command, args []string) {
        fmt.Println("search called")
    },
}

func init() {
    rootCmd.AddCommand(searchCmd)
}
要检查子命令“search”是否按预期工作,现在使用“search”命令运行 CLI,您将在终端中看到“search called”打印。
go run main.go search
现在,让我们处理 API 方面的工作。让我们导入 Google Gemini API 的包以及日志记录和操作系统级别任务所需的其他包。这是完整的列表。
import (
    "context"
    "log"
    "os"

    "github.com/google/generative-ai-go/genai"
    "github.com/spf13/cobra"
    "google.golang.org/api/option"
)
然后让我们添加一个名为 getResponse 的函数。该函数将帮助我们与 Gemini API 进行通信,获取响应并打印它。另外,如果您看到我们对提示文本进行了硬编码 - “写一个关于人工智能和魔法的故事”,请不要担心,我们会更改它,但首先让我们让它发挥作用:)。这是一个完整的函数代码,将其添加到您的 init 函数下面。您将在 Gemini 网站上找到相同的启动代码。
func getResponse() {

    ctx := context.Background()
    client, err := genai.NewClient(ctx, option.WithAPIKey(os.Getenv("GEMINI_API_KEY")))
    if err != nil {
        log.Fatal(err)
    }
    defer client.Close()

    model := client.GenerativeModel("gemini-1.5-flash")
    resp, err := model.GenerateContent(ctx, genai.Text("Write a story about a AI and magic"))
    if err != nil {
        log.Fatal(err)
    }

    fmt.Println(resp.Candidates[0].Content.Parts[0])
}
Now let's add getResponse function to the in the field Run: function. So that when we run the sun command it will call getResponse function. Now the code will look like this.
package cmd

import (
    "context"
    "fmt"
    "log"
    "os"

    "github.com/google/generative-ai-go/genai"
    "github.com/spf13/cobra"
    "google.golang.org/api/option"
)

// searchCmd represents the search command
var searchCmd = &cobra.Command{
    Use:   "search",
    Short: "A brief description of your command",
// Added the getResponse() function
    Run: func(cmd *cobra.Command, args []string) {
        getResponse()
    },
}

func init() {
    rootCmd.AddCommand(searchCmd)
}

func getResponse() {

    ctx := context.Background()
    client, err := genai.NewClient(ctx, option.WithAPIKey(os.Getenv("GEMINI_API_KEY")))
    if err != nil {
        log.Fatal(err)
    }
    defer client.Close()

    model := client.GenerativeModel("gemini-1.5-flash")
    resp, err := model.GenerateContent(ctx, genai.Text("Write a story about a AI and magic"))
    if err != nil {
        log.Fatal(err)
    }

    fmt.Println(resp.Candidates[0].Content.Parts[0])
}
If you getting a red squiggly line under the imported package names run go mod tidy. It will install the missing package and do a cleanup. Now, again execute the go run main.go search. This time you will get a response from the API for the Prompt we hardcoded, i.e, "Write a story about a AI and magic"
In case you are encountering the below error check if your environment variable is set properly with the right name. You can check by executing the printenv command in your terminal and see if it's present there or not.

Once everything is working, let’s make the prompt dynamic so that we don’t have to hardcode the prompt directly into the code and we provide it via the terminal.
To do that, add an ARG: field to the searchCmd struct so that the user at least needs to enter an argument after the sub-command. Also, we will modify the getResponse function to accept a slice of data because args will be in the slice format, and we will use the strings package to convert it into a sentence.
Lastly, replace the hardcoded text in genai.Text() with the userArgs variable we created to convert the slice into a sentence. This is how the complete code will look like; I have commented above on the changes we have to make for better understanding.
package cmd

import (
    "context"
    "fmt"
    "log"
    "os"
    "strings" // import strings package

    "github.com/google/generative-ai-go/genai"
    "github.com/spf13/cobra"
    "google.golang.org/api/option"
)

var searchCmd = &cobra.Command{
    Use:   "search",
    Short: "A brief description of your command",
    Args:  cobra.MinimumNArgs(1), // Minimum 1 arg required
    Run: func(cmd *cobra.Command, args []string) {
        getResponse(args)
    },
}

func init() {
    rootCmd.AddCommand(searchCmd)
}

// Function can now accept slice parameter
func getResponse(args []string) {
        // Creating a sentence out of a slice
    userArgs := strings.Join(args[0:], " ")

    ctx := context.Background()
    client, err := genai.NewClient(ctx, option.WithAPIKey(os.Getenv("GEMINI_API_KEY")))
    if err != nil {
        log.Fatal(err)
    }
    defer client.Close()

    model := client.GenerativeModel("gemini-1.5-flash")
        // change the hardcoded text to userArgs variable
    resp, err := model.GenerateContent(ctx, genai.Text(userArgs))
    if err != nil {
        log.Fatal(err)
    }

    fmt.Println(resp.Candidates[0].Content.Parts[0])
}
If you execute the go run main search now, it will give you an error message in the terminal saying at least one arg is required. This means our code is working perfectly.

Now let's execute the command the right way giving it an argument - a prompt/question.
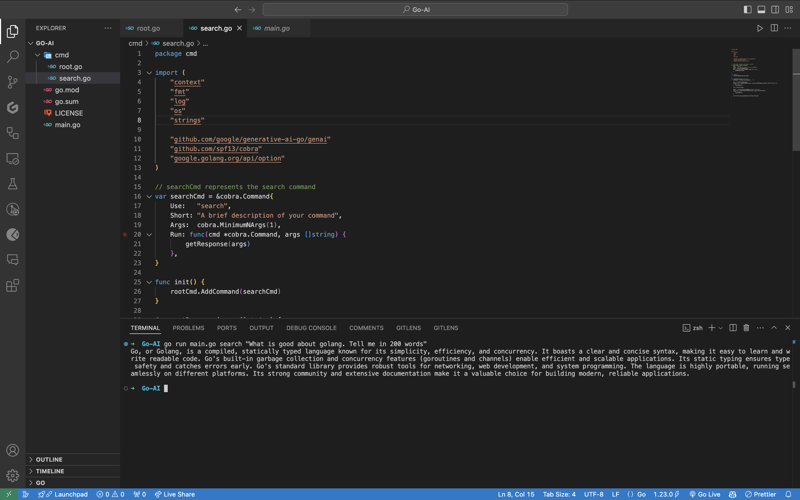
As you can see, it provided us with the answer. We pass the prompt in quotes so that we can add special characters like "?", ".", etc. So here it is, a fully functional AI-powered CLI.
Now, if you want to publish the package so that your CLI can directly execute commands and be used from anywhere in the system, it’s very simple to do that. First, push your changes to GitHub and then head over to the URL https://pkg.go.dev/github.com/

Once it’s live, you can simply download the CLI by using the go install command:
go install <repo-url>
go install github.com/Pradumnasaraf/go-ai@latest
And directly use the CLI with commands like go-ai, go-ai search, etc. If you encounter the error saying command not found: go-ai after running it, you need to add $GOPATH/bin to your $PATH environment variable. Refer to this guide for that.
That's it for this blog. This was a little longer than the blogs I usually write. I'm glad you're still reading and made it to the end—thank you so much for your support. I sometimes share tips on Twitter. You can connect with me there.
以上是使用 Golang 和 Google Gemini 构建 AI 支持的 CLI的详细内容。更多信息请关注PHP中文网其他相关文章!


