


使用 Lemon Squeezy 轻松付款 | Next.js 集成变得简单

介绍
对于许多企业家来说,付款过程感觉像是对耐心的终极考验。正当你以为自己终于解开了这一切的时候,另一层复杂的情况却出现了,提醒你一帆风顺仍然是一个遥远的梦想。

你也有同感吗? Lemon Squeezy 是您的阿司匹林!
这种神奇的支付药水简化了一切,因此您可以抛弃支付的麻烦,专注于有趣的事情。不再需要编码扭曲。这就像您的团队中有一只支付独角兽。
为什么选择柠檬挤压?
好吧,想象一下运行您的 SaaS 业务,不需要税务合规方面的博士学位,也不需要源源不断的阿司匹林来解决付款问题。 LemonSqueezy 简化了一切,从支付和订阅到全球税务合规和欺诈预防。
此外,它还为您提供多货币支持和可容纳各种数字产品的店面。这就像拥有一个精通技术的业务合作伙伴来处理所有无聊的事情,这样您就可以专注于您最擅长的事情 - 创造!非常适合数字创作者、企业家以及任何喜欢点击按钮而不是编码解决方案的人。
项目设置
在我们深入讨论之前,我只想说,您可以在我的 GitHub 存储库中找到完整的代码,并在我的 Instagram 上观看演示。现在,关于 GitHub 上的这个项目,它有两种付款方式:一是经典的一次性付款;二是传统的一次性付款。第二,时下流行的订阅模式。
但对于本教程,我们将全力以赴一次性付款。哦,对于我的例子,我使用每月房屋清洁服务作为案例研究。这可能听起来有点荒谬,但是嘿,这都是我们编码练习的一部分! ?
1. 设置 LemonSqueezy
为了开始,您应该在 Lemon Squeezy 中创建一个商店以及一些产品和变体。
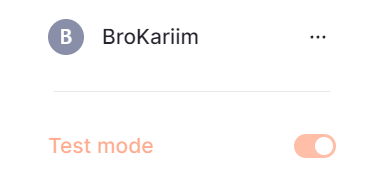
确保您已开启测试模式。发布商店后,它将关闭;检查左下角。
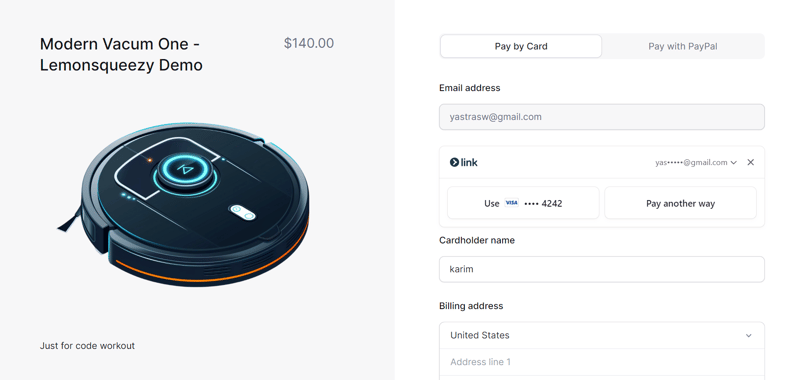
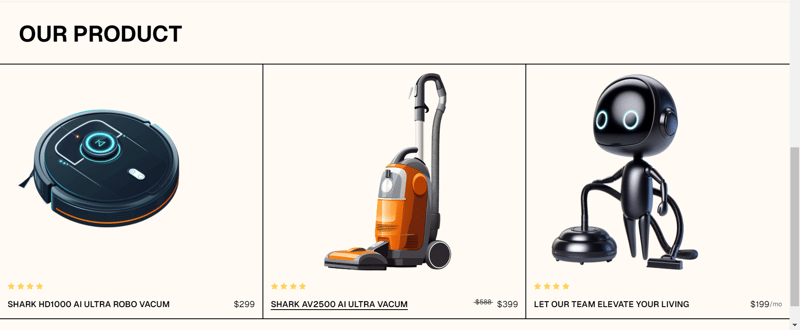
这是我的产品的样子
接下来,让我们在 https://app.lemonsqueezy.com/settings/api 生成一个 API 密钥来连接到我们的商店:
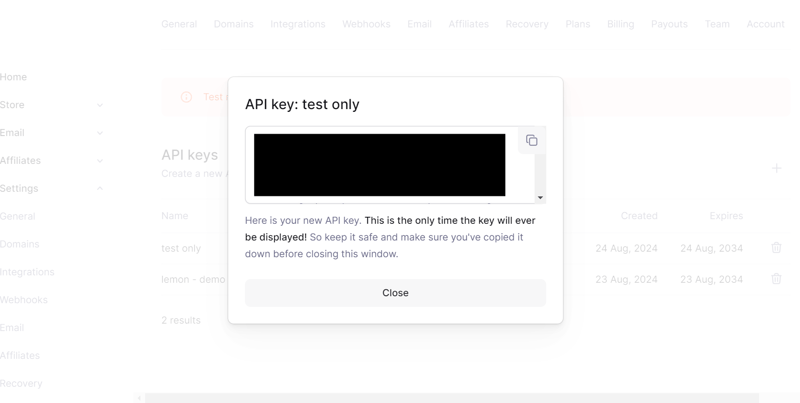
将其作为环境变量添加到您的 Next.js 项目中:
LEMONSQUEEZY_API_KEY="[YOUR API KEY]"
2. 设置路由处理程序
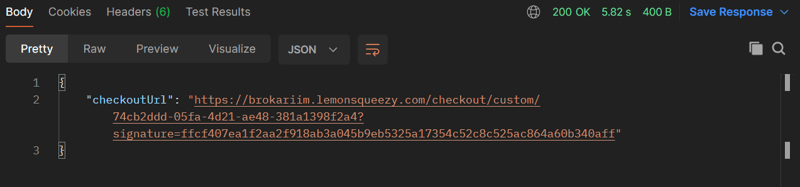
接下来,创建一个API路由来处理支付过程,在这部分,我们想要的最终结果是获得一个checkoutUrl,稍后我们将其传递到前端部分。
export const dynamic = "force-dynamic";

export async function POST(req: NextRequest) {
  try {

    const reqData = await req.json();

    if (!reqData.productId) {
      console.error("Product ID is missing");
      return NextResponse.json({ message: "Product ID is required" }, { status: 400 });
    }


    const response = await lemonSqueezyApiInstance.post("/checkouts", {
      data: {
        type: "checkouts",
        attributes: {
          checkout_data: {
            custom: {
              user_id: "123",
            },
          },
        },
        relationships: {
          store: {
            data: {
              type: "stores",
              id: process.env.LEMON_SQUEEZY_STORE_ID?.toString(),
            },
          },
          variant: {
            data: {
              type: "variants",
              id: reqData.productId.toString(),
            },
          },
        },
      },
    });

    const checkoutUrl = response.data.data.attributes.url;
    console.log(response.data);
    return NextResponse.json({ checkoutUrl });
  } catch (error) {
    console.error("Error in POST /api/lemonsqueezy:", error);
    return NextResponse.json({ message: "An error occured" }, { status: 500 });
  }
}
这是此代码的简单解释:
- 首先,我们确保页面始终动态渲染,这对于实时数据非常重要,方法是使用export constdynamic =“force-dynamic”;
- 定义处理对此 API 路由的 POST 请求的异步函数,该函数首先检查是否提供了产品 ID。如果没有,它会返回错误消息。
- 接下来,我们对 Lemonsqueezy 进行 Api 调用,以创建一个新的结账会话,包括商店 ID 和产品型号等详细信息。
- 要获取 storeId,请转到该 的设置

- API 调用后,它从响应中提取结帐 URL:
const checkoutUrl = response.data.data.attributes.url;
- 最后,它在响应中返回此 URL:
返回 NextResponse.json({ checkoutUrl });
为了确保我们的 API 正常工作,我们需要对其进行测试。我为此使用了一个名为 Postman 的工具。在开始之前,我们需要产品的variantId,您可以在LemonSqueezy 仪表板中找到它。
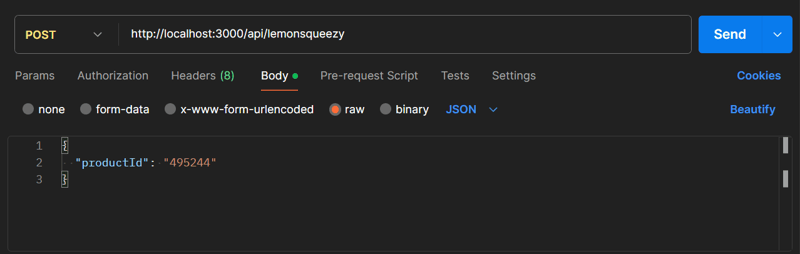
如果一切正常,您应该会收到包含 checkoutUrl 的响应
3. CreatIng the UI & Call the item data
Now that we've laid the groundwork, our next step is time to make the frontend look good, I am a huge fan of TailwindCSS so i make the pricing card with them
the code is availale here
Next lets set up an async function that calls the API route we just created. The function will send a POST request with the productId and, in return, get the checkout URL. Once you have the URL, open it in a new tab to send the user to the payment page.
 const buyProcut1 = async () => {
    try {
      const response = await axios.post("../api/lemonsqueezy", {
        productId: "495244",
      });

      console.log(response.data);
      window.open(response.data.checkoutUrl, "_blank");
    } catch (error) {
      console.error(error);
      alert("Failed to buy product #1");
    }
  };
That code is about
- Defines an asynchronous function called buyProduct1
- Next send a request to your server with a specific productId, If success opens a new browser tab with the checkout URL
- If anything goes wrong during the process, it catches the problem, logs it, and shows an alert to the user saying the purchase failed.
4. Setup Webhook
Last but not least, we're setting up webhooks to keep track of orders. Head back to your LemonSqueezy dashboard and set up a webhook.
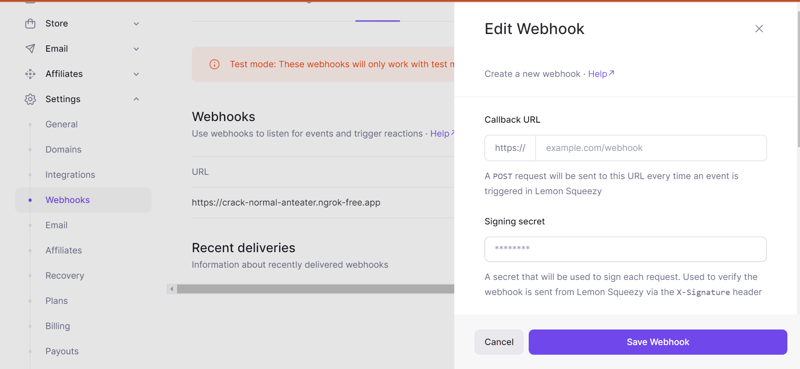
For the URL, you’ll need something publicly accessible, which is tricky during local development. This is where ngrok comes in handy.
ngrok will give you a temporary public URL that forwards to your local machine, You can check this link to setup ngrok in your device :
https://dashboard.ngrok.com/get-started/setup/
Just like before, the code to handle the webhook is already done for you. All you need to do is set it up in your route handler and enjoy the sweet
Let's stay in touch on Instagram, Twitter, and GitHub—where the real magic happens.
Thanks for sticking around! ?

以上是使用 Lemon Squeezy 轻松付款 | Next.js 集成变得简单的详细内容。更多信息请关注PHP中文网其他相关文章!

热AI工具

Undress AI Tool
免费脱衣服图片

Undresser.AI Undress
人工智能驱动的应用程序,用于创建逼真的裸体照片

AI Clothes Remover
用于从照片中去除衣服的在线人工智能工具。


Stock Market GPT
人工智能驱动投资研究,做出更明智的决策

热门文章
热工具

记事本++7.3.1
好用且免费的代码编辑器

SublimeText3汉化版
中文版,非常好用

禅工作室 13.0.1
功能强大的PHP集成开发环境

Dreamweaver CS6
视觉化网页开发工具

SublimeText3 Mac版
神级代码编辑软件(SublimeText3)

 JavaScript实现点击图片切换效果:专业教程
Sep 18, 2025 pm 01:03 PM
JavaScript实现点击图片切换效果:专业教程
Sep 18, 2025 pm 01:03 PM
本文将介绍如何使用JavaScript实现点击图片切换的效果。核心思路是利用HTML5的data-*属性存储备用图片路径,并通过JavaScript监听点击事件,动态切换src属性,从而实现图片切换。本文将提供详细的代码示例和解释,帮助你理解和掌握这种常用的交互效果。
 如何使用JavaScript中的GeOlocation API获取用户的位置?
Sep 21, 2025 am 06:19 AM
如何使用JavaScript中的GeOlocation API获取用户的位置?
Sep 21, 2025 am 06:19 AM
首先检查浏览器是否支持GeolocationAPI,若支持则调用getCurrentPosition()获取用户当前位置坐标,并通过成功回调获取纬度和经度值,同时提供错误回调处理权限被拒、位置不可用或超时等异常,还可传入配置选项以启用高精度、设置超时时间和缓存有效期,整个过程需用户授权并做好相应错误处理。
 如何在JavaScript中使用setInterval创建重复间隔
Sep 21, 2025 am 05:31 AM
如何在JavaScript中使用setInterval创建重复间隔
Sep 21, 2025 am 05:31 AM
要创建JavaScript中的重复间隔,需使用setInterval()函数,它会以指定毫秒数为间隔重复执行函数或代码块,例如setInterval(()=>{console.log("每2秒执行一次");},2000)会每隔2秒输出一次消息,直到通过clearInterval(intervalId)清除,实际应用中可用于更新时钟、轮询服务器等场景,但需注意最小延迟限制、函数执行时间影响,并在不再需要时及时清除间隔以避免内存泄漏,特别是在组件卸载或页面关闭前应清理,确保
 JavaScript中DOM元素访问的常见陷阱与解决方案
Sep 15, 2025 pm 01:24 PM
JavaScript中DOM元素访问的常见陷阱与解决方案
Sep 15, 2025 pm 01:24 PM
本文旨在解决JavaScript中通过document.getElementById()获取DOM元素时返回null的问题。核心在于理解脚本执行时机与DOM解析状态。通过正确放置标签或利用DOMContentLoaded事件,可以确保在元素可用时再尝试访问,从而有效避免此类错误。
 NUXT 3组成API解释了
Sep 20, 2025 am 03:00 AM
NUXT 3组成API解释了
Sep 20, 2025 am 03:00 AM
Nuxt3的CompositionAPI核心用法包括:1.definePageMeta用于定义页面元信息,如标题、布局和中间件,需在中直接调用,不可置于条件语句中;2.useHead用于管理页面头部标签,支持静态和响应式更新,需与definePageMeta配合实现SEO优化;3.useAsyncData用于安全地获取异步数据,自动处理loading和error状态,支持服务端和客户端数据获取控制;4.useFetch是useAsyncData与$fetch的封装,自动推断请求key,避免重复请
 如何将文本复制到JavaScript中的剪贴板?
Sep 18, 2025 am 03:50 AM
如何将文本复制到JavaScript中的剪贴板?
Sep 18, 2025 am 03:50 AM
使用ClipboardAPI的writeText方法可复制文本到剪贴板,需在安全上下文和用户交互中调用,支持现代浏览器,旧版可用execCommand降级处理。
 JavaScript中数字格式化:使用toFixed()方法保留固定小数位
Sep 16, 2025 am 11:57 AM
JavaScript中数字格式化:使用toFixed()方法保留固定小数位
Sep 16, 2025 am 11:57 AM
本教程详细讲解如何在JavaScript中将数字格式化为固定两位小数的字符串,即使是整数也能显示为"#.00"的形式。我们将重点介绍Number.prototype.toFixed()方法的使用,包括其语法、功能、示例代码以及需要注意的关键点,如其返回类型始终为字符串。
 如何在JavaScript中创建多行字符串?
Sep 20, 2025 am 06:11 AM
如何在JavaScript中创建多行字符串?
Sep 20, 2025 am 06:11 AM
thebestatoreateamulti-linestlinginjavascriptsisisingsistisingtemplatalalswithbacktticks,whatpreserveticks,whatpreservereakeandeexactlyaswrite。
