Windows 11 和 Windows 10 都可以非常轻松地清除 Windows 更新缓存。您可以使用图形方法或命令行选项来删除保存的更新文件。我们将向您展示可用的选项。
您可能想要清除 Windows 更新缓存的原因有很多。
您可能会遇到查找或安装更新的问题,清除缓存通常可以解决问题。清除缓存可强制 Windows 重新下载所有必需的文件,从而修复 Windows 更新的问题。
另一个原因是为了释放存储空间。更新缓存文件通常会占用大量存储空间,您可以通过删除这些缓存文件来回收这些存储空间。 (Windows 在安装这些更新后会删除一些更新文件,但不是全部。)
删除更新缓存的简单图形方法是使用文件资源管理器。此方法会删除所有更新缓存文件。
要使用此方法,请按 Windows+R 打开“运行”对话框。在框中键入以下内容,然后按 Enter:
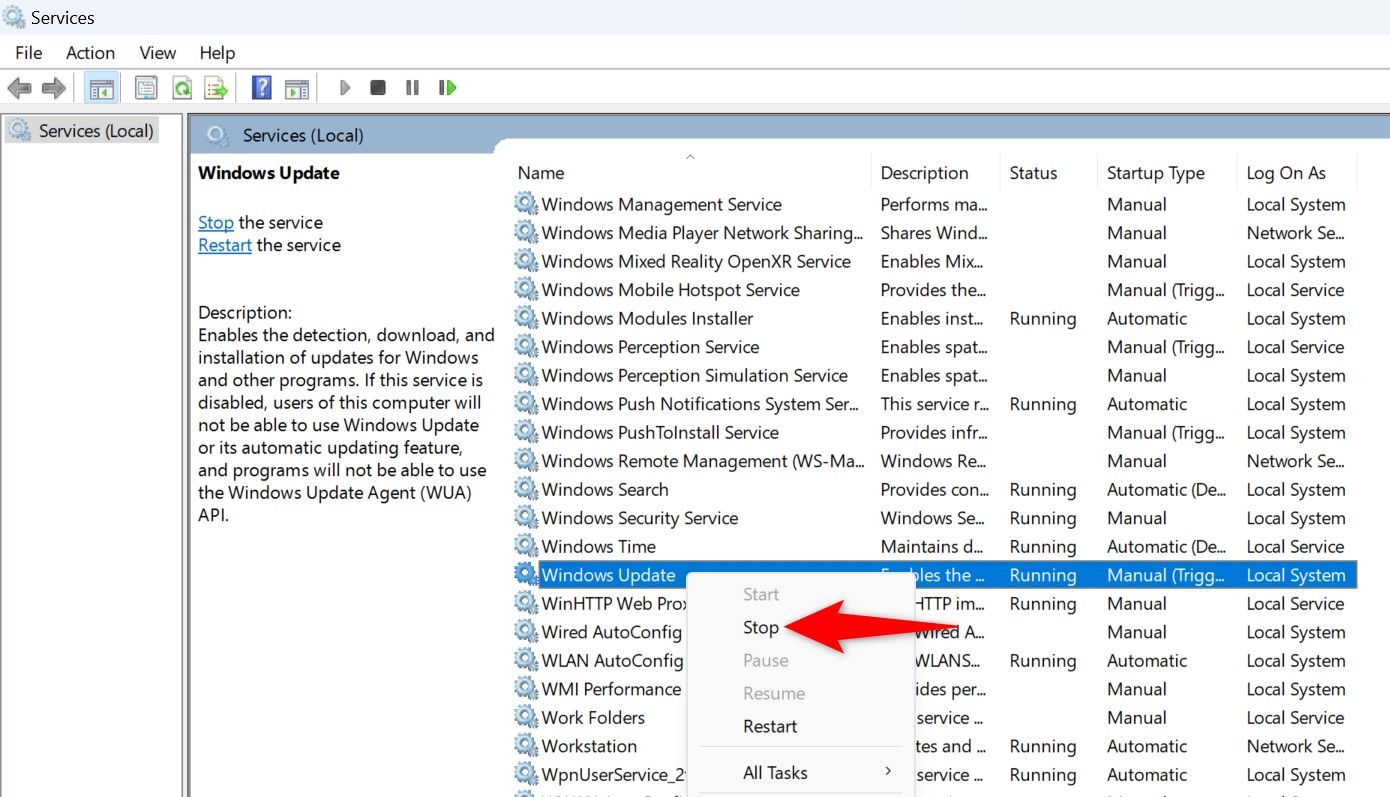
services.msc
在“服务”窗口中,找到 Windows Update 服务。右键单击它并选择“停止”。请保持此窗口打开,因为您稍后会回到这里。
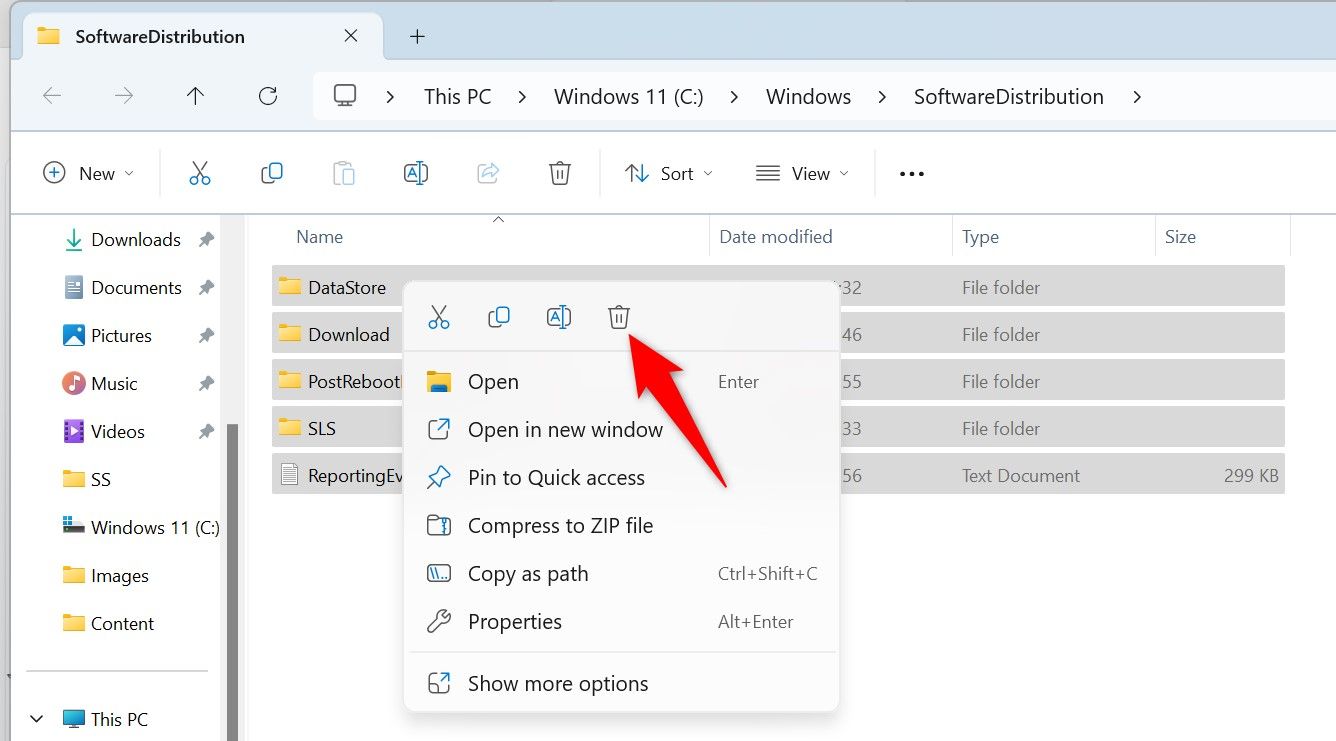
使用 Windows+R 再次启动运行,在框中键入下面的路径,然后按 Enter。以下是 Windows 更新缓存文件夹的路径。它假定 Windows 安装在您的 C: 驱动器上。但是,如果不是这种情况,只需更改路径中的驱动器号即可。
C:WindowsSoftwareDistribution
按 Ctrl+A 选择打开的文件夹中的所有文件。右键单击选定的文件,然后选择垃圾桶图标 (Windows 11) 或“删除”(Windows 10)。
关闭文件资源管理器并清空回收站。
然后,返回“服务”窗口,右键单击“Windows Update”,然后选择“启动”。
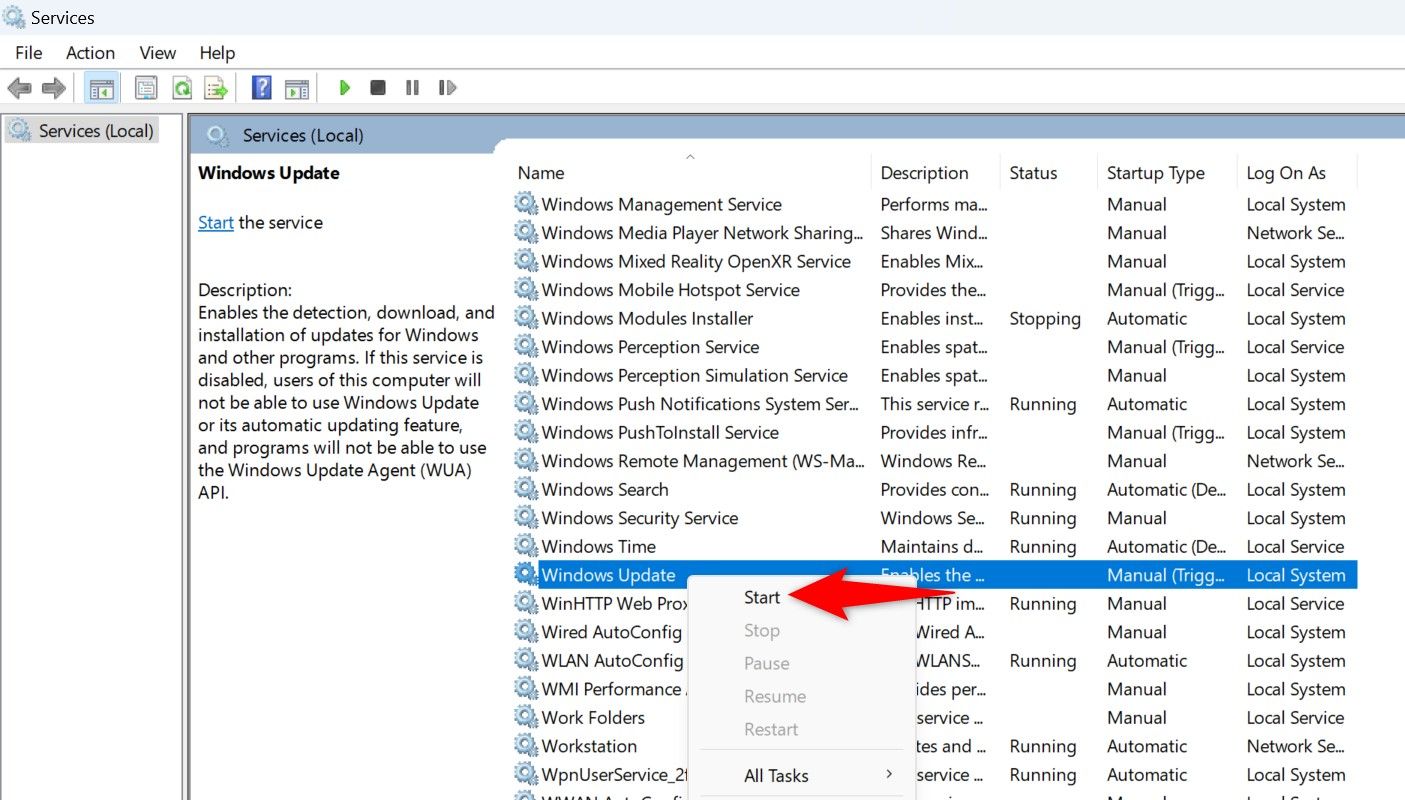
这可确保您的电脑可以继续查找最新更新。
Windows 的内置磁盘清理实用程序可帮助删除一些 Windows 更新缓存文件。
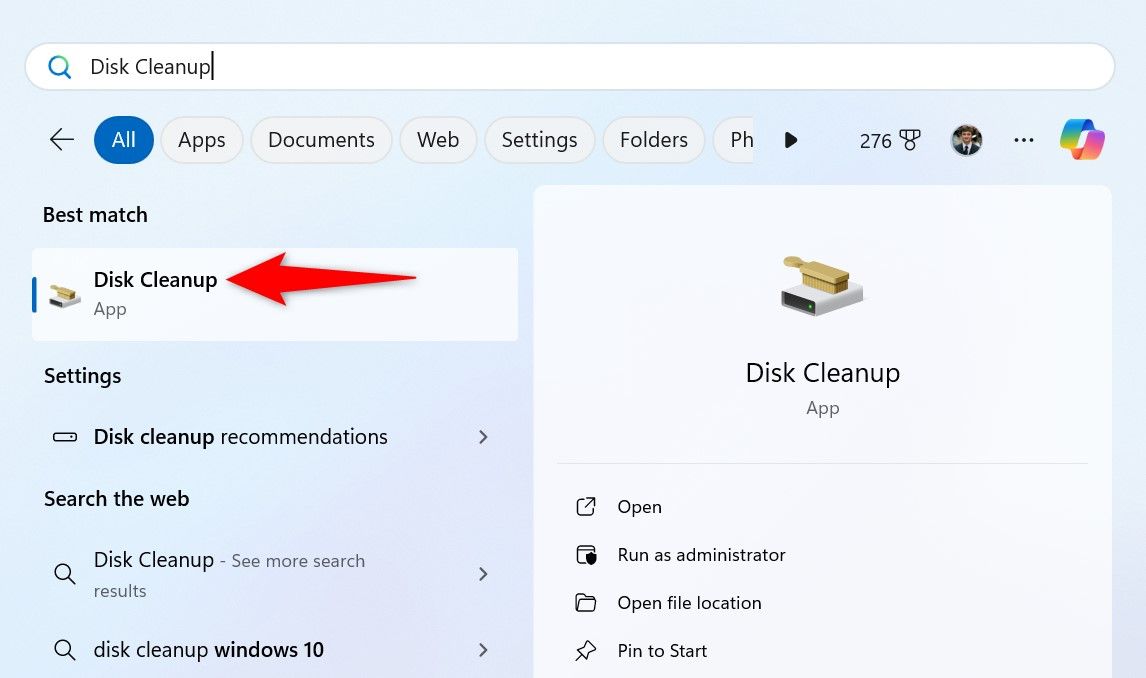
要使用它,请打开“开始”菜单,搜索“磁盘清理”,然后启动该实用程序。
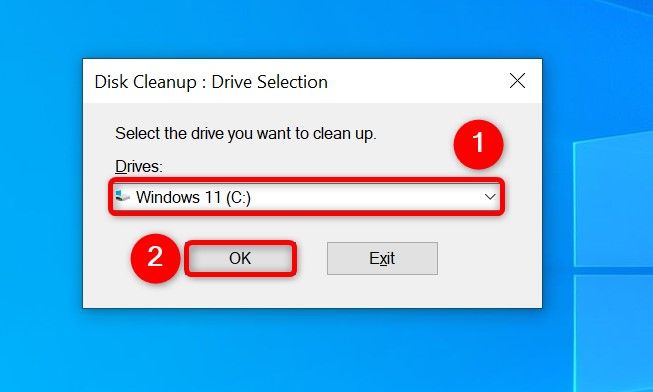
选择您的 Windows 安装驱动器并选择“确定”。
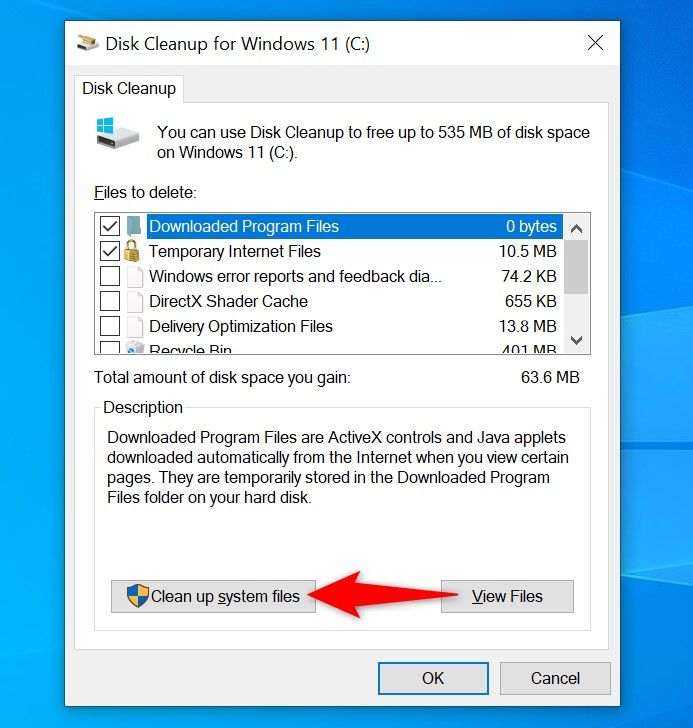
选择“清理系统文件”。
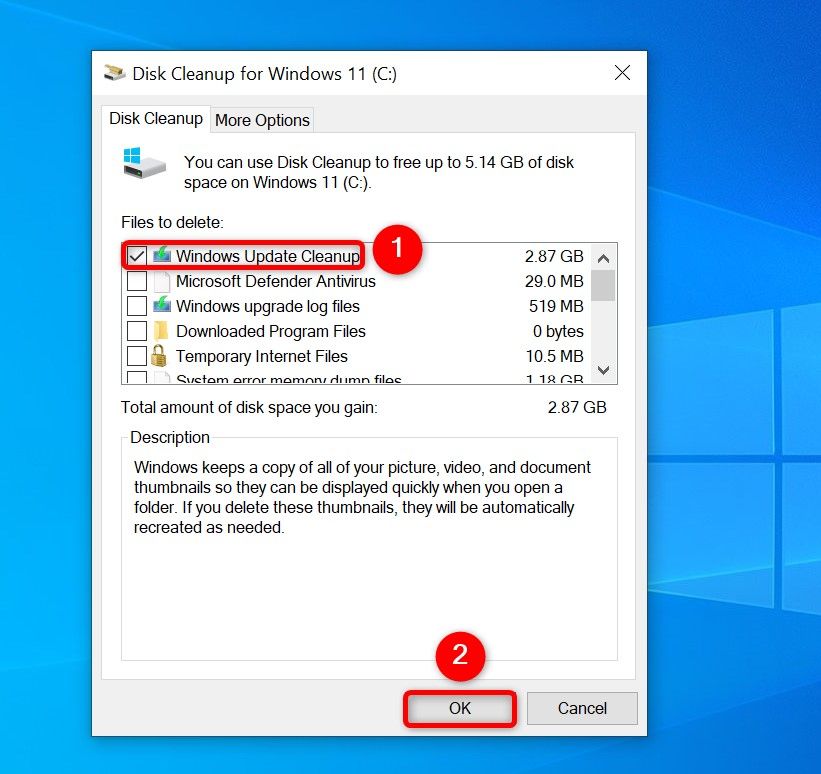
再次选择 Windows 安装驱动器并选择“确定”。
在磁盘清理中,启用“Windows 更新清理”选项。如果您也想删除这些文件,请随意启用其他选项。然后,单击底部的“确定”。
该工具将开始清理更新缓存文件。
如果您更喜欢命令行方法而不是图形方法,请在命令提示符(或 PowerShell)中使用一些命令来删除更新缓存。
首先打开“开始”菜单,搜索命令提示符,然后选择“以管理员身份运行”。
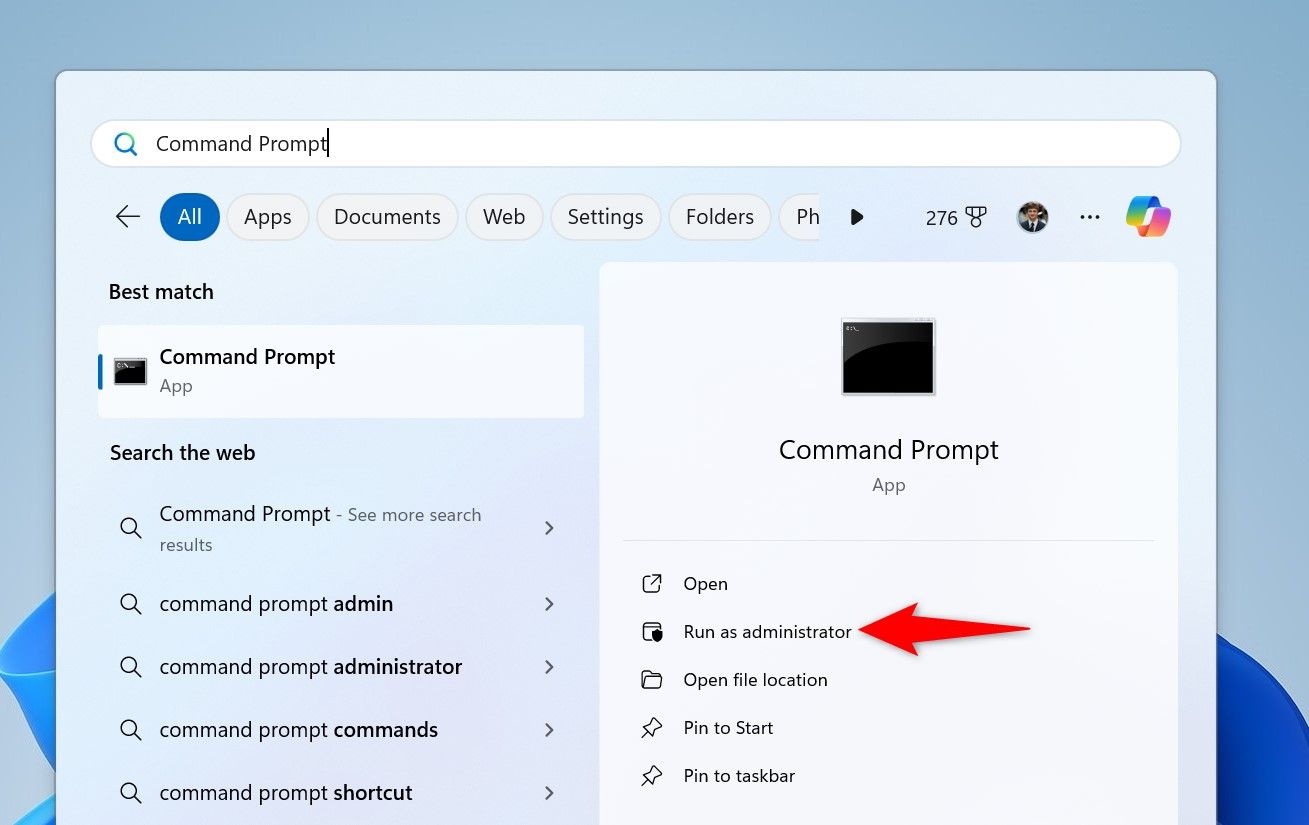
在“用户帐户控制”(UAC) 提示中,选择“是”。
在命令提示符中键入以下行,然后在每行后按 Enter。第一个命令禁用 Windows Update 服务,第二个命令关闭后台智能传输服务服务。
net stop wuauservnet stop bits 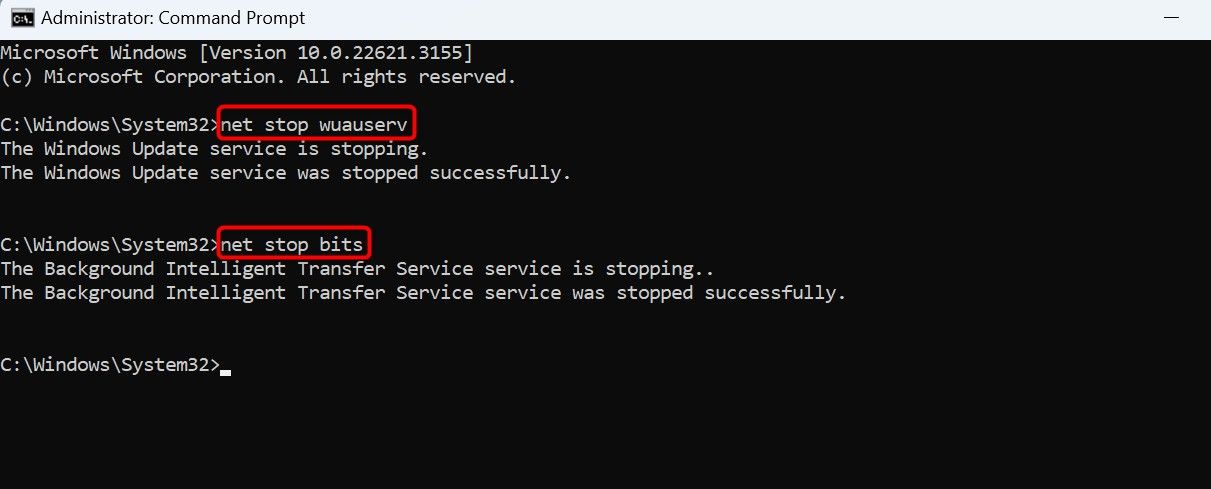
Next up, run the following command to make the Windows Update cache folder the current working directory.
cd %windir%SoftwareDistribution
Type the following command and press Enter to delete the update cache.
del /f /s /q *.*

After clearing the cache, restart the services you stopped above. Do that by typing the following commands and pressing Enter after each line.
net start wuauservnet start bits You’re done.
You can make a batch file out of the commands above to clear your Windows Update cache in just a single click. This is a convenient method if you delete your update cache files often.
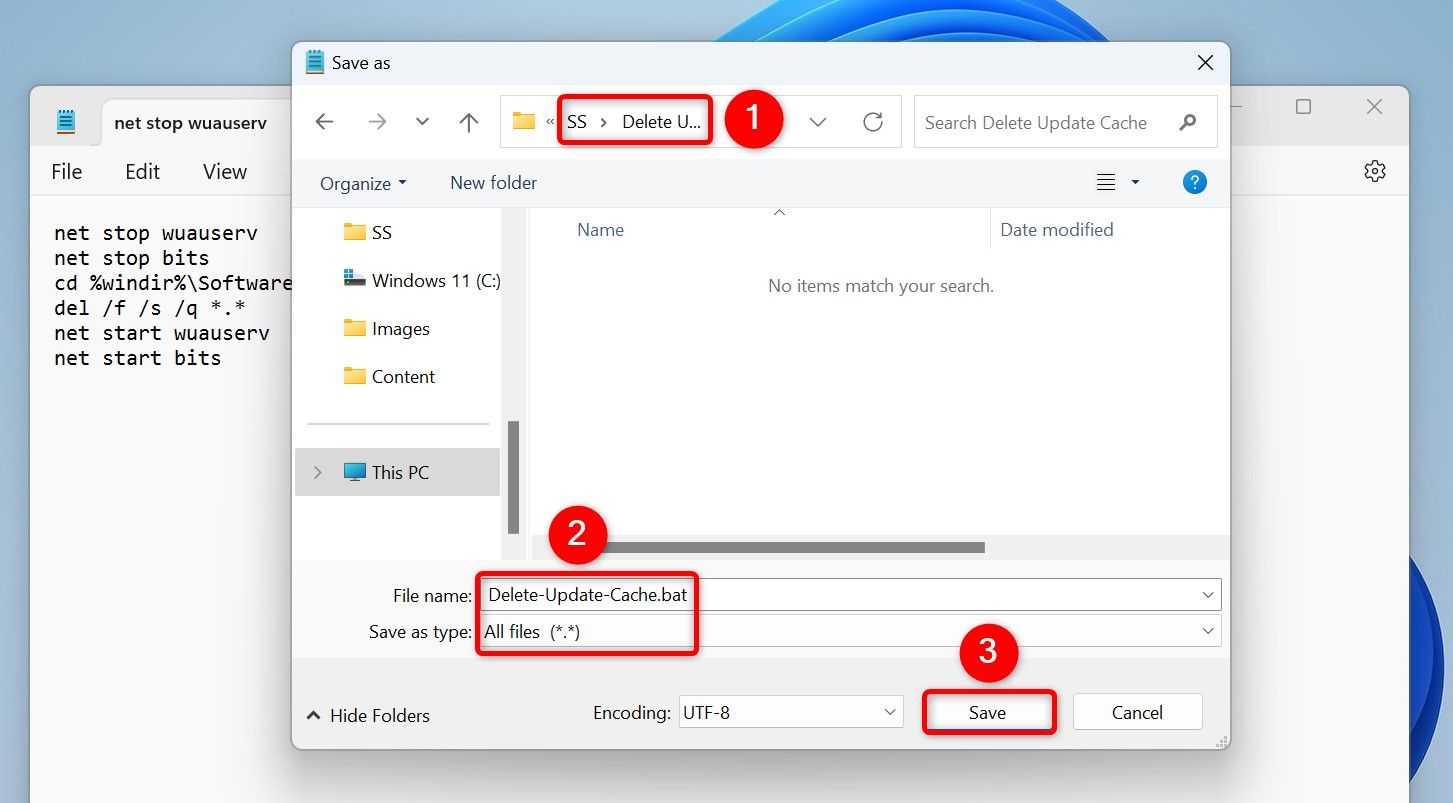
To make that script, open the Start Menu, search for Notepad, and launch the app. Copy the code below and paste it in your Notepad document.
net stop wuauservnet stop bitscd %windir%SoftwareDistributiondel /f /s /q *.*net start wuauservnet start bits Save the file by choosing File > Save from the menu bar.
In the "Save As" window, select the folder where you want to save the script. Click the "Save as Type" drop-down menu and choose "All Files." Select the "File Name" field and enter a name of your choice. Then, append .bat at the end of the file name. This ensures Notepad saves the file as a batch script.
Then, click "Save."
In the future, to clear your Windows Update cache using the script, right-click the script file and select "Run as Administrator." In the User Account Control prompt, choose "Yes." The script will stop certain services, deletes the update cache files, and restarts the stopped services.
And that’s how you get rid of the update cache files using various ways on your Windows 11 or Windows 10 computer. We hope you find the methods useful.
以上是如何清除 Windows 11 和 10 上的更新缓存的详细内容。更多信息请关注PHP中文网其他相关文章!