

#安裝外掛程式導向視窗完成後,在eclipse右下角將會出現安裝外掛程式的進度,等外掛程式安裝完成後重新啟動eclipse生效


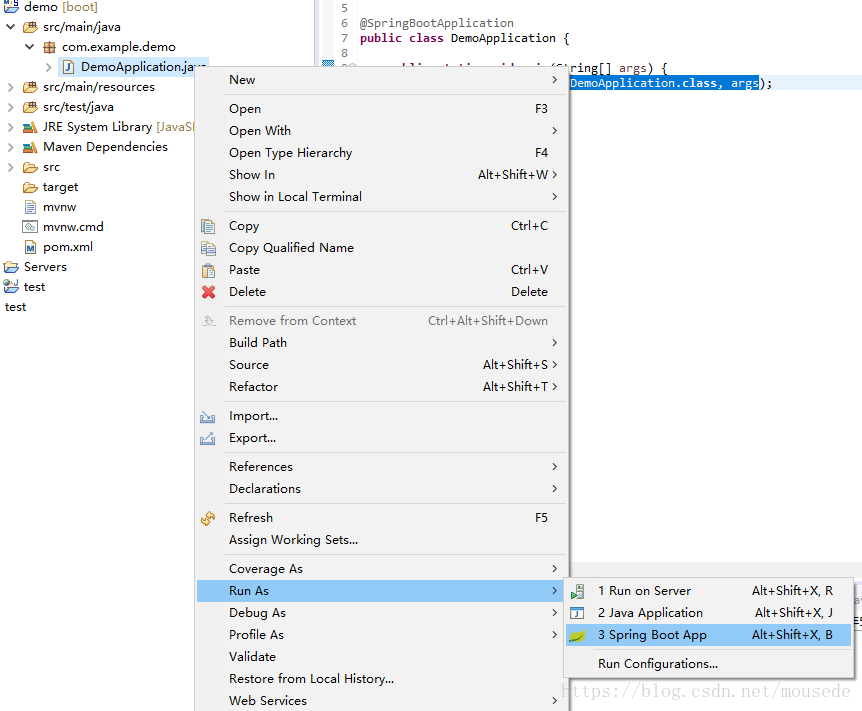


##專案啟動

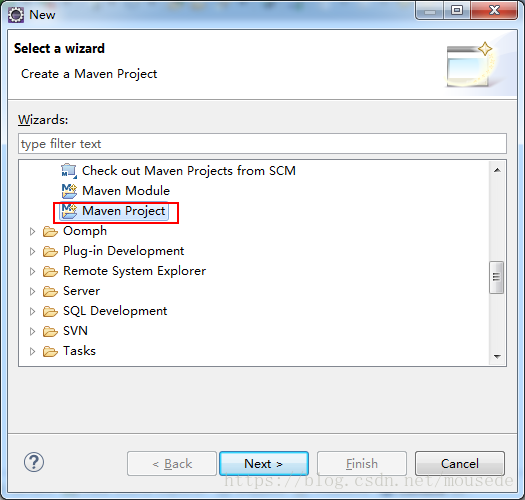
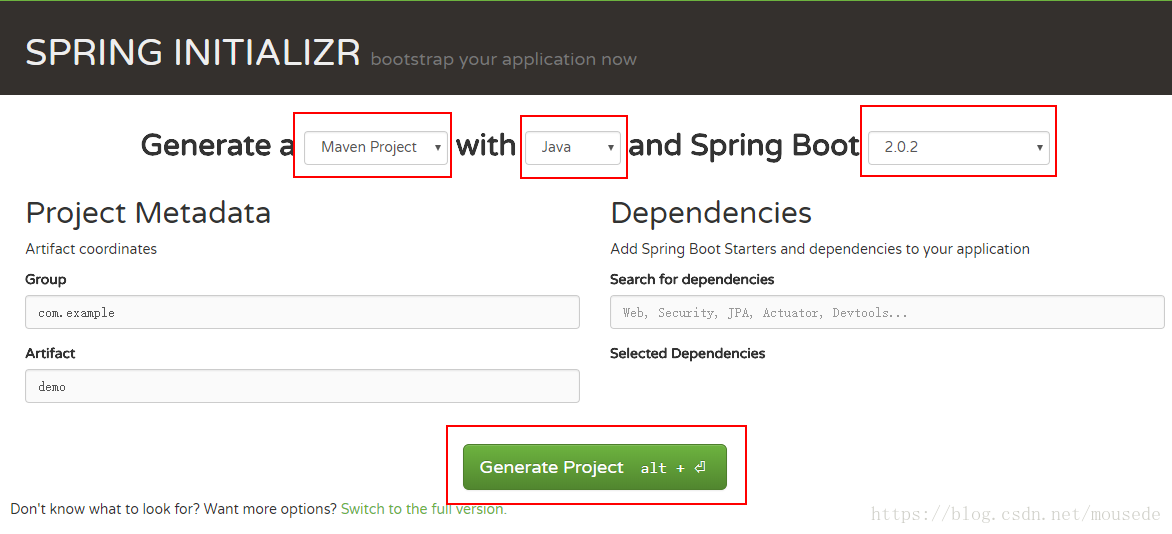
1.建立Maven專案
2.選擇專案類型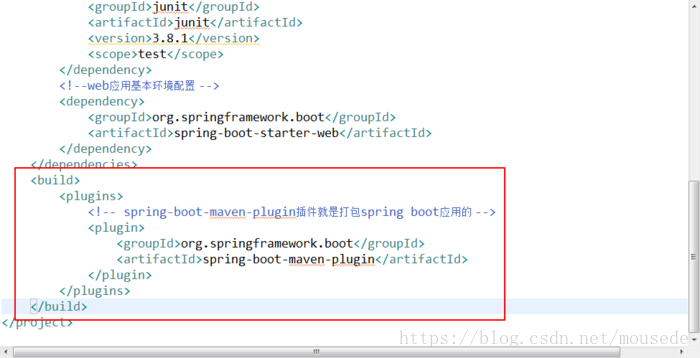

<!-- spring boot基本环境 -->
<parent>
    <groupId>org.springframework.boot</groupId>
    <artifactId>spring-boot-starter-parent</artifactId>
    <version>2.0.2.RELEASE</version>
</parent>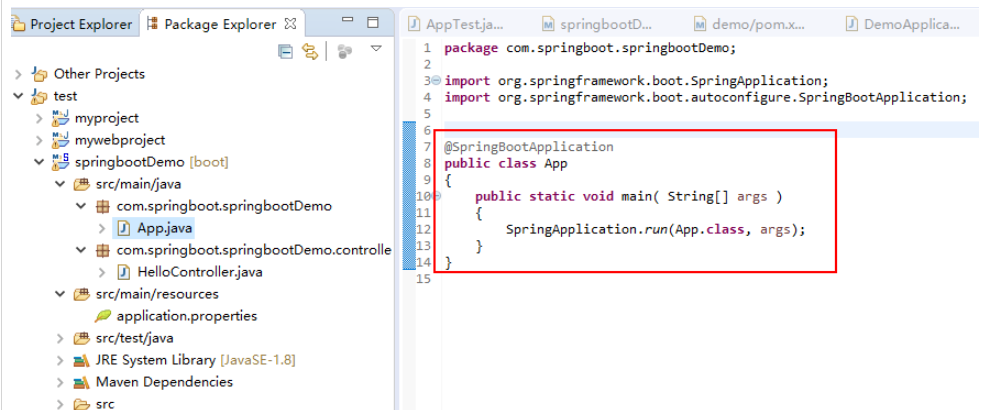 6.pom.xml中新增依賴
<!--web应用基本环境配置 -->
<dependency>
    <groupId>org.springframework.boot</groupId>
    <artifactId>spring-boot-starter-web</artifactId>
</dependency>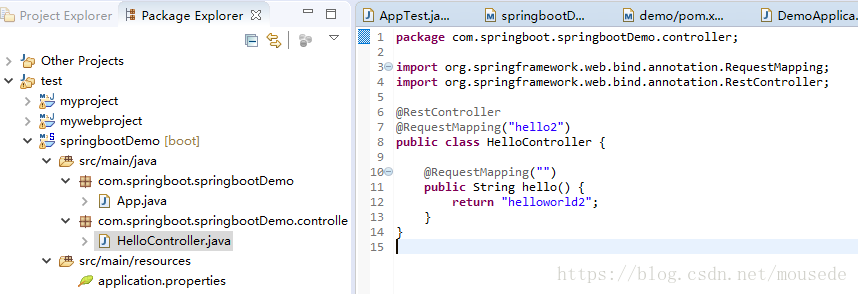 #7.pom.xml中新增編譯外掛
<build>
    <plugins>
    <!-- spring-boot-maven-plugin插件就是打包spring boot应用的 -->
        <plugin>
            <groupId>org.springframework.boot</groupId>
            <artifactId>spring-boot-maven-plugin</artifactId>
        </plugin>
    </plugins
</build>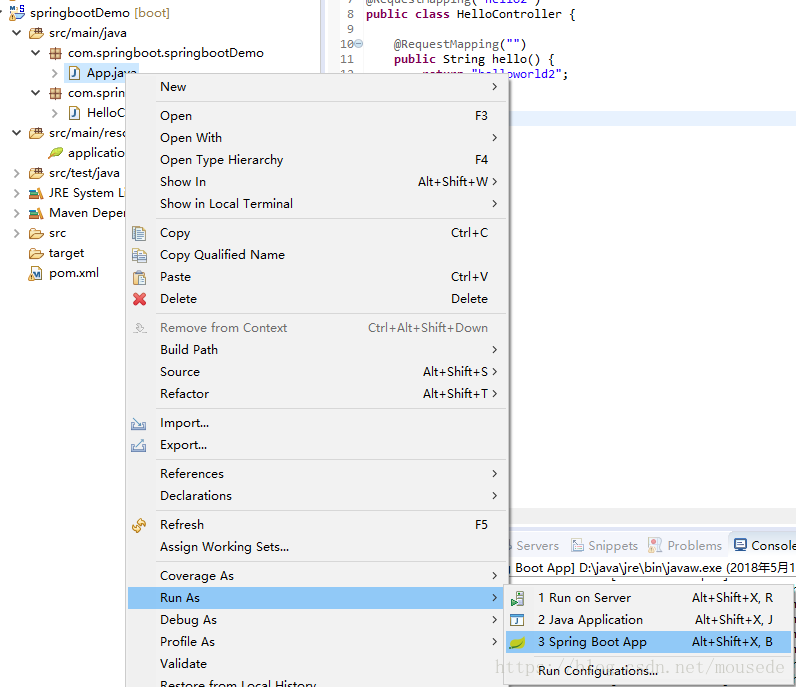 8.基礎套件與類別
package com.springboot.springbootDemo;
import org.springframework.boot.SpringApplication;
import org.springframework.boot.autoconfigure.SpringBootApplication;
@SpringBootApplication
public class App
{
    public static void main( String[] args )
    {
        SpringApplication.run(App.class, args);
    }
}package com.springboot.springbootDemo.controller;
import org.springframework.web.bind.annotation.RequestMapping;
import org.springframework.web.bind.annotation.RestController;
@RestController
@RequestMapping("hello2")
public class HelloController {
@RequestMapping("")
public String hello() {
return "helloworld2";
}
}以上是eclipse建立springboot專案的方式有哪些的詳細內容。更多資訊請關注PHP中文網其他相關文章!


