


nginx proxy_pass反向代理程式設定實例分析

下面舉個小實例說明下:
centos7系統函式庫中預設是沒有nginx的rpm包的,所以我們自己需要先更新下rpm依賴函式庫
1)使用yum安裝nginx需要包含nginx的函式庫,安裝nginx的函式庫
[root@localhost ~]# rpm -uvh http://nginx.org/packages/centos/7/noarch/rpms/nginx-release-centos-7-0.el7.ngx.noarch.rpm
2)使用下列指令安裝nginx
[root@localhost ~]# yum install nginx
3) nginx設定
[root@localhost ~]# cd /etc/nginx/conf.d/
[root@localhost conf.d]# cat test.conf
server {
listen 80;
server_name localhost;
location / {
root /var/www/html;
index index.html;
}
}

[root@localhost conf.d]# cat /var/www/html/index.html
this is page of test!!!!
4)啟動nginx
[root@localhost ~]# service nginx start //或者使用 systemctl start nginx.service
5)測試存取(103.110.186.23是192.168.1.23機器的外網)
[root@localhost conf.d]# curl http://192.168.1.23
this is page of test!!!!
看看以下幾種情況:分別用http://192.168.1.23/proxy/index.html來存取測試
為了方便測試,先在另一台機器192.168.1.5上部署一個8090埠的nginx,設定如下:
[root@bastion-idc ~]# cat /usr/local/nginx/conf/vhosts/haha.conf
server {
listen 8090;
server_name localhost;
location / {
root /var/www/html;
index index.html;
}
}
[root@bastion-idc ~]# cat /var/www/html/index.html
this is 192.168.1.5
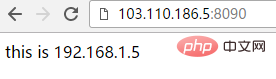
[root@bastion-idc ~]# /usr/local/nginx/sbin/nginx -s reload測試存取(103.110.186.5是192.168.1.5的外網路ip):
[root@bastion-idc ~]# curl http://192.168.1.5:8090
this is 192.168.1.5
#192.168.1.23作為nginx反向代理機器,nginx配置如下:
[root@localhost conf.d]# cat test.conf
server {
listen 80;
server_name localhost;
location / {
root /var/www/html;
index index.html;
}
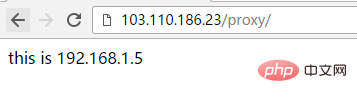
location /proxy/ {
proxy_pass http://192.168.1.5:8090/;
}
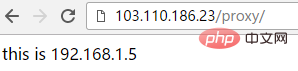
} 這樣,訪問http://192.168.1.23/proxy/就會被代理到http://192.168.1.5:8090/。 p匹配的proxy目錄不需要存在根目錄/var/www/html裡面[root@localhost conf.d]# curl http://192.168.1.23/proxy/ this is 192.168.1.5 [root@localhost conf.d]# curl http://192.168.1.23/proxy <html> <head><title>301 moved permanently</title></head> <body bgcolor="white"> <center><h1>301 moved permanently</h1></center> <hr><center>nginx/1.10.3</center> </body> </html>頁面訪問http://103.110.186.23/proxy的時候,會自動加上"/”(同理是由於proxy_pass配置的url後面加了"/"),並反代到http://103.110.186.5:8090的結果
[root@localhost conf.d]# cat test.conf
server {
listen 80;
server_name localhost;
location / {
root /var/www/html;
index index.html;
}

location /proxy/ {
 proxy_pass http://192.168.1.5:8090;
}
}
[root@localhost conf.d]# service nginx restart
redirecting to /bin/systemctl restart nginx.service
那麼訪問http://192.168.1.23/proxy或http://192.168.1.23/proxy/,都會失敗! 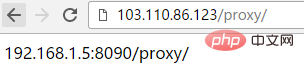
[root@localhost conf.d]# cat test.conf
server {
listen 80;
server_name localhost;
location / {
root /var/www/html;
index index.html;
}

location /proxy/ {
 proxy_pass http://192.168.1.5:8090/haha/;
}
}
[root@localhost conf.d]# service nginx restart
redirecting to /bin/systemctl restart nginx.service
[root@localhost conf.d]# curl http://192.168.1.23/proxy/
192.168.1.5 haha-index.html
這樣設定的話,訪問http://103.110.186.23/proxy代理到http://192.168.1.5:8090/ haha/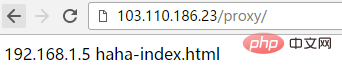
[root@localhost conf.d]# cat test.conf
server {
listen 80;
server_name localhost;
location / {
root /var/www/html;
index index.html;
}

location /proxy/ {
 proxy_pass http://192.168.1.5:8090/haha;
}
}
[root@localhost conf.d]# service nginx restart
redirecting to /bin/systemctl restart nginx.service
[root@localhost conf.d]# curl http://192.168.1.23/proxy/index.html
192.168.1.5 hahaindex.html
上面配置後,訪問http ://192.168.1.23/proxy/index.html就會被代理到http://192.168.1.5:8090/hahaindex.html同理,訪問http://192.168.1.23/proxy/test.html就會被代理到http://192.168.1.5:8090/hahatest.html
[root@localhost conf.d]# curl http://192.168.1.23/proxy/index.html
192.168.1.5 hahaindex.html
注意,這種情況下,不能直接存取http://192.168.1.23/proxy/,後面就算是預設的index.html檔案也要跟上,否則存取失敗!

上面四種方式都是符合的path路徑後面加上"/",下面說下path路徑後面不帶"/"的情況:
[root@localhost conf.d]# cat test.conf
server {
listen 80;
server_name localhost;
location / {
root /var/www/html;
index index.html;
}

location /proxy {
 proxy_pass http://192.168.1.5:8090/;
}
}
[root@localhost conf.d]# service nginx restart
redirecting to /bin/systemctl restart nginx.service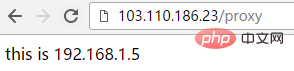
[root@localhost conf.d]# cat test.conf
server {
listen 80;
server_name localhost;
location / {
root /var/www/html;
index index.html;
}

location /proxy {
 proxy_pass http://192.168.1.5:8090;
}
}
[root@localhost conf.d]# service nginx restart
redirecting to /bin/systemctl restart nginx.service
[root@localhost conf.d]#
這樣設定的話,訪問http://103.110.186.23/proxy會自動加上"/」(即變成http://103.110.186.23/proxy/),代理到192.168.1.5: 8090/proxy/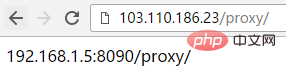
[root@localhost conf.d]# cat test.conf
server {
listen 80;
server_name localhost;
location / {
root /var/www/html;
index index.html;
}

location /proxy {
 proxy_pass http://192.168.1.5:8090/haha/;
}
}
[root@localhost conf.d]# service nginx restart
redirecting to /bin/systemctl restart nginx.service
這樣配置的話,訪問http://103.110.186.23/proxy會自動加上"/」(即變成http://103.110.186.23/proxy/),代理程式到http://192.168.1.5:8090/haha/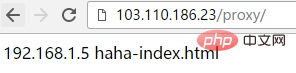
[root@localhost conf.d]# cat test.conf
server {
listen 80;
server_name localhost;
location / {
root /var/www/html;
index index.html;
}

location /proxy {
 proxy_pass http://192.168.1.5:8090/haha;
}
}
[root@localhost conf.d]# service nginx restart
redirecting to /bin/systemctl restart nginx.service
以上是nginx proxy_pass反向代理程式設定實例分析的詳細內容。更多資訊請關注PHP中文網其他相關文章!

熱AI工具

Undress AI Tool
免費脫衣圖片

Undresser.AI Undress
人工智慧驅動的應用程序,用於創建逼真的裸體照片

AI Clothes Remover
用於從照片中去除衣服的線上人工智慧工具。

Clothoff.io
AI脫衣器

Video Face Swap
使用我們完全免費的人工智慧換臉工具,輕鬆在任何影片中換臉!

熱門文章
熱工具

記事本++7.3.1
好用且免費的程式碼編輯器

SublimeText3漢化版
中文版,非常好用

禪工作室 13.0.1
強大的PHP整合開發環境

Dreamweaver CS6
視覺化網頁開發工具

SublimeText3 Mac版
神級程式碼編輯軟體(SublimeText3)


 php寫完代碼怎麼執行 php代碼執行的幾種常見方式
May 23, 2025 pm 08:33 PM
php寫完代碼怎麼執行 php代碼執行的幾種常見方式
May 23, 2025 pm 08:33 PM
PHP代碼可以通過多種方式執行:1.使用命令行,直接輸入“php文件名”執行腳本;2.通過Web服務器,將文件放入文檔根目錄並通過瀏覽器訪問;3.在IDE中運行,利用內置調試工具;4.使用在線PHP沙箱或代碼執行平台進行測試。
 安裝Nginx後配置文件路徑及初始設置
May 16, 2025 pm 10:54 PM
安裝Nginx後配置文件路徑及初始設置
May 16, 2025 pm 10:54 PM
了解Nginx的配置文件路徑和初始設置非常重要,因為它是優化和管理Web服務器的第一步。 1)配置文件路徑通常是/etc/nginx/nginx.conf,使用nginx-t命令可以查找並測試語法。 2)初始設置包括全局設置(如user、worker_processes)和HTTP設置(如include、log_format),這些設置允許根據需求進行定制和擴展,錯誤配置可能導致性能問題和安全漏洞。
 linux如何限制用戶資源? ulimit怎麼配置?
May 29, 2025 pm 11:09 PM
linux如何限制用戶資源? ulimit怎麼配置?
May 29, 2025 pm 11:09 PM
Linux系統通過ulimit命令限制用戶資源,防止資源過度佔用。 1.ulimit是shell內置命令,可限製文件描述符數(-n)、內存大小(-v)、線程數(-u)等,分為軟限制(當前生效值)和硬限制(最高上限)。 2.臨時修改直接使用ulimit命令,如ulimit-n2048,但僅對當前會話有效。 3.永久生效需修改/etc/security/limits.conf及PAM配置文件,並添加sessionrequiredpam_limits.so。 4.systemd服務需在unit文件中設置Lim
 Debian Nginx配置技巧有哪些
May 29, 2025 pm 11:06 PM
Debian Nginx配置技巧有哪些
May 29, 2025 pm 11:06 PM
在Debian系統上配置Nginx時,以下是一些實用的技巧:配置文件的基本結構全局設置部分:定義影響整個Nginx服務的行為參數,比如工作線程數量及運行用戶權限。事件處理部分:決定Nginx如何應對網絡連接,是提升性能的關鍵配置。 HTTP服務部分:包含大量與HTTP服務相關的設定,可內嵌多個server和location塊。核心配置選項worker_connections:定義每個工作線程所能處理的最大連接數,通常設為1024。 multi_accept:激活多連接接收模式,增強並發處理的能力。 s
 配置Nginx服務開機自啟動的具體步驟
May 16, 2025 pm 10:39 PM
配置Nginx服務開機自啟動的具體步驟
May 16, 2025 pm 10:39 PM
Nginx配置開機自啟動的步驟如下:1.創建systemd服務文件:sudonano/etc/systemd/system/nginx.service,並添加相關配置。 2.重新加載systemd配置:sudosystemctldaemon-reload。 3.啟用Nginx開機自啟動:sudosystemctlenablenginx。通過這些步驟,Nginx會在系統啟動時自動運行,確保網站或應用的可靠性和用戶體驗。
 配置PhpStorm與Docker容器化開發環境
May 20, 2025 pm 07:54 PM
配置PhpStorm與Docker容器化開發環境
May 20, 2025 pm 07:54 PM
通過Docker容器化技術,PHP開發者可以利用PhpStorm提高開發效率和環境一致性。具體步驟包括:1.創建Dockerfile定義PHP環境;2.在PhpStorm中配置Docker連接;3.創建DockerCompose文件定義服務;4.配置遠程PHP解釋器。優點是環境一致性強,缺點包括啟動時間長和調試複雜。
 Debian Apache2的SEO優化技巧有哪些
May 28, 2025 pm 05:03 PM
Debian Apache2的SEO優化技巧有哪些
May 28, 2025 pm 05:03 PM
DebianApache2的SEO優化技巧涵蓋多個層面,以下是一些關鍵方法:關鍵詞研究:利用工具(如關鍵詞魔術工具)挖掘頁面的核心及輔助關鍵詞。優質內容創作:產出有價值且原創的內容,內容需經過深入調研,確保語言流暢且格式清晰。內容排版與結構優化:運用標題和小標題引導閱讀。編寫簡潔明了的段落和句子。利用列表展示重點信息。結合圖片、視頻等多媒體增強表現力。留白設計提昇文本易讀性。技術層面SEO改進:robots.txt文件:規定搜索引擎爬蟲的訪問權限。加速網頁加載:借助緩存機制和Apache配置優化
 如何在Debian上實現Docker的自動化部署
May 28, 2025 pm 04:33 PM
如何在Debian上實現Docker的自動化部署
May 28, 2025 pm 04:33 PM
在Debian系統上實現Docker的自動化部署可以通過多樣的方法來完成,以下是詳細的步驟指南:1.安裝Docker首先,確保你的Debian系統保持最新狀態:sudoaptupdatesudoaptupgrade-y接著,安裝必要的軟件包以支持APT通過HTTPS訪問倉庫:sudoaptinstallapt-transport-httpsca-certificatescurlsoftware-properties-common-y導入Docker的官方GPG密鑰:curl-
