一、nginx安裝
1、nginx安裝環境
nginx是c語言開發,建議在linux上執行,本教學課程使用centos6.5作為安裝環境。
安裝nginx需要先將官網下載的原始碼進行編譯,編譯依賴gcc環境,如果沒有gcc環境,需要安裝gcc:yum install gcc-c
pcre(perlcompatible regular expressions)是一個perl函式庫,包括perl 相容的正規表示式函式庫。 nginx的http模組使用pcre來解析正規表示式,所以需要在linux上安裝pcre函式庫。
yuminstall -y pcre pcre-devel
註:pcre-devel是使用pcre開發的二次開發函式庫。 nginx也需要此程式庫。
zlib函式庫提供了許多種壓縮和解壓縮的方式,nginx使用zlib對http套件的內容進行gzip,所以需要在linux上安裝zlib函式庫。
yuminstall -y zlib zlib-devel
openssl是一個強大的安全通訊端層密碼庫,囊括主要的密碼演算法、常用的金鑰和憑證封裝管理功能及ssl協議,並提供豐富的應用程式供測試或其它目的使用。
nginx不僅支援http協議,也支援https(也就是在ssl協定上傳輸http),所以需要在linux安裝openssl函式庫。
yuminstall -y openssl openssl-devel
2、編譯安裝
將nginx-1.8.0.tar.gz拷貝至linux伺服器。
解壓縮:
tar -zxvf nginx-1.8.0.tar.gz
進入nginx的根目錄:
cd nginx-1.8.0
a.configure
./configure --help查詢詳細參數(參考本教學附錄部分:nginx編譯參數)
參數設定如下:
./configure \
--prefix=/usr/local/nginx \
--pid-path=/var/run/nginx/nginx.pid \
--lock-path=/var/lock/nginx.lock \
--error-log-path=/var/log/nginx/error.log \
--http-log-path=/var/log/nginx/access.log \
--with-http_gzip_static_module \
--http-client-body-temp-path=/var/temp/nginx/client\
--http-proxy-temp-path=/var/temp/nginx/proxy\
--http-fastcgi-temp-path=/var/temp/nginx/fastcgi\
--http-uwsgi-temp-path=/var/temp/nginx/uwsgi\
--http-scgi-temp-path=/var/temp/nginx/scgi
注意:上邊將臨時檔案目錄指定為/var/temp/nginx,需要在/var下建立temp及nginx目錄
b.編譯安裝
make
make install
安裝成功檢視安裝目錄:

#c.啟動nginx##
cd /usr/local/nginx/sbin/
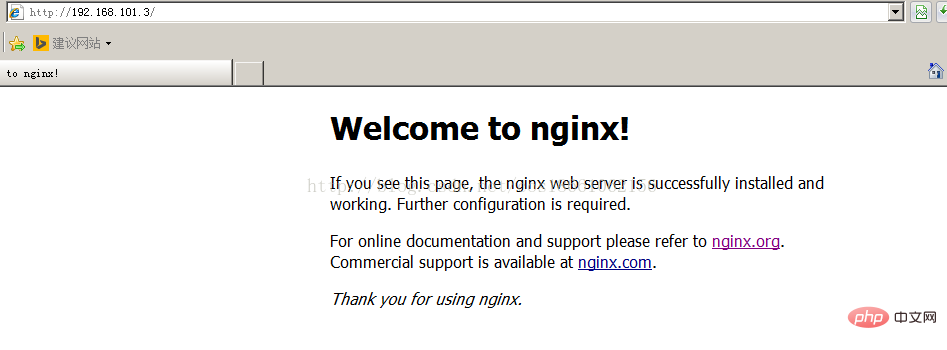
./nginx

./nginx-c /usr/local/nginx/conf/nginx.conf
#方式1,快速停止:
cd /usr/local/nginx/sbin
./nginx -s stop
方式2,完整停止(建議使用):
cd /usr/local/nginx/sbin
./nginx -s quit
方式1,先停止再啟動(建議使用):
對nginx重新啟動相當於先停止nginx再啟動nginx,即先執行停止指令再執行啟動指令。 如下:./nginx -s quit ./nginx
方式2,重新載入設定檔:
當nginx的設定檔nginx.conf修改後,要想讓設定生效需要重新啟動nginx,使用-s reload不用先停止nginx再啟動nginx即可將設定資訊在nginx中生效,如下:./nginx -s reload

二、ftp安裝
1、安裝vsftpd元件[root@bogon ~]# yum -y install vsftpd
[root@bogon ~]# useradd ftpuser
[root@bogon ~]# passwd ftpuser
[root@bogon ~]# vim /etc/sysconfig/iptables
[root@bogon ~]# service iptables restart
[root@bogon ~]# getsebool -a | grepftp
allow_ftpd_anon_write --> off
allow_ftpd_full_access --> off
allow_ftpd_use_cifs --> off
allow_ftpd_use_nfs --> off
ftp_home_dir --> off
ftpd_connect_db --> off
ftpd_use_passive_mode --> off
httpd_enable_ftp_server --> off
tftp_anon_write --> off
[root@bogon ~]#
[root@bogon ~]#setsebool -p allow_ftpd_full_access on
[root@bogon ~]#setsebool -p ftp_home_dir on
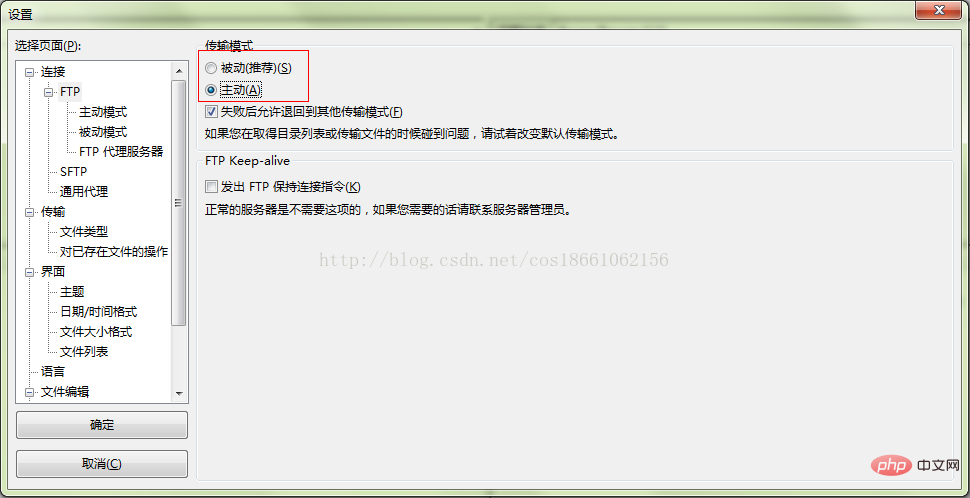
这样应该没问题了(如果,还是不行,看看是不是用了ftp客户端工具用了passive模式访问了,如提示entering passive mode,就代表是passive模式,默认是不行的,因为ftp passive模式被iptables挡住了,下面会讲怎么开启,如果懒得开的话,就看看你客户端ftp是否有port模式的选项,或者把passive模式的选项去掉。如果客户端还是不行,看看客户端上的主机的电脑是否开了防火墙,关吧)
filezilla的主动、被动模式修改:
菜单:编辑→设置

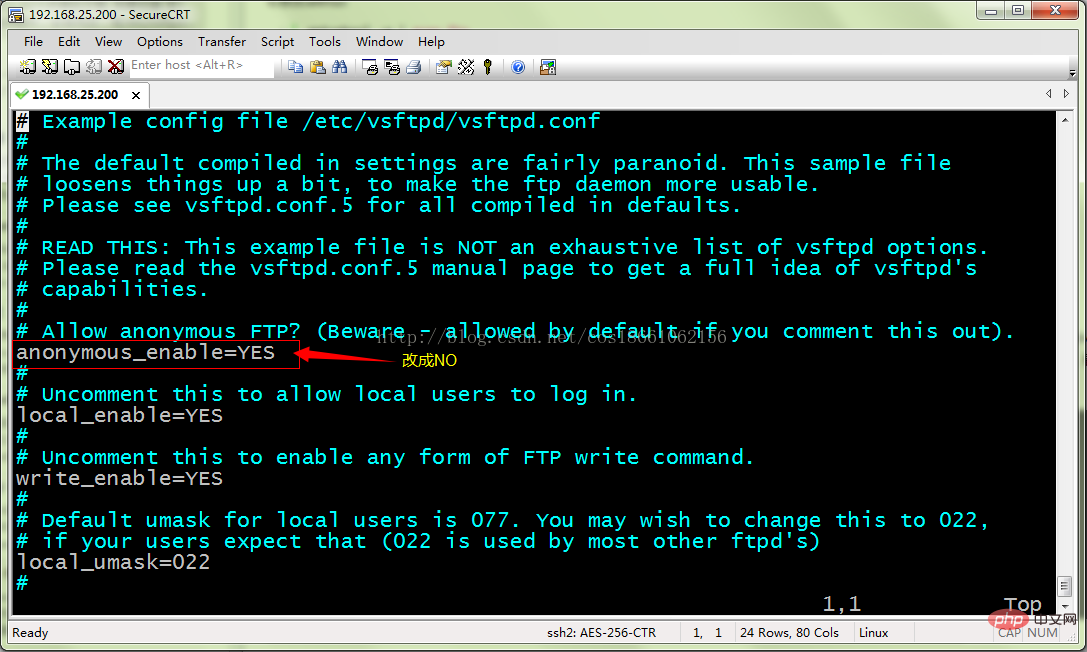
6、关闭匿名访问
修改/etc/vsftpd/vsftpd.conf文件:

重启ftp服务:
[root@bogon ~]# service vsftpd restart
7、开启被动模式
默认是开启的,但是要指定一个端口范围,打开vsftpd.conf文件,在后面加上
pasv_min_port=30000
pasv_max_port=30999
表示端口范围为30000~30999,这个可以随意改。改完重启一下vsftpd
由于指定这段端口范围,iptables也要相应的开启这个范围,所以像上面那样打开iptables文件。
也是在21上下面另起一行,更那行差不多,只是把21 改为30000:30999,然后:wq保存,重启下iptables。这样就搞定了。
8、设置开机启动vsftpd ftp服务
[root@bogon ~]# chkconfig vsftpd on
以上是Linux平台透過nginx和vsftpd建構圖片伺服器的方法的詳細內容。更多資訊請關注PHP中文網其他相關文章!


