uniapp實作自訂設定導覽列的方法:使用一個view,程式碼為【
, 】。

本教學操作環境:windows7系統、uni-app2.5.1版本,此方法適用於所有品牌電腦。
推薦(免費):uni-app開發教學
uniapp實作自訂設定導覽列的方法:
在單一頁面關閉預設的導覽列
"navigationStyle": "custom"
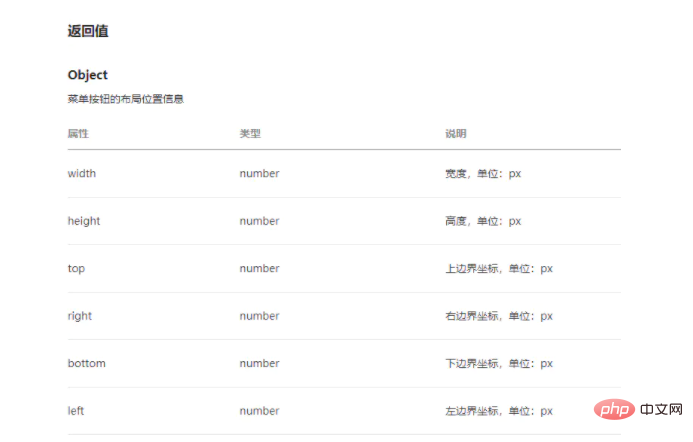
官方取得的參數是

參數詳解

實作原則
用一個view,padding-top=top;height=height;padding-bottom=給一個自己喜歡的數值rpx
實作的程式碼
<template>
<view>
<view :style="'height:' + demo.height + 'px;' + 'padding-top:' + demo.top + 'px;padding-bottom:10rpx'">
<view :style="'top:' + demo.top + 'px'">
<view class="iconfont icon-xiaoxi"></view>
</view>
测试辣
</view>
</view>
</template>
<script>
export default {
data () {
return {
demo: {
top: 0,
height: 0
}
}
},
created () {
const demo = uni.getMenuButtonBoundingClientRect()
this.demo.top = demo.top
this.demo.height = demo.height
}
}
</script>
<style>
.demo{
position: relative;
display: flex;
align-items: center;
justify-content: center;
background: #fff;
font-size: 26rpx;
.left{
float: left;
position: absolute;
width: max-content;
height: max-content;
top: 0;
bottom: 0;
left: 20rpx;
margin: auto;
.iconfont{
color: #3C3C3C;
}
}
}
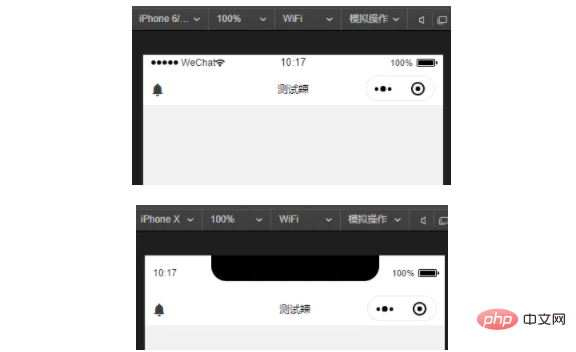
</style>效果

#相關免費學習推薦:php程式設計(影片)
以上是uniapp如何實現自訂設定導覽列的詳細內容。更多資訊請關注PHP中文網其他相關文章!
