【相關學習推薦:php圖文教學】
#php 可以像java perl python 那樣運行,今天發現如果我早早知道這個,或許我不會去學習java 和python
當年學java不過為了一個程式放在伺服器上,不停的跑啊跑,原來php 也可以。
php -h
Usage: php [options] [-f] <file> [--] [args...]
php [options] -r <code> [--] [args...]
php [options] [-B <begin_code>] -R <code> [-E <end_code>] [--] [args...]
php [options] [-B <begin_code>] -F <file> [-E <end_code>] [--] [args...]
php [options] -S <addr>:<port> [-t docroot] [router]
php [options] -- [args...]
php [options] -a
-a Run as interactive shell
-c <path>|<file> Look for php.ini file in this directory
-n No configuration (ini) files will be used
-d foo[=bar] Define INI entry foo with value 'bar'
-e Generate extended information for debugger/profiler
-f <file> Parse and execute <file>.
-h This help
-i PHP information
-l Syntax check only (lint)
-m Show compiled in modules
-r <code> Run PHP <code> without using script tags <?..?>
-B <begin_code> Run PHP <begin_code> before processing input lines
-R <code> Run PHP <code> for every input line
-F <file> Parse and execute <file> for every input line
-E <end_code> Run PHP <end_code> after processing all input lines
-H Hide any passed arguments from external tools.
-S <addr>:<port> Run with built-in web server.
-t <docroot> Specify document root <docroot> for built-in web server.
-s Output HTML syntax highlighted source.
-v Version number
-w Output source with stripped comments and whitespace.
-z <file> Load Zend extension <file>.
args... Arguments passed to script. Use -- args when first argument
starts with - or script is read from stdin
--ini Show configuration file names
--rf <name> Show information about function <name>.
--rc <name> Show information about class <name>.
--re <name> Show information about extension <name>.
--rz <name> Show information about Zend extension <name>.
--ri <name> Show configuration for extension <name>.1.用php指令列的方式執行php腳本,例如/usr/bin/php test.php
縮寫php test.php
#test.php
<?php
for($i=0;$i<10;$i++){
echo $i;
echo '\n';
}
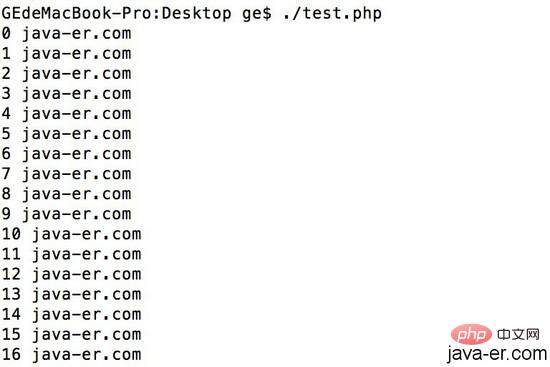
?>2.腳本開頭第一行寫上#!/usr/bin/php,然後可以把腳本設為可執行chmod a x test.php,之後就可以用命令列的方式直接執行腳本了,例如./test.php
#!/usr/bin/php
<?php
for($i=0;$i<10;$i++){
 echo $i;
 echo " java-er.com \n";
}
?>執行一小時,看看php會不會掛,我希望一個命令行可以跑到天荒地老
#!/usr/bin/php
<?php
for($i=0;$i<360;$i++){
 echo $i;
 sleep(10);
 echo " java-er.com \n";
}
?>
3. 外部傳入參數
#!/usr/bin/php
<?php
 var_dump($argc); //返回参数总个数
 var_dump($argv);

exit;
?>
./test.php

int(1)
array(1) {
 [0]=>
 string(10) "./test.php"
}
./test.php a java php

int(4)
array(4) {
 [0]=>
 string(10) "./test.php"
 [1]=>
 string(1) "a"
 [2]=>
 string(4) "java"
 [3]=>
 string(3) "php"
}相關學習推薦:php程式設計(影片)
以上是詳解php命令列寫shell實例的詳細內容。更多資訊請關注PHP中文網其他相關文章!


