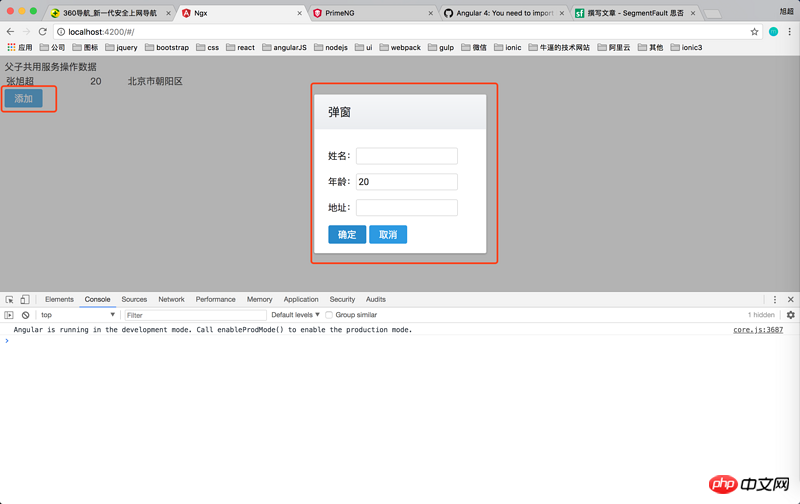
這次帶給大家angular4多個組件相互數據通信,angular4多個組件相互數據通信的注意事項有哪些,下面就是實戰案例,一起來看一下。
應用場景,不同組件中操作統一組數據,不論哪個組件對數據進行了操作,其他組件中立馬看到效果。這樣他們就要共用一個服務實例,是本次的重點,如果不同實例,那麼操作的就不是同一組數據,那麼就不會有這樣的效果,想實現共用服務實例,就是在所有父組件中priviates :[]中引入這個元件,子元件中不需要再次引入,那麼他們都是用的父元件中的服務實例。
1、公用服務
import {Injectable} from "@angular/core";
@Injectable()
export class CommonService {
 public dateList: any = [
 {
  name: "张旭超",
  age: 20,
  address: "北京市朝阳区"
 }
 ];
 constructor() {
 }
 addDateFun(data) {
 this.dateList.push(data);
 }
}2、parent.component.ts
import {Component, OnInit} from "@angular/core";
import {CommonService} from "./common.service";
// 这里要通过父子公用服务来操作数据,只需要在父组件中引入服务。
@Component({
 selector: "parent-tag",
 templateUrl: "parent.component.html",
 providers: [
 CommonService
 ]
})
export class ParentComponent implements OnInit {
 public list: any = [];
 constructor(private commonService: CommonService) {
 this.list = commonService.dateList;
 }
 ngOnInit() {
 }
}3、parent.component.html
<table width="500">
 <tr *ngFor="let item of list">
 <td>
  {{item.name}}
 </td>
 <td>
  {{item.age}}
 </td>
 <td>
  {{item.address}}
 </td>
 </tr>
</table>
<child-one-tag></child-one-tag>4、child-one .component.ts
import {Component} from "@angular/core";
import {CommonService} from "./common.service";
@Component({
 selector: "child-one-tag",
 templateUrl: "child-one.component.html"
})
export class ChildOneComponent {
 public display: boolean = false;
 public username: string = "";
 public age: number = 20;
 public address: string = "";
 constructor(public commonService: CommonService) {
 }
 showDialog() {
 this.display = true;
 }
 hideDialog() {
 this.display = false;
 }
 addInfoFun() {
 let params = {
  name: this.username,
  age: this.age,
  address: this.address
 };
 this.commonService.addDateFun(params);
 params = {};
 }
}5、child-one.component.html
<p-dialog header="弹窗" [(visible)]="display" [width]="300" appendTo="body" modal="modal">
 <form #myForm="ngForm" name="myForm">
 <p>姓名:<input type="text" name="username" [(ngModel)]="username" pInputText/></p>
 <p>年龄:<input type="number" name="age" [(ngModel)]="age" pInputText/></p>
 <p>地址:<input type="text" name="address" [(ngModel)]="address" pInputText/></p>
 <button pButton label="确定" type="submit" (click)="addInfoFun()"></button>
 <button pButton label="取消" (click)="hideDialog()"></button>
 </form>
</p-dialog>
<button label="添加" pButton (click)="showDialog()"></button>

相信看了本文案例你已經掌握了方法,更多精彩請關注php中文網其它相關文章!
推薦閱讀:
以上是angular4多個元件相互數據通信的詳細內容。更多資訊請關注PHP中文網其他相關文章!


