

下面小編就為大家帶來一個php製作圓形使用者頭像的實例_自訂封裝類別原始碼。小編覺得蠻不錯的,現在就分享給大家,也給大家做個參考。一起跟著小編過來看看吧
想法
#使用圖層的方法設計,共需要建立3個影像圖層
1.底層:最後產生的圖片
2.真實使用者頭像:作為中間層,使用者上傳的真實頭像圖片
3.圓形遮罩:作為最上層,在蒙版中繪製圓形,並設定為透明
如圖:
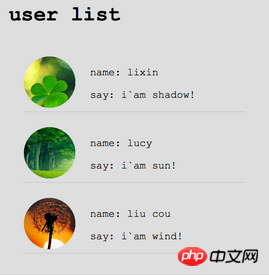
##如圖:
主功能類別avatar.class.php
<?php
class avatar
{
private $fileName; //文件的绝对路径(或基于最终调用文件的相对路径)
private $rgb; //颜色索引(数组 array(255,255,0) 或 16进制值 ffff00/#ffff00/ff0/#ff0)
private $size; //图像大小
private $imgInfo; //图像信息
/**
* 初始化
* Enter description here ...
* @param string $fileName 文件的绝对路径(或基于最终调用文件的相对路径)
* @param mixed $rgb 颜色索引(数组 array(255,255,0) 或 16进制值 ffff00/#ffff00/ff0/#ff0)
* @param int $size 图像大小
*/
public function __construct($fileName, $rgb, $size)
{
$this->fileName = $fileName;
if(is_array($rgb)){
$this->rgb = $rgb; //rgb颜色数组 array(255,255,0)
}else{
//有的人喜欢带#号
$rgb = trim($rgb, '#');
//处理缩写形式
if (strlen($rgb)==3){
$_tmp = $rgb[0].$rgb[0].$rgb[1].$rgb[1].$rgb[2].$rgb[2];
$rgb = $_tmp;
}
$this->rgb = $this->createRGB($rgb); //16进制值 ffff00
}
$this->size = $size;
$this->imgInfo = getimagesize($this->fileName);
if(!$this->imgInfo){
throw Exception("无法读取图像文件");
}
if(!in_array($this->imgInfo[2], array(2,3))){
//仅允许jpg和png
throw Exception("图像格式不支持");
}
}
/**
* 显示图像
* Enter description here ...
*/
public function show()
{
header("content-type:image/png");
$shadow = $this->createshadow(); //遮罩图片
//创建一个方形图片
$imgbk = imagecreatetruecolor($this->size, $this->size); //目标图片
switch ($this->imgInfo[2]){
case 2:
$imgfk = imagecreatefromjpeg($this->fileName); //原素材图片
break;
case 3:
$imgfk = imagecreatefrompng($this->fileName); //原素材图片
default:
return ;
break;
}
$realSize = $this->imgInfo[0]<$this->imgInfo[1]? $this->imgInfo[0] : $this->imgInfo[1];
imagecopyresized($imgbk, $imgfk, 0, 0, 0, 0, $this->size, $this->size, $realSize, $realSize);
imagecopymerge($imgbk, $shadow, 0, 0, 0, 0, $this->size, $this->size, 100);
//创建图像
imagepng($imgbk);
//销毁资源
imagedestroy($imgbk);
imagedestroy($imgfk);
imagedestroy($shadow);
}
/**
* 创建一个圆形遮罩
* Enter description here ...
* @param array 10进制颜色数组
*/
private function createshadow()
{
$img = imagecreatetruecolor($this->size, $this->size);
imageantialias($img, true); //开启抗锯齿
$color_bg = imagecolorallocate($img, $this->rgb[0], $this->rgb[1], $this->rgb[2]); //背景色
$color_fg = imagecolorallocate($img, 0, 0, 0); //前景色,主要用来创建圆形
imagefilledrectangle($img, 0, 0, 200, 200, $color_bg);
imagefilledarc($img, 100, 100, 200, 200, 0, 0, $color_fg, IMG_ARC_PIE);
imagecolortransparent($img, $color_fg); //将前景色转换为透明
return $img;
}
/**
* 将字符形式16进制串转为10进制
* Enter description here ...
* @param $str
*/
private function getIntFromHexStr($str)
{
$format = '0123456789abcdef';
$sum = 0;
for($i=strlen($str)-1, $c=0, $j=0; $i>=$c; $i--,$j++){
$index = strpos($format, $str[$i]);//strpos从0计算
$sum+=$index * pow(16,$j);
}
return $sum;
}
/**
* 将16进制颜色转为10进制颜色值数组(RGB)
* Enter description here ...
* @param $str 16进制串(如:ff9900)
*/
private function createRGB($str)
{
$rgb = array();
if(strlen($str) != 6){
$rgb[] = 0xff;
$rgb[] = 0xff;
$rgb[] = 0xff;
return $rgb; //默认白色
}
$rgb[] = $this->getIntFromHexStr(substr($str, 0, 2));
$rgb[] = $this->getIntFromHexStr(substr($str, 2, 2));
$rgb[] = $this->getIntFromHexStr(substr($str, 4, 2));
return $rgb;
}
}以上是php製作圓形使用者頭像的自訂封裝類別實例的詳細內容。更多資訊請關注PHP中文網其他相關文章!


