想像一個使用者必須記住他們造訪的每個網站的密碼的世界。
喔等等,這就是這個世界!
讓我們透過整合 Google Sign-In 來解決您的應用程式的問題,以便用戶可以毫不費力地使用其 Big G 憑證登入。
將 Google Sign-In 整合到 React 應用程式中比調試 useEffect 中的拼寫錯誤更容易。
說真的,只需兩步驟即可歡迎大G加入您的專案。讓我們開始吧!
在奇蹟發生之前,您需要告訴 Google 您的應用程式。方法如下:
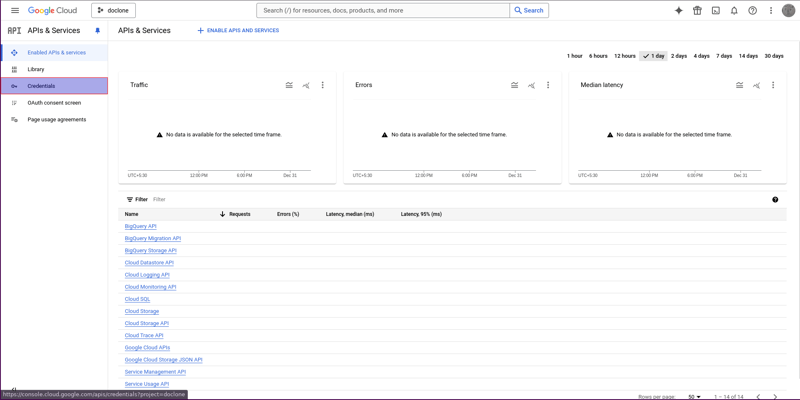
前往 Google Cloud Console:https://console.cloud.google.com/。
導覽至 API 和服務:進入後,在儀表板上點選 API 和服務。

憑證側邊欄:在左側,按一下憑證。


點擊「建立」:Google 現在將產生您的客戶端 ID 和金鑰。
複製客戶端 ID 和秘密:將這些保存在安全的地方(但不要以純文字格式,因為我們比這更好)。
恭喜!主要設定已完成。現在是時候動手編寫一些程式碼了。
我們將使用 [@react-oauth/google](https://www.npmjs.com/package/@react-oauth/google) 套件。當有人已經開始運作時,為什麼要重新發明輪子呢?
npm install @react-oauth/google
   // App.jsx
   import { useState } from "react";
   import { GoogleOAuthProvider, GoogleLogin } from "@react-oauth/google";

   function Homepage() {
     const [authData, setAuthData] = useState(null);

     const gContainer = {
       display: 'flex',
       flexDirection: 'column',
       alignItems: 'center',
       marginTop: '50px'
     };

     return (
       <GoogleOAuthProvider clientId={"YOUR_GOOGLE_CLIENT_ID_HERE"}>
         <div>


<ol>
<li>
<strong>Run Your App</strong>:
Fire up your app with npm start or yarn start, and you’re good to go!</li>
</ol>

<p>Now users can log in, and you’ll have access to their Google access token to authenticate them on your backend (or to marvel at in your console logs).</p>

<h2>


  <img src="/static/imghw/default1.png" data-src="https://img.php.cn/upload/article/000/000/000/173565247884217.jpg" class="lazy" alt="Integrating Google Sign-In with React: A Dev-Friendly Guide">
</h2>

<h2>


  What Just Happened?
</h2>

<p>You’ve successfully added Google Sign-In to your React app by following these steps. When users log in, you’ll receive their access token. </p>

<p><img src="/static/imghw/default1.png" data-src="https://img.php.cn/upload/article/000/000/000/173565247990959.jpg" class="lazy" alt="Integrating Google Sign-In with React: A Dev-Friendly Guide"></p>

<p>You can call an API endpoint using this token to fetch user-related information. For example:<br>
</p>

<pre class="brush:php;toolbar:false">const userInfoEndpoint = `https://oauth2.googleapis.com/tokeninfo?id_token=${accessToken}`;
此請求將傳回使用者的個人資料資料。
建議在後端處理此問題,以防止濫用您的 API 進行虛假登入。
為了進行快速測試,我將使用 LiveAPI 向此端點發送請求,並確認是否可以從我們先前獲得的令牌中檢索使用者資訊。

就是這樣!現在,您已從 OAuth 獲得了所需的所有數據,例如個人資料圖片、姓名和電子郵件。

請容許我再佔用您一分鐘的時間。
我正在開發一個名為 LiveAPI 的超級方便的文件產生工具。
LiveAPI 將您的儲存庫作為輸入,並為您擁有的所有 API 輸出美觀、安全的 API 文件。

加分點:它允許您直接從文件執行 API 並產生任何語言的請求片段。
祝您編碼愉快,願 Big G 永遠對您有利,LiveAPI 可以為您節省一些時間!
以上是將 Google Sign-In 與 React 整合:開發者友善指南的詳細內容。更多資訊請關注PHP中文網其他相關文章!


