

您是否遇到過一個令人興奮的開源項目,您很想為它做出貢獻,但您不知道如何開始?或者您可能是一位相對經驗豐富的開發人員(或只是更精通開源的人),希望為令人興奮的開源專案做出貢獻?好吧,我已經回答了您關於「我如何開始為開源做出貢獻」的問題。
從技術上講,我不會一般意義上回答這個問題。本文會更偏向一個具體的開源專案Utreexo。所以,我想這篇文章的目的是回答「我如何開始為 Utreexo 做出貢獻?」這個問題。
好吧,如果你在這裡,我假設你從某個地方聽說過 Utreexo,或者至少你知道它是一個與比特幣相關的項目。如果您從未聽說過,那也沒關係,我會嘗試對其進行更多分解,並提供相關鏈接,但是,強烈建議您對比特幣的工作原理有較高的了解,以便更好地理解這篇文章.
無論如何,為了回答上面的問題,讓我們先介紹一下 Utreexo 想要實現的目標的背景。
我們所知的比特幣網路(或…還不知道)將所有交易的記錄儲存在數位分類帳中,稱為區塊鏈。此分類帳包含網路上已進行的所有交易的記錄。然而,網路的當前狀態不一定包含網路上發生的所有事情的歷史記錄,而是由所有未花費交易輸出(UTXO 集)的集合組成。該集合包含有關“哪個錢包有什麼”的資訊。簡單來說,UTXO 集基本上只包含比特幣錢包帳戶中有多少比特幣的記錄。嗯,最後一句話不是很準確,因為我們的比特幣錢包通常有多個未花費的交易輸出,這些輸出組合起來就反映了我們的錢包餘額以及可花費的金額。
問題是,隨著網路上交易數量的增加,這種比特幣狀態成長得更快、更大。這帶來了一個重大的可擴展性問題,因為更大的規模需要更大的硬體資源,這可能會阻止一些人操作比特幣節點以及其他缺點。
這就是 Utreexo 發揮作用的地方。
所以我們再次問,「Utreexo 是什麼」? Utreexo 是一種透過提出基於雜湊的動態加密累加器並引入僅儲存狀態的累加器表示的緊湊狀態節點來大幅減少運行完全驗證節點所需的儲存的方法。這些節點需要發送者提供額外的包含證明,然後才能驗證交易,
使用 Utreexo,網路的當前狀態以更小的尺寸表示,這意味著更少的資源使用,這將鼓勵幾乎任何人方便地運行節點。您可以從以下資源 ELI5 中閱讀有關 Utreexo 的更多資訊:Utreexo — 擴展解決方案,或使用 Utreexo 改進比特幣網絡,或從此處下載 Utreexo 白皮書。
設定您的開發環境
現在我們對 Utreexo 了解更多了,讓我們開始設定我們的開發環境。
Utreexo 是用 Go 編寫的,因此擁有 Go 程式語言的基本知識和理解將是額外的好處。但是,如果您是 Go 新手,您可以查看這些資源以了解有關該語言的更多信息,並了解該語言的一些基本概念有效 Go,學習 Go。
我在這篇文章中使用 Visual Studio 程式碼,但請隨意使用您選擇的任何文字編輯器。
首先,我們需要安裝 Go 程式語言。這裡不會介紹安裝步驟,但你可以查看這篇文章,詳細介紹如何安裝和執行Go程式。下載並安裝 Go。一旦你完成安裝 Go,請按照文章並透過檢查
go版本
我們可以繼續克隆程式碼庫。掌握 git 的基本知識在這裡會很有幫助。首先,我們需要在我們的電腦系統上安裝git。要檢查 git 是否已安裝,您可以開啟一個新的終端機或 powershell 視窗並輸入
git –版本
如果安裝了 git,您將看到帶有版本號的輸出。如果沒有,您必須繼續使用安裝 Git 中的指令來安裝 git。
之後,您可以嘗試命令
git –版本
again. If git was successfully installed, we can now proceed to forking and cloning the repository.
Forking the repository basically means creating a copy of the repository on our personal GitHub accounts. Changes we make thereafter will be pushed to our forked repository, and then we can submit a pull request.
To clone the repository, we navigate to the desired location and open in terminal. Or we can navigate directly using the terminal.
For instance, let’s say we have a folder on our desktop called "Projects" which we want our Utreexo code to reside in, we simply navigate to desktop, and then open the “Projects” folder, and inside there, we right click and take “Open in terminal” for windows and Ubuntu. Or we can navigate directly inside our terminal window
First let’s ensure we are in the root directory of our system by navigating there.
Cd ~
And then
cd Desktop/Projects
When in here, we need to clone the repository. There’s a slight consideration to be made here. When you visit the utreexo main organisation on GitHub, we have several repositories. One of which is the utreexo repo, which contains the actual dynamic accumulator implementation, and then there is the utreexod repo, which is a bitcoin full node implementation, that supports Utreexo. We will be focusing on the latter, that is, the bitcoin full node implementation with Utreexo support. Let’s proceed to fork and then clone the repository
To fork the repository, we go to the utreexod repo github page, and on the far right, we will find the “fork” button.
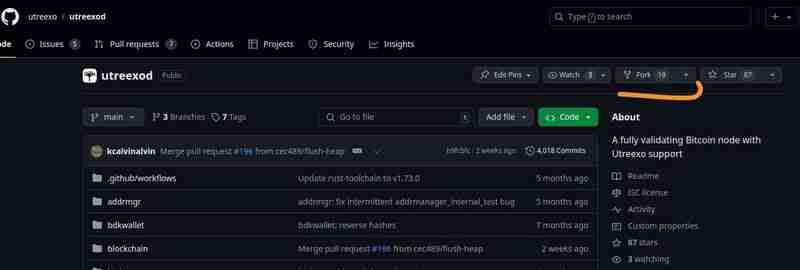
We need to click on this, and follow the onscreen instructions. Once done, our personal github accounts will have the same copy of this reposirory.
Now we can proceed to clone the repository from our personal account
git clone https://github.com/yourgithubusername/utreexod.git
When it’s done, we can open the folder with our text editor, and proceed to install all dependencies as described in the description of the GitHub repo. Now we’re in.
From here, we will want to spend some time, understanding the various sections of the code base, and what each section is responsible for. Once you have a broad idea of the code base, you can go ahead and check the Issues section of the repository to find any issue you would love to tackle, or perhaps a feature suggestion.
Once identified, we create a new branch and name the branch properly
git branch feature1 git checkout feature1
Here, “feature1” is the name of the feature we are going to be working on. Give it a more descriptive name.
Once we are done working on our feature and feel it is ready, we commit and push to github, and then raise a pull request.
To commit, we first of all stage the changes made using
git add .
And then proceed to commit with
git commit -m “Commit message”
The commit message should be a short description of the changes made and it should be inside quotes as mentioned above.
If you are using vscode, the git extension really simplifies all of these processes.
If you need more resources on how to commit your changes and push then to github, check this resource, and for creating a pull request, you can also check here.
After our pull request has been made, we then wait for updates from maintainers, and once everything has been sorted, and probably more changes made requested, the Pull request will be merged, and… there you go. You have Successfully contributed to Utreexo
Open source contributions like this are a driving source of major software, making contributions to open source is very important, as you make changes to software used by tens of thousands of users out there. That contribution brings a high level of satisfaction. From here, it is advisable to continue building relationships with other community members and maintainers and continue contributing to the software on a regular basis.
以上是如何開始為 Utreexo 做出貢獻的詳細內容。更多資訊請關注PHP中文網其他相關文章!


