abstract:首先总结一下学习到的知识一.全局配置 * 全局配置文件app.js 主要用来配置所有页面,总页面的最上方窗口颜色,标题,tabBar等. * 公共模块文件util.js 公共的模块只能通过 module.e
首先总结一下学习到的知识
一.全局配置
* 全局配置文件app.js
主要用来配置所有页面,总页面的最上方窗口颜色,标题,tabBar等.
* 公共模块文件util.js
公共的模块只能通过 module.exports或者 exports才能对外访问,在需要用到这个模块的方法中 require()即可使用
var requestUrl = "http://www.admin.com/index.php";    //引入通用url
function post(url,data,fun,that) {
if(url == ''){
return false;
}
url = requestUrl+url;    //拼接url
wx.request({    //发起请求,也就是请求一个url接口
url: url, // 仅为示例,并非真实的接口地址
data: data,    //数据
header: {
'content-type': 'application/json' // 默认值
},
method : "POST",    //传输方法
dataType : "json",    //格式
success(res) {    //请求成功
that[fun](res.data.result);
// console.log(res.data)
},
fail : function(res){    //请求失败
console.log('请求失败');
return false;
}
})
}
module.exports.post = post    //暴露接口

/*****************************************************************************/
var com = require("../../utils/util.js");    //引入
二.各个页面中的方法
1.page({})中的onLoad : function(){} 当页面加载执行的方法
2.wx.request({}) 发起请求 url:请求的url地址 data 传输的数据 method 请求方式 dataType 数据格式 success请求成功执行 fail 请求失败执行
3.this.setData({}) 设置传输到前台的数据
4.wx.getSystemInfoSync() 获取系统信息,包括手机型号等
5.wx.navigateTo 跳转 <navigete url="url"></navigator> 跳转
6.wx:for="{{lists}}" 循环数据 {{item}} 遍历的数据
7.bindtap="method" 绑定点击事件
-----------------------------------------------------------------------------------------------------------------------------------------------------
下面沾了些代码,大部分都差不多,所以只沾几个比较特殊的吧
<!--index.wxml-->
<view class="container">
<!-- 轮播图 -->
<view class="swiper_content">
<swiper indicator-dots="true" indicator-color="#A33" indicator-active-color="#fff" autoplay="true" interval="4000" circular="true">
<block wx:for="{{img}}" wx:key="">
<swiper-item>
<image src='{{item}}' class="item_img"></image>
</swiper-item>
</block>
</swiper>
</view>
<!-- 轮播图结束 -->
<view class="news_content">
<view class="news_total"> -- 最新新闻 -- </view>
<!-- 新闻页面 -->
<block wx:for="{{list}}" wx:key="">
<view class="news_contents" >
<navigator url='../news/details?id={{item.id}}'>
<image src="{{item.img}}"></image>
<view class="news_text">
<view class="news_title">
{{item.title}}
</view>
<view class="news_desc">
{{item.title}}....
</view>
<view class="news_time">
--- {{item.add_time_s}}
</view>
</view>
</navigator>
<view class="clear"></view>
</view>
</block>
</view>
</view>
// pages/shop/list.js
var com = require("../../utils/util.js");
var page = 1;
var total = 0;
Page({
/**
* 页面的初始数据
*/
data: {
lists : [],
new : [],
height:0,
total:0
},
/**
* 生命周期函数--监听页面加载
*/
onLoad: function (options) {
var sync = wx.getSystemInfoSync();
console.log(sync);
this.setData({
height: sync.screenHeight
})
com.post("/api/home/shop_list", {page : page}, "setContent", this);
},
setContent : function(res){
console.log(res);
this.setData({
lists : this.data.lists.concat(res.product.lists),
new: res.new,
total : res.product.total
})
},
plus_p : function(){
if(page<=this.data.total){
page = page + 1;
com.post("/api/home/shop_list", { page: page }, "setContent", this);
}
},
goUrl : function(e){
console.log(e);
wx.navigateTo({
url: 'details?id=' + e.currentTarget.dataset.id,
})
}
})<!--pages/shop/list.wxml-->
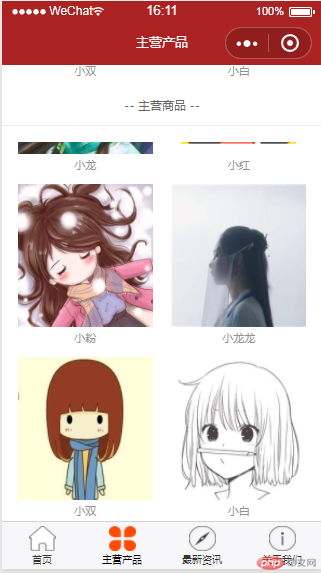
<view class="container">
<view class="list_title">
<text>-- 热销产品 -- </text>
</view>
<view class="shop_list">
<view class="list_item" wx:for="{{new}}" wx:key="" bindtap="goUrl" data-id="{{item.id}}">
<image src='{{item.img}}'></image>
<text>{{item.title}}</text>
</view>
</view>
<view class="list_title">
<text>-- 主营商品 -- </text>
</view>
<scroll-view class="shop_list" style="height:500px" scroll-y="true" bindscrolltolower="plus_p">
<view class="list_item" wx:for="{{lists}}" wx:key="" bindtap="goUrl" data-id="{{item.id}}">
<image src='{{item.img}}'></image>
<text>{{item.title}}</text>
</view>
</scroll-view>
</view>// pages/shop/details.js
var com = require("../../utils/util.js");
var img = [];
Page({
/**
* 页面的初始数据
*/
data: {
content:[]
},
/**
* 生命周期函数--监听页面加载
*/
onLoad: function (options) {
com.post("/api/home/shop_details",{id:options.id},"setContent",this);
},
setContent : function(res){
console.log(res);
this.setData({
content : res
})
img = res.imgs
console.log(img)
},
previews : function(e){
console.log(e);
wx.previewImage({
urls: img,
current: e.currentTarget.dataset.src
});
}
})<view class="container">
<view class="list_swiper">
<swiper indicator-dots="true" autoplay="true" class="swipers">
<block wx:for="{{content.imgs}}" wx:key="">
<swiper-item>
<image src="{{item}}" bindtap="previews" data-src="{{item}}" />
</swiper-item>
</block>
</swiper>
</view>
<!-- 名称 -->
<view class="title">
{{content.title}}
</view>
<!-- 名称结束 -->
<!-- 价格 -->
<view class="list_price">
<text class="old" space='true'>{{content.old_price}}元/h</text>
<text class="new">{{content.price}}元/h</text>
</view>
<!-- 价格结束 -->
<!-- 分割 -->
<view class="gray"></view>
<!-- 分割结束 -->
<view class="content_title">
<view></view>描述
</view>
<view class="desc">
{{content.desc}}
</view>
</view>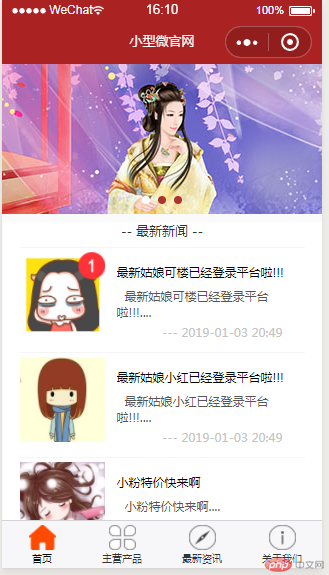


Correcting teacher:查无此人Correction time:2019-01-04 18:00:44
Teacher's summary:做的不错,理解的透彻。小程序基本功能你都会了,如果工作上有需求,还可以多看看小程序api,能发现更多功能。