Course Intermediate 11330
Course Introduction:"Self-study IT Network Linux Load Balancing Video Tutorial" mainly implements Linux load balancing by performing script operations on web, lvs and Linux under nagin.

Course Advanced 17632
Course Introduction:"Shangxuetang MySQL Video Tutorial" introduces you to the process from installing to using the MySQL database, and introduces the specific operations of each link in detail.

Course Advanced 11347
Course Introduction:"Brothers Band Front-end Example Display Video Tutorial" introduces examples of HTML5 and CSS3 technologies to everyone, so that everyone can become more proficient in using HTML5 and CSS3.
2017-05-24 11:37:35 0 1 1014
Ways to fix issue 2003 (HY000): Unable to connect to MySQL server 'db_mysql:3306' (111)
2023-09-05 11:18:47 0 1 823
Experiment with sorting after query limit
2023-09-05 14:46:42 0 1 725
CSS Grid: Create new row when child content overflows column width
2023-09-05 15:18:28 0 1 615
PHP full text search functionality using AND, OR and NOT operators
2023-09-05 15:06:32 0 1 577

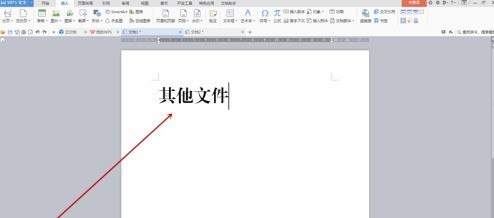
Course Introduction:First, use Founder's small standard Simplified Song to input the label content in a blank document, adjust the font size, and then move the cursor to the middle of every two words and press the Enter key to make the text vertical. Select all vertical text, click the [Table] drop-down menu button in the [Insert] tab of the toolbar, and select [Convert Text to Table] in the pop-up menu. After the dialog box pops up, there is no need to change the settings. Click the OK button to close the dialog box. You can see the effect in Figure 2 below. Right-click on the selection to pop up the menu and select [Borders and Shading]. After the dialog box pops up, use the mouse to click on the center line border pointed by the red arrow in Figure 1 below. When the center line disappears, click the OK button to close the dialog box. At this time, the center line of the table has completely disappeared, leaving only a large border. Move mouse to right
2024-06-10 comment 0 499

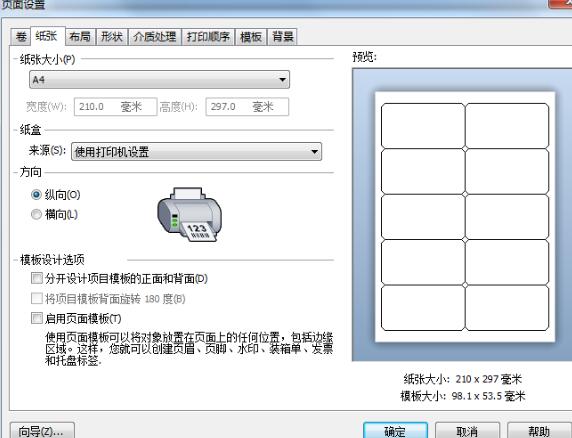
Course Introduction:1. In BarTender, double-click the blank space of the label, or click the Page Setup button in the toolbar. Opens the Page Setup dialog box. Set the paper size and orientation in the [Paper] tab. 2. Switch to the [Layout] tab and set the number of rows and columns of labels; in the [Spacing] column, check [Manual setting] to set the gap between labels in each row and column. (Default is 0). 3. Click OK to print the preview effect:
2024-04-08 comment 0 1095

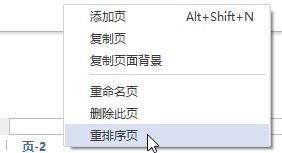
Course Introduction:In the lower left corner of the drawing page, right-click the page label. Select the reorder page. Adjust the page order in the pop-up dialog box, and then click OK. Note: If you choose the default page number format, such as page-1, when reordering pages, if Automatically update page names is selected, Edraw will rename the pages.
2024-06-02 comment 0 820

Course Introduction:Insert a horizontal text box into the PPT page, enter the number 321, set the text size and color, etc. (You can also insert a background for the page). Select the text box, click the [Font Spacing] button in the [Start]-[Font] group, select the [Other Spacing] option, open the [Font] dialog box, set [Spacing] to [Compact], and the measurement value to [180] . Select the text box, click [Animation]-[Animation Style]-[Appear], and then click [Add Animation]-[Disappear]. At this time, click the [Animation Pane] button to open the animation pane, and you can see the two animations just added. Select animation 1, right-click the mouse, select [Effect Options], and in the [Appear] dialog box that opens, set [Animation Text] to [By Letter], [Delay Between Letters]
2024-04-17 comment 0 579

Course Introduction:1. Determine the animation target: point, line, shape. In the mathematics courseware production tool, you can use the line segment tool to create a line segment. Select the endpoints A and B on the text toolbar, and then use the point tool to make any point C on the line segment AB. as the picture shows. 2. Select the animation target, execute the animation command, select point C with the move tool, and execute the [Edit] - [Operation Button] - [Animation] command, as shown in the figure. 3. After setting the speed, direction, and label to execute the animation command, the animation button properties dialog box will pop up. Set the movement direction to two-way, then the speed to medium speed, and finally click OK. 4. To demonstrate the animation of point C on line segment AB, click the animation point operation button with the mouse, and you can see the animation of point C moving left and right on line segment AB, thus realizing the use of
2024-04-08 comment 0 682