

Course Intermediate 11425
Course Introduction:"Self-study IT Network Linux Load Balancing Video Tutorial" mainly implements Linux load balancing by performing script operations on web, lvs and Linux under nagin.

Course Advanced 17717
Course Introduction:"Shangxuetang MySQL Video Tutorial" introduces you to the process from installing to using the MySQL database, and introduces the specific operations of each link in detail.

Course Advanced 11416
Course Introduction:"Brothers Band Front-end Example Display Video Tutorial" introduces examples of HTML5 and CSS3 technologies to everyone, so that everyone can become more proficient in using HTML5 and CSS3.
javascript - How to get files by dragging them to the browser?
2017-06-12 09:25:02 0 1 752
2023-08-16 19:28:38 0 1 566
javascript - How to upload images to vue on the mobile phone
2017-07-05 11:01:18 0 3 3461
2017-05-19 10:18:00 0 2 789
Problem: Images load too slowly
2023-08-17 22:40:08 0 1 669
Course Introduction:php Imagick获取图片RGB颜色值,。php Imagick获取图片RGB颜色值, 很多图片站点都会根据用户上传的图片检索出图片的主要颜色值,然后在通过颜色搜索相关的图片。 之前按照
2016-06-13 comment 0 1112
Course Introduction:上传图片 -- 保存并显示图片 -- JS获取缩略图参数 -- 提交位置参数 -- 图片缩放保存类处理图片 -- 保存截取的图片--更新数据库 -- 跳转
2016-06-06 comment 0 1302

Course Introduction:Imperial CMS provides the function of batch uploading pictures. The specific steps are as follows: Log in to the Imperial CMS backend and enter the "Attachment Management" module. Click the "Batch Upload Images" button, select files and set upload parameters. Click the "Start Upload" button and the upload progress will be displayed in the window. After the upload is completed, the image will be saved in the specified directory.
2024-04-17 comment 0 567

Course Introduction:First, open mBlockwork, click [Role], and click [Add]. Then, click [Upload Character] in the pop-up dialog box, select the animation picture to be added, select the added picture, and click [OK]. Then, move the picture to the appropriate position in the navigation window, drag and drop the program building blocks into the programming interface in the following order, and modify the appropriate parameters. Finally, click the little green flag to run.
2024-06-02 comment 0 1079
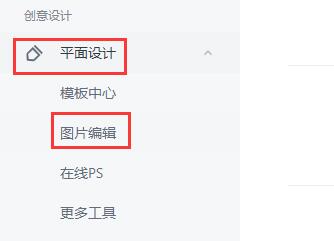
Course Introduction:1. First open the picture editing in the final design. 2. Then click [Upload Image] to upload any image. 3. Then click the tool library in the lower left corner to open the [Draft Cutout] tool. 4. Upload the images that need to be processed below. 5. After the upload is completed, click the mode in the upper left corner and check Automatic recognition, and automatic recognition will be performed as needed. 6. After the recognition is completed, click [Change Background] in the upper right corner. 7. Then select the desired color. 8. After selecting, click [Download] in the upper right corner. 9. It is recommended to select the [PNG] format for saving, and then click [Confirm Download]. 10. After the download is completed, we can see that the background color of our photos has been changed.
2024-06-08 comment 0 964
