Course Intermediate 11308
Course Introduction:"Self-study IT Network Linux Load Balancing Video Tutorial" mainly implements Linux load balancing by performing script operations on web, lvs and Linux under nagin.

Course Advanced 17618
Course Introduction:"Shangxuetang MySQL Video Tutorial" introduces you to the process from installing to using the MySQL database, and introduces the specific operations of each link in detail.

Course Advanced 11324
Course Introduction:"Brothers Band Front-end Example Display Video Tutorial" introduces examples of HTML5 and CSS3 technologies to everyone, so that everyone can become more proficient in using HTML5 and CSS3.
How to restrict product attributes in woocommerce customer template
2023-09-07 19:42:32 0 1 603
2017-05-31 10:41:50 0 1 847
2023-08-15 22:46:56 0 1 567
Rendering data in a table using jQuery in PHP
2023-09-04 09:54:29 0 1 548
How to create a button in HTML with the same properties as the last row of the table?
2023-09-16 22:19:11 0 1 677
Course Introduction:Below, the editor will bring you an example code that uses jQuery to easily change the color of every other row of a table and change the color of clicked rows. The editor thinks it’s pretty good, so I’ll share it with you now and give it as a reference. Let’s follow the editor and take a look.
2016-05-16 comment 0 1534

Course Introduction:What this article brings to you is about jquery’s implementation of how table rows will change color when the mouse is clicked (code attached). It has certain reference value. Friends in need can refer to it. I hope it will be helpful to you.
2018-08-16 comment 0 3420
Course Introduction:Jquery realizes the alternating color change of the table. Click to select the row and move the mouse over the color change effect. The demo code is attached. Friends who like it can refer to it.
2016-05-16 comment 0 1506

Course Introduction:Create a new SQL query window in Navicat and enter the stored procedure. Select the code of the stored procedure and click "Run Selected". If the run passes, check whether the personal code meets the requirements. Otherwise, just click on the SCOTT user, then double-click on the EMP table, and finally run the code.
2019-08-06 comment 0 4887

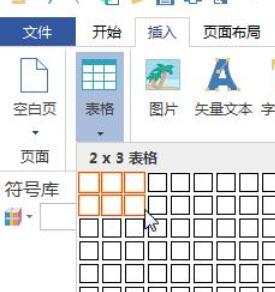
Course Introduction:1. Insert a table After inserting the menu, click the table, select the number of rows and columns and click to confirm. You can also click the Insert Table button and enter the number of rows and columns. Click on a cell to enter text. When you have finished entering text, click outside the form to exit. 2. Move the table. Click the table you want to move. Place the cursor on the cross button on the upper left side of the table. When the cursor changes to a 4-way arrow, drag the button to move the table. 3. Adjust the height and width of rows or columns by clicking on the table. Adjust the width and height of the table in the table menu. You can also place the cursor on the edge of a row or column and move it up or down or left or right to change the height and width of the row or column. 4. Add a row Click on the left side of the table to select a row of the table. This row turns purple when selected. On the Table menu, click Insert Above or Insert Below. five,
2024-06-04 comment 0 799