Course Intermediate 11382
Course Introduction:"Self-study IT Network Linux Load Balancing Video Tutorial" mainly implements Linux load balancing by performing script operations on web, lvs and Linux under nagin.

Course Advanced 17695
Course Introduction:"Shangxuetang MySQL Video Tutorial" introduces you to the process from installing to using the MySQL database, and introduces the specific operations of each link in detail.

Course Advanced 11394
Course Introduction:"Brothers Band Front-end Example Display Video Tutorial" introduces examples of HTML5 and CSS3 technologies to everyone, so that everyone can become more proficient in using HTML5 and CSS3.
2017-05-19 10:34:32 0 1 726
Ways to fix issue 2003 (HY000): Unable to connect to MySQL server 'db_mysql:3306' (111)
2023-09-05 11:18:47 0 1 883
Experiment with sorting after query limit
2023-09-05 14:46:42 0 1 767
CSS Grid: Create new row when child content overflows column width
2023-09-05 15:18:28 0 1 650
PHP full text search functionality using AND, OR and NOT operators
2023-09-05 15:06:32 0 1 620

Course Introduction:This time I will bring you the implementation of the jquery click thumbnail switching playback effect. What are the precautions for jquery clicking thumbnail switching playback? The following is a practical case, let's take a look.
2018-04-25 comment 0 1850

Course Introduction:1. First start PPT2010, execute the insert-picture command, insert a landscape picture material, and adjust the size. 2. Execute the insert command again, select smartart and then bring up the select smartart graphics dialog box. 3. Switch to the Picture tab, select the hexagonal cluster, and click the OK button to view the effect. 4. Then execute the Format-Add Shape command and click multiple times to add. Of course, adding shapes should be based on your actual situation. 5. Select the hexagon cluster and execute the Design-Convert-Convert to Shape command to convert it into a graphic. 6. Select the image to execute the Cut command, right-click the shape and select the Format Shape command from the drop-down menu. 7. In the Format Shape dialog box, set the fill to a picture or texture.
2024-03-26 comment 0 727

Course Introduction:Preface: Many friends have asked related questions about displaying thumbnails in Mac folders. This article will give you a detailed answer for your reference. I hope it will be helpful to you! Let’s take a look! How to set the display thumbnails for pictures on the computer 1. First, after turning on the computer and entering the desktop, it is found that the pictures on the desktop do not display thumbnails. 2. Then click the [My Computer] icon, and then click the [Tools] option above. Right-click "My Computer" on the desktop and select "Properties". In the pop-up settings window, click "Advanced system settings". Switch to the "Advanced" tab and click "Settings." In the window that opens, switch to "Visual Effects" and uncheck "Show Thumbnails". 3. The details are as follows: First, open the picture file on your computer
2024-02-13 comment 0 671

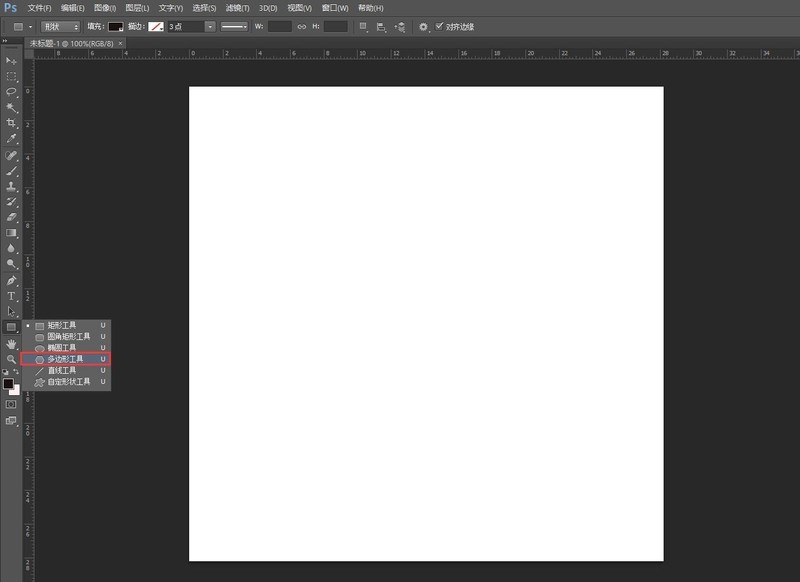
Course Introduction:1. Create a new PS canvas, create a new transparent canvas, and click [Polygon Tool]. 2. Draw a hexagon, convert it to a path, and fill it with black. 3. Copy one more layer with Ctrl+J, shrink it and stack it on top, and use the [Paint Bucket] to fill it with royal blue. 4. Select the gray layer, click [Layer] [Layer Style] [Bevel and Relief], and design the structure and shadow data of the relief as shown in the figure. 5. Select the royal blue layer, click [Layer] [Layer Style] [Bevel and Relief], and design the structure and shadow data of the relief as shown in the figure. 6. Complete the picture.
2024-04-19 comment 0 513

Course Introduction:1. In the new artboard page, click the star tool and draw a rounded shape with 40 corner points. 2. Select the graphic and add an orange gradient, remove the outer stroke, copy the graphic and reduce it to a dot shape, and place it in the center. 3 .Open the Mixing Options window, set the distance between the two stars to the specified number of steps 100, click the OK button to save 4. Then find the Distort and Transform column in the Effect menu, open the Shrink and Expand panel, and modify the parameters to -18%5 .Finally click the Roughen button in the Distort and Transform column again, adjust the size to 7%, change the point to Smooth, and click OK to save.
2024-05-06 comment 0 1055