Course Intermediate 11274
Course Introduction:"Self-study IT Network Linux Load Balancing Video Tutorial" mainly implements Linux load balancing by performing script operations on web, lvs and Linux under nagin.

Course Advanced 17599
Course Introduction:"Shangxuetang MySQL Video Tutorial" introduces you to the process from installing to using the MySQL database, and introduces the specific operations of each link in detail.

Course Advanced 11309
Course Introduction:"Brothers Band Front-end Example Display Video Tutorial" introduces examples of HTML5 and CSS3 technologies to everyone, so that everyone can become more proficient in using HTML5 and CSS3.
Ways to fix issue 2003 (HY000): Unable to connect to MySQL server 'db_mysql:3306' (111)
2023-09-05 11:18:47 0 1 776
Experiment with sorting after query limit
2023-09-05 14:46:42 0 1 703
CSS Grid: Create new row when child content overflows column width
2023-09-05 15:18:28 0 1 595
PHP full text search functionality using AND, OR and NOT operators
2023-09-05 15:06:32 0 1 552
Shortest way to convert all PHP types to string
2023-09-05 15:34:44 0 1 982

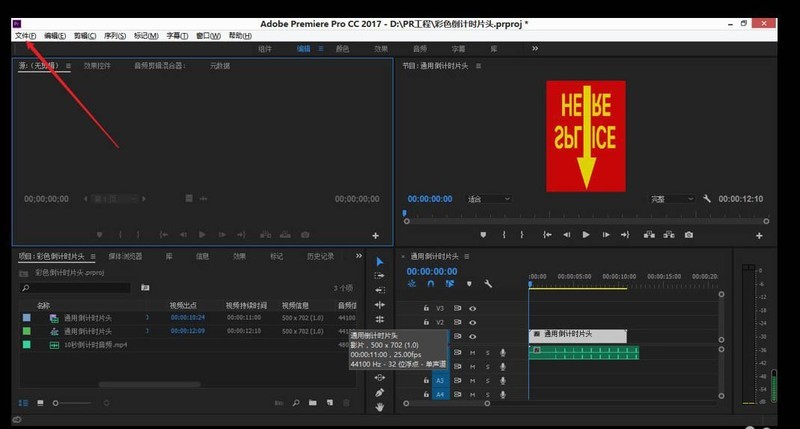
Course Introduction:1. Left-click [File]. 2. Left-click [Import] in steps 1-2, or you can use the shortcut key Ctrl+I instead. 3. Left-click the PSD material you want to add. 4. Left-click [Open]. 5. Select Import as... according to your needs, for example: each layer. 6. Left-click [OK] to complete the import.
2024-05-08 comment 0 703

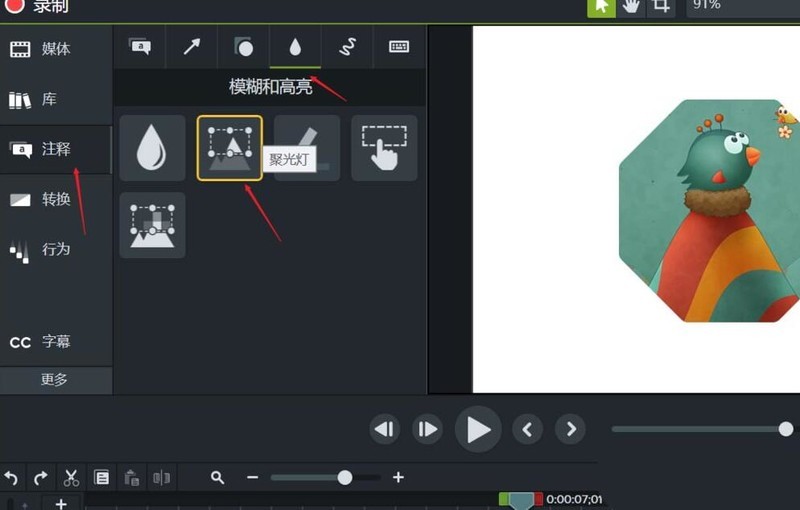
Course Introduction:1. Click on the note on the left, find Blur and Highlight, and select the second special effect spotlight. 2. Drag it directly to the center of the screen, and the spotlight effect will illuminate the bird's head. 3. Using the same method, I also want to light up the lower left corner of the screen. 4. We found that the bird’s head was also darker after the first spotlight effect processing. We don’t want this result. 5. Select the second spotlight effect and press the delete key directly to delete it. 6. Use screenshot software or ctrl+f to export this frame of animation and add it to the material box. 7. Add this screenshot to the central preview window of the video and click the crop tool above your head. 8. Cut and retain the part that needs to be highlighted, as shown in the picture. You can put it in a suitable position or cover the original position in two places and highlight the effect at the same time.
2024-06-03 comment 0 668

Course Introduction:1. Import the material, create a new composition, and drag the material to the composition. 2. Create a new solid layer (move the solid layer downward to prevent overlap when doing the rotation animation in the next step). After selecting the color, use the pen tool to draw the general shape of the light. Press the F key to add an appropriate feathering effect and adjust the overlay mode. Make it more like a light. 3. Select the center point moving tool and move the center point of the solid layer with the mask drawn to the middle and lower part of the mask. 4. Make a key frame animation for the rotation of the solid layer with the mask drawn on it, so that the light swings left and right, and can also change in intensity. Open their three-dimensional layers and adjust the positional relationship between the two layers in the two views, so as to simulate better effects. 5. Finally, copy the simulated light to one layer and adjust the keyframes so that
2024-04-07 comment 0 961

Course Introduction:1. First use a pen to draw the basic structure of the path, which is mainly divided into elements such as lamp poles, lamp holders, advertising racks, and connecting structural components. 2. Set a gray-black gradient to fill the street lamp pole, so that the thick bottom and thin top light poles appear. 3. Use different gray and black colors to fill the hanging structural parts on the light pole, so that the metal material appears on the special-shaped structural parts. 4. Fill the lamp head with a gray-white gradient, and then fill the highlight path above the lamp head with a translucent gray-white gradient so that the effect of glass appears on the lamp head. 5. Set a golden gradient to fill the connector in the middle of the street lamp, so that the copper material appears on such connector. 6. Next, we fill the advertising frame in the middle of the street lamp with a gray-black gradient, and then use a circle to perform a mask operation, so that the black iron material appears on the
2024-04-07 comment 0 1105

Course Introduction:1. Create a new blank layer, then use the brush tool to select a color and apply it on the part illuminated by the light. 2. Then change the layer’s blending option to [Color]. 3. Now the color of the light has been modified! 4. If you feel that the color of the light is not harmonious with other surrounding environments, you can double-click the layer to enter the layer style. In the next layer, hold down the ALT key and drag the black slider toward the white. Just make the black shadows in the environment stand out more.
2024-06-10 comment 0 451