Course Intermediate 11331
Course Introduction:"Self-study IT Network Linux Load Balancing Video Tutorial" mainly implements Linux load balancing by performing script operations on web, lvs and Linux under nagin.

Course Advanced 17634
Course Introduction:"Shangxuetang MySQL Video Tutorial" introduces you to the process from installing to using the MySQL database, and introduces the specific operations of each link in detail.

Course Advanced 11347
Course Introduction:"Brothers Band Front-end Example Display Video Tutorial" introduces examples of HTML5 and CSS3 technologies to everyone, so that everyone can become more proficient in using HTML5 and CSS3.
javascript - Use of perfect-scrollbar plug-in
2017-07-05 10:39:45 0 1 1522
html - Using setInterval in jquery to make gears scroll in a loop
2017-05-16 13:25:04 0 3 844
ScrollPosition not set to top when navigating to other pages
2023-08-30 09:07:14 0 1 566
Ways to fix issue 2003 (HY000): Unable to connect to MySQL server 'db_mysql:3306' (111)
2023-09-05 11:18:47 0 1 825
Experiment with sorting after query limit
2023-09-05 14:46:42 0 1 725

Course Introduction:What this article shares with you is a jQuery full-screen (full-screen) scrolling plug-in web page special effect. Roll the mouse wheel to switch the entire screen to one screen. You can set the text/picture to display the JS code absolutely up, down, left, right, and center. The most popular jQuery full-screen scrolling nowadays. Plug-in! (Compatibility test: IE6 and above, Firefox, Chrome, Opera, Safari, 360 and other mainstream browsers)
2016-05-16 comment 0 1104

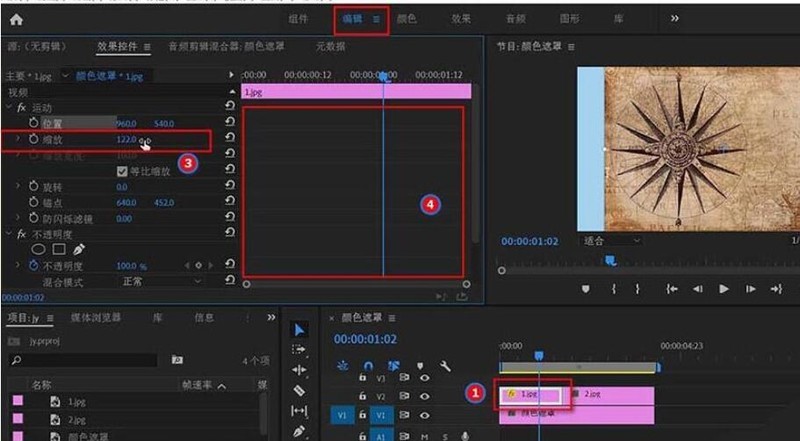
Course Introduction:1. Open Premiere and create a new light color mask. 2. Drag the color mask into the timeline on the right. 3. Import the material into the project area and drag it to the timeline on the right. 4. Import the second piece of footage and drag it into the timeline on the right. 5. Click the left mouse button to select the first piece of material, move to the upper toolbar, click [Edit], [Effect Controls], [Motion], find [Zoom] below, click the number on the right and drag left and right. Change the size of the number while observing the size of the video preview area on the right, adjust it to the appropriate position and release the left mouse button. As you can see, the small window on the right of Motion does not display keyframes. 6. Click the clock icon with the mouse. The icon will change to a blue style with a slash inside, and the keyframe window will appear.
2024-06-02 comment 0 795

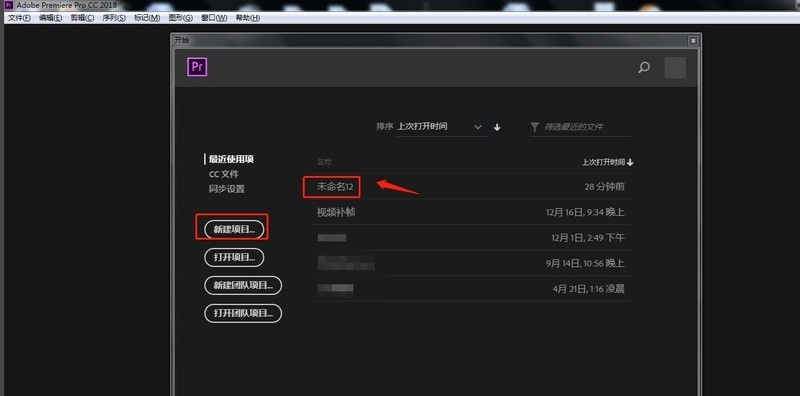
Course Introduction:1. First open the PR software on your computer, click [New Project] to create a video editing project. 2. Click on the lower left area of the software to import the required video material. 3. Long press the left mouse button and drag the imported video material on the left to the timeline on the right. 4. Click [Video Effect] - [Transform] - [Vertical Flip] in the effect window on the right, and drag the effect to the timeline video track. 5. Click on the effect control window in the upper left corner, create a mask, and select the flip area. 6. After the editing is completed, export the produced video.
2024-04-29 comment 0 402

Course Introduction:First, we open Photoshop, click [Create] on the screen box, and create a new blank canvas. Then we select the text tool, enter text on the canvas, and adjust the font, font size, color and other attributes. Next, we click on the text layer, right-click and select [Convert to Smart Object]. Click [Window] - [Timeline] - [Create Timeline] on the menu bar. We click on the text timeline panel and find [Transform], as shown in the figure below. We set a mark point at the starting position, move the timeline slider, and then ctrl+t to rotate the text 180 degrees, so that the software automatically records the second Three transformation points. Then we adjust the timeline length and click [File] - [Export] - [Save for web] in the upper left corner. most
2024-06-02 comment 0 485

Course Introduction:1. First open the PR software on your computer and click [New Project] to create a video editing project. 2. Click on the lower left area of the software to import the required video material. 3. Long press the left mouse button and drag the imported video material on the left to the timeline on the right. 4. Click [Audio Effects] - [Room Reverb] in the effects window on the right and drag the effect to the timeline audio track. 5. Click the effect control window on the upper left, click [Edit] in the room reverb effect, and set the preset to [Vocal Reverb (Medium)]. 6. After the processing is completed, export the produced video to the required format.
2024-06-05 comment 0 985