CourseAdvanced10788
Course Introduction:"jQuery Slideshow Album Tutorial" teaches you how to use our jQuery to create a slide show photo effect. The code in the tutorial does not require you to master it, just know how to use it.

CourseElementary54123
Course Introduction:"HTML5 From Beginner to Mastery Tutorial" introduces in detail that HTML5 has added a lot of new content based on HTML, with more functions and more dazzling effects.

CourseElementary26925
Course Introduction:"Javascript Basics Tutorial" will take you to quickly learn the basic knowledge of javascript and explain it through examples, so that you can better understand the javascript scripting language.

CourseElementary30789
Course Introduction:This tutorial will start from the basics and does not require you to have any programming knowledge. The "HTML Tutorial" contains our knowledge of HTML5, truly achieving a comprehensive learning of HTML.

CourseElementary24061
Course Introduction:"HTML5 Quick Self-Study Tutorial" is suitable for zero-based entry learning of HTML5. HTML5 is the fifth version of HTML development. With the support of browser technology, it has also begun to be widely used. H5 will become the new standard for WEB development. This course will provide readers with Explain all the core features of HTML5.
apache cannot parse php7apache2_4.dll
2017-05-16 13:13:58 0 4 1073
rsa - openssl_private_decrypt does not take effect in typecho Login.php
2017-05-16 13:14:27 0 1 4926
2017-05-16 13:14:29 0 3 770
PHP7.1 cannot obtain session data
2017-05-16 13:14:02 0 2 681

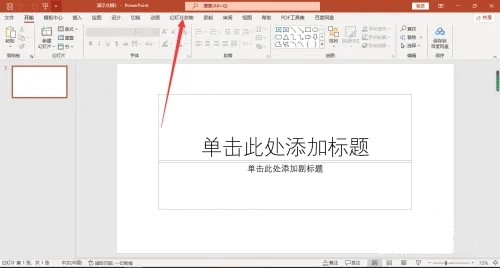
Course Introduction:PPT is widely used in classroom teaching and office meetings. It supports the automatic playback function. Sometimes the automatic playback of PPT is not needed. How to cancel it? What the editor wants to share with you today is how to cancel the automatic playback of PPT. Users in need can come and learn about it. Method/step Click Slide Show to open the PPT software. On the start page, click Slide Show. Click Set Up Slide Show In the slide show, click Set Up Slide Show. Click Manual in setting the show mode, advance the slide and select Manual.
2024-08-27 comment 0396

Course Introduction:When editing a document using Word, pictures need to be inserted due to content requirements, but many users want to know how to set the uniform size of pictures in Word? It looks neat, but many friends don't know how to set it up. So this tutorial will share the operation method with the majority of users, hoping to help everyone. How to uniformly resize Word pictures: 1. First, you need to open the word document interface, insert a picture in word, and select a picture. 2. After selecting the picture, right-click with the mouse, and a drop-down menu will pop up. Click on the size and position options. 3. The layout setting window will appear. Click the size setting module. 4. Cancel the locked aspect ratio in the settings interface, and then reset the picture
2024-08-29 comment 0770

Course Introduction:When editing a WPS document, you may need to insert multiple pictures into the WPS. If the sizes of these pictures are inconsistent, it will look very unsightly. Is there any way to resize all wps images at once? This article will show you how to resize images in batches using WPS, so you don’t have to modify them one by one. How to resize pictures uniformly in wps? Open wps and create a new word document. Click [Insert] - [Picture] - [Local Picture] above. Insert all the pictures you want to edit. Click the [Start] option above. Click [Select] on the far right. Click [Select Pane] in the drop-down list. Hold down the control key to select all images. Adjust the width and height of the picture. Detailed steps: 1. Open w
2024-08-27 comment 0540

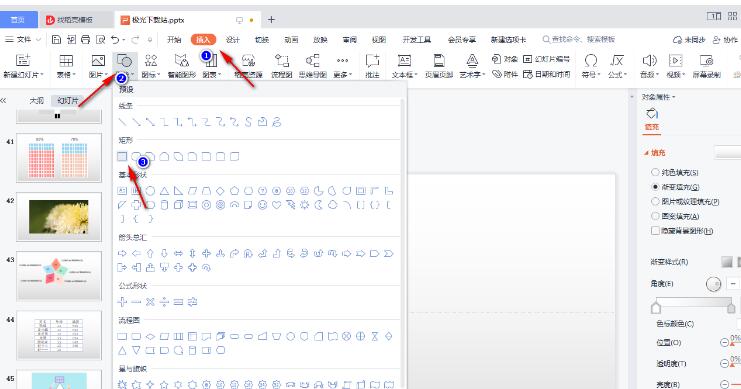
Course Introduction:WPS office software is an office software that friends are very familiar with. In many cases, it can also create slides. If we want to make the slide content less monotonous, we can design an animated progress bar in the slide, but How should we set it up? Next, the editor will talk about the specific steps. If you are interested, let’s take a look. Production method 1. First create a new slide and insert a [rectangle]. 2. Adjust the rectangle to the same size as the slide page. 3. Then click [Insert], select [Shape], and then select to insert [Rounded Rectangle]. 4. Insert a rounded rectangle above the slide, adjust the rounded arc of the rounded rectangle, and adjust the rounded arc to the maximum. 5. Then select the rounded rectangle and click [Fill
2024-08-27 comment 0726

Course Introduction:When many users use Word to edit documents, they need to add various pictures to the document due to different needs. Then there will be a problem of different picture sizes. Adjusting one by one is a waste of time, so some people want to know How to batch resize images in Word documents? In response to this problem, today the editor of PHP Chinese website will share with you the method of batch adjustment of images. I hope that the content of this issue can answer your questions. Method for batch resizing pictures in Word 1. First, open the Word software and enter the software homepage. First, we randomly select a picture that we like. 2. After selecting the picture, right-click the picture and a drop-down list will appear next to the picture. Let's look below to find the size and position options
2024-08-27 comment 0280