Found a total of 10000 related content

jQuery and CSS3 realize the navigation menu with fixed top position and floating effect in the imitation petal network
Article Introduction:This article mainly introduces jQuery+CSS3 to implement a navigation menu with a fixed top position and a floating effect on the imitation petal network. It can realize the function of horizontally floating the navigation bar and fixing it at the top after the page slides down. It involves jQuery event response and page element attribute dynamics. Modify related operation skills, friends in need can refer to the following
2018-06-25
comment 0
2296

How to implement pull-up to change nav color function in uniapp
Article Introduction:With the popularity of mobile applications, uniapp is very popular as a cross-platform application development framework. The pull-up function to change the nav color makes many developers put it down. Next, let’s explore how to implement this function. 1. Determine the requirements: When the page is pulled down to a certain height, the background color of the navigation (nav) at the top of the page changes. 2. Modify the HTML file: add a fixed-position navigation bar at the top of the page, and set its background color to the color that needs to be changed. 3. Modify the JS file: by listening to the page drop-down event
2023-04-20
comment 0
1293

How to hide the top bar button in uniapp
Article Introduction:With the popularity of mobile applications, the use of frameworks to develop mobile applications has become more and more common. UniApp is a cross-platform application framework that uses Vue.js syntax and supports compilation to multiple platforms. Hiding top bar buttons is a skill to master in UniApp development. This article will take UniApp as an example to introduce how to hide the top bar button. 1. What is the top bar button? In UniApp, the top bar is a navigation bar fixed at the top of the page. It can render the left return arrow, middle title and
2023-04-20
comment 0
2643
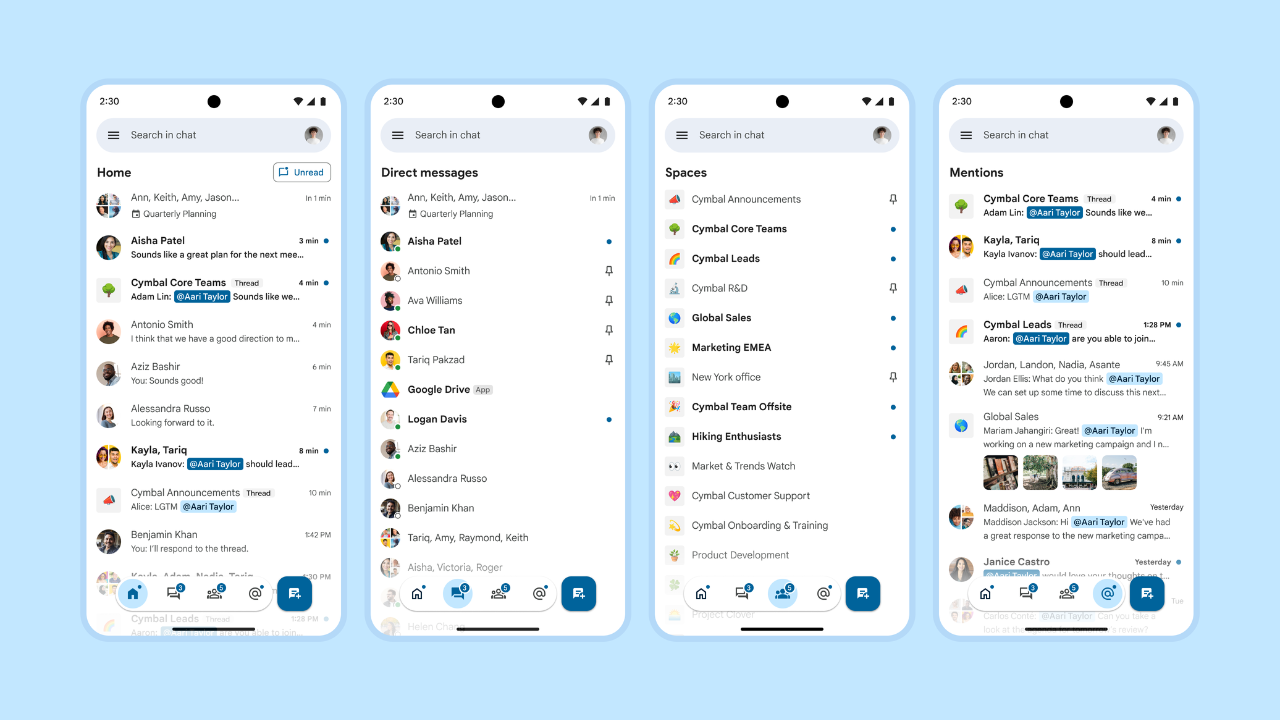
Google Chat launches new mobile user experience
Article Introduction:Google has announced an updated Google Chat experience for Android and iOS devices. The bottom navigation bar has been redesigned to simplify using the app. Here’s a breakdown of the key features highlighted in the update: Home View: Provides a unified overview of all conversations, allowing users to efficiently filter and focus on unread messages. Direct Messages: Displays a streamlined list of personal and group chats, prioritizing pinned conversations at the top. Spaces: Provides a concise display of all spaces, emphasizing canned dialogue at the front. Mention view: Make it easy to track messages mentioning a user in conversations and spaces. For Android and iOS users in the Rapid Release and Planned Release domains, the rollout is gradual, starting on November 29, 2023
2023-11-30
comment 0
990

How to create a vertical navigation bar using HTML and CSS?
Article Introduction:A navigation bar is a graphical feature that allows users to navigate a website or application. It is usually presented as a list of links at the top or side of the screen and helps users navigate to various areas or pages within the website. HTML and CSS can be used to build horizontal or vertical navigation bars. HTML is used to specify the structure and content of the navigation bar, while CSS is used to design and make the navigation bar look attractive. You can improve the overall user experience and make it easier for users to find what they're looking for on your site by adding a navigation bar. Methods There are various ways to build a navigation bar using HTML and CSS, some of them are as follows - Using Navigation Tags using Unordered List (UL) Now let us understand each method in detail with examples. Use unordered list (UL)
2023-09-24
comment 0
1634
How to change the default browser settings in win11
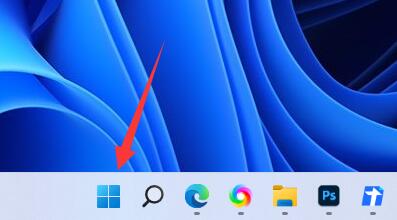
Article Introduction:If multiple browsers are installed on our computer, the wrong browser will be used when opening the web page. At this time, we need to manually modify the default browser. We can modify it by entering the application settings. How to change the default browser in win11. The first step is to click on the windows logo at the bottom to open the "Start Menu" 2. Click on "Settings" in the menu 3. Go to "Applications" in the left column 4. Find and click "Default Applications" on the right " option. 5. Find the default browser you want under the application list. 6. Select the desired file or website type below. 7. Finally, select the default browser you want and click "OK". Ps: If you want to set all links to be opened through this browser, just modify them one by one.
2024-01-09
comment 0
1967

What design is javascript used for?
Article Introduction:What is JavaScript used for? JavaScript is a front-end programming language that can provide dynamic effects and interactivity to websites, making them more attractive and easier to use. It can be used in many different design aspects. 1. Dynamic effects One of the most common uses of JavaScript is to provide dynamic effects for websites. These effects can make the website more vivid and attractive. For example, you can pin the navigation bar to the top of the page when the user scrolls down the page so that the user can easily access the navigation menu. Use Java
2023-05-16
comment 0
552

How to score Traffic Management 12123
Article Introduction:Traffic Control 12123 is a software specially designed for car owners to check traffic violations and handle vehicle services. It brings together a lot of functional services for you, so that you can feel more confident when using your car. If you want to rate the software, come here Let’s find out more about PHP Chinese website. Explanation of the Traffic Management 12123 scoring method 1. Open the Traffic Management 12123 application: - Find and launch the [Traffic Management 12123] application on your mobile phone. 2. Enter the Personal Center: - After entering the application, usually find the [My] or [Personal Center] entrance at the bottom or upper right corner of the screen, and click to enter. 3. Enter the settings menu: - In the personal center interface, find and click the [Settings] option, usually located in the navigation bar at the top or bottom of the interface. 4. Find the rating or feedback function: - in the device
2024-04-09
comment 0
1173

How to check memory usage on Xiaomi Mi 14Pro?
Article Introduction:Recently, Xiaomi released a powerful high-end smartphone Xiaomi 14Pro, which not only has a stylish design, but also has internal and external black technology. The phone has top performance and excellent multitasking capabilities, allowing users to enjoy a fast and smooth mobile phone experience. However, performance will also be affected by memory. Many users want to know how to check the memory usage of Xiaomi 14Pro, so let’s take a look. How to check memory usage on Xiaomi Mi 14Pro? Introduction to how to check the memory usage of Xiaomi 14Pro. Open the [Application Management] button in [Settings] of Xiaomi 14Pro phone. To view the list of all installed apps, browse the list and find the app you want to view, click on it to enter the app details page. In the application details page
2024-03-18
comment 0
1537

What should I do if the mt manager cannot find the downloaded file?
Article Introduction:First, confirm the save location of the file download. It is usually stored in the Download or Downloads folder by default. Then, use the path navigation bar at the top of the MT manager to manually browse to the corresponding storage directory. Let’s take a look with the editor. Let’s see the solution. What should I do if mt manager cannot find the downloaded file? 1. Please first enter the settings interface of your phone. In the settings page, you need to click and open the "Application Settings" option. 2. In the submenu of application settings, find and click to enter the "root permissions" page. 3. In the root permissions page, please continue to click and open the "Authorization Management" function. 4. After entering authorization management, you will see the option of "Application Permission Management", please click and open it. 5.
2024-07-04
comment 0
833

How to set the address book blacklist on Redmi K70?
Article Introduction:The new phones released recently by various manufacturers have very powerful functions. The latest Redmi K70 launched by Redmi has very comprehensive functions and features. This phone not only has a very good appearance, but also performs very well in terms of performance. Some users want to know how to set up an address book blacklist on Redmi K70? , the editor will introduce the specific content to you in detail below. How to set the address book blacklist on Redmi K70? First, start your Redmi K70 phone and open the Phone app. Next, click on the “Contacts” option on the bottom navigation bar. In the address book interface, find the menu icon in the upper right corner (usually three vertical dots) and click it. Step 2: In the pop-up menu, select the "Blacklist" option
2024-02-24
comment 0
1189

How to open the address book blacklist on Xiaomi 14Pro?
Article Introduction:Users who have used Xiaomi mobile phones know that Xiaomi mobile phones have many functions, which are very convenient for daily use. Xiaomi 14Pro, newly launched this year, is no exception. This phone is not only more powerful, but also has a smoother experience. Of course, some users want to know how to set the address book blacklist on Xiaomi 14Pro. Will it be complicated? How to set the address book blacklist on Xiaomi 14Pro? First, go into your phone’s Phone app. Find the "Contacts" option in the bottom navigation bar, then browse the contact list, select the contact you want to add to the blacklist, and click to enter the details page. Step 2: On the contact details page, click the More Options button in the upper right corner (usually three vertical dots). in the pop-up
2024-02-24
comment 0
1131
How to create a form by taking a photo on DingTalk_Introduction to how to create a form by taking a photo on DingTalk
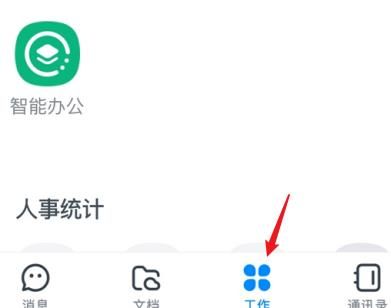
Article Introduction:1. Open DingTalk APP and enter the [Work] page. 2. Find [OA Approval] in the application list and click to enter. 3. After entering, click [Settings] on the bottom navigation menu. 4. Enter the settings page and click the [Create Approval Form] item. 5. Enter the Create Approval Form page, and then click [Photograph to Create Approval]. 6. After entering, click [Agree Agreement and Shoot], turn on the camera function of your mobile phone, lay the form flat and try to take a clearer picture. 7. After completion, it will wait for recognition, and the new form field will be created. Click [Edit] to make manual adjustments. 8. After the adjustment is completed, it can be released. More detailed adjustment suggestions will be more convenient to operate on the computer.
2024-04-29
comment 0
1198
How to create and approve photos on DingTalk app_Technical steps for creating approval templates for photos on DingTalk
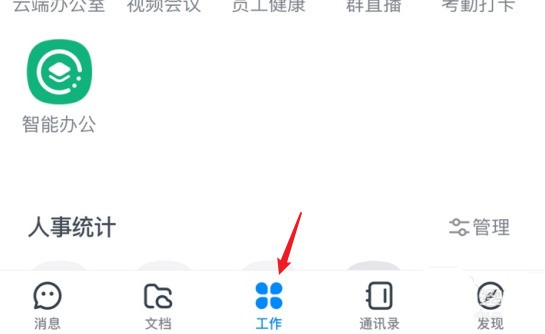
Article Introduction:1. Open the APP and enter the [Work] page. 2. Find [OA Approval] in the application list and click to enter. 3. After entering, click [Settings] on the bottom navigation menu. 4. Enter the settings page and click the [Create Approval Form] item. 5. Enter the Create Approval Form page, and then click [Photograph to Create Approval]. 6. After entering, click [Agree Agreement and Shoot], turn on the camera function of your mobile phone, lay the form flat and try to take a clearer picture. 7. After completion, it will wait for recognition, and the new form field will be created. Click [Edit] to make manual adjustments. 8. After the adjustment is completed, it can be released. More detailed adjustment suggestions will be more convenient to operate on the computer.
2024-04-29
comment 0
335

How to delete thousands of notes in the handbook
Article Introduction:Qianben Notes is a comprehensive mobile note-taking software that allows users to record notes anytime and anywhere. It can also create a handbook to record important matters in life conveniently and easily. However, some users may not know how to delete the ledger when using the software. The following are the specific steps to delete the notebook: 1. Open the Qianben Notes app and log in to your account. 2. Find the ledger list on the main interface, which can be an option in the sidebar or bottom navigation bar. 3. Find the ledger you want to delete and long press the ledger. 4. In the pop-up options, select "Delete" or a similar option. 5. Confirm the deletion action and follow the prompts to complete the deletion of the ledger. Through the above steps, you can easily delete the files you don’t need. [Operation Steps] 1. Open Qianbenpen
2024-01-19
comment 0
1088

Take stock of those cloud editors to help code development
Article Introduction:With the rapid increase in network bandwidth and the iteration of web technology, network latency has become low enough and response has become fast enough, so many online editors have emerged, most of which have integrated development environments themselves, which can do It works right out of the box, so more and more people are beginning to accept and choose cloud editors as development tools. Next, we will share several cloud editors that perform well. Cloud Studiocloud studio is a cloud editor jointly launched by Code Cloud and Tencent Cloud. No configuration is required. You only need to open the browser to have a complete online programming experience. Its simple interface and comprehensive functions are very suitable for novices to get started quickly. It is developed based on VS Code and provides automatic import packages
2023-04-10
comment 0
1498
How to install win7 operating system on computer
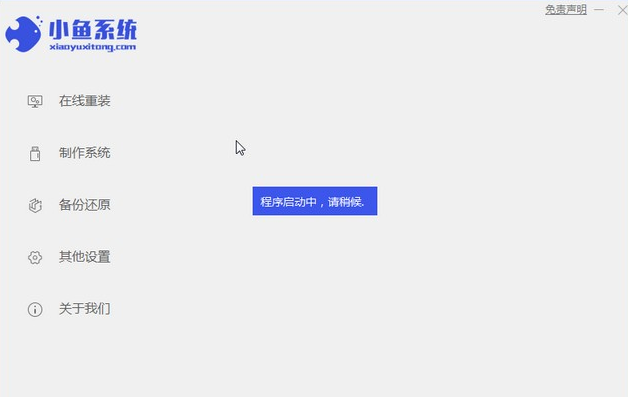
Article Introduction:Among computer operating systems, WIN7 system is a very classic computer operating system, so how to install win7 system? The editor below will introduce in detail how to install the win7 system on your computer. 1. First download the Xiaoyu system and reinstall the system software on your desktop computer. 2. Select the win7 system and click "Install this system". 3. Then start downloading the image of the win7 system. 4. After downloading, deploy the environment, and then click Restart Now after completion. 5. After restarting the computer, the Windows Manager page will appear. We choose the second one. 6. Return to the computer pe interface to continue the installation. 7. After completion, restart the computer. 8. Finally come to the desktop and the system installation is completed. One-click installation of win7 system
2023-07-16
comment 0
1192
php-insertion sort
Article Introduction::This article mainly introduces php-insertion sort. Students who are interested in PHP tutorials can refer to it.
2016-08-08
comment 0
1046
