
Eclipse+Pydev
1. Install Eclipse
Eclipse can be found and downloaded from its official website Eclipse.org. Usually we can choose the Eclipse version that suits us, such as Eclipse Classic. After the download is complete, unzip it to the directory you want to install.
Of course, before executing Eclipse, you must confirm that the Java runtime environment is installed, that is, JRE or JDK must be installed. You can go to (www.java.com/en/download/manual.jsp) to find the JRE download and Install.
2. Install Pydev
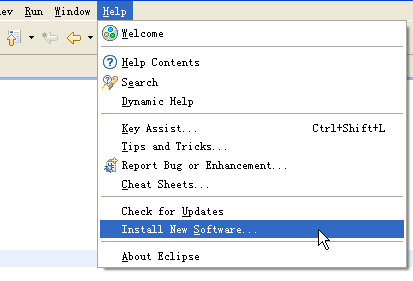
After running Eclipse, select help-->InstallnewSoftware, as shown in the figure below.
Click Add and add the installation address of pydev: pydev.org/updates/, as shown in the figure below.
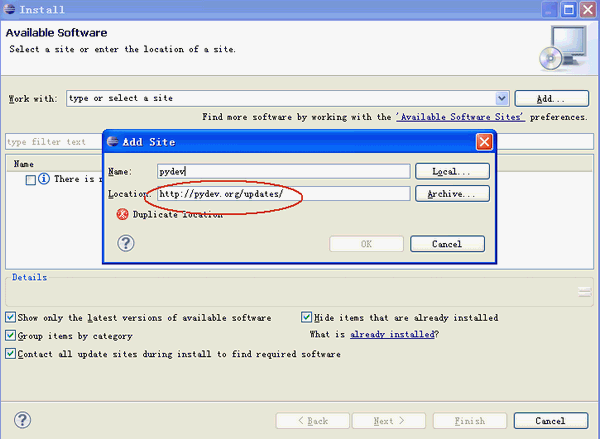
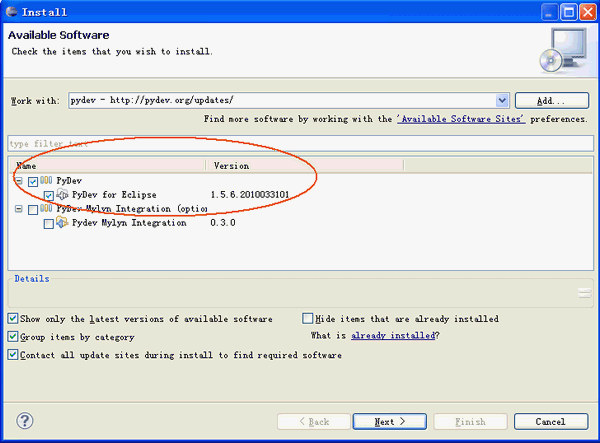
After completion, click "ok", then click the "+" of PyDev to expand the PyDev node. Wait a short period of time for it to obtain PyDev related packages from the Internet. , when completed, there will be more PyDev related packages in the sub-nodes, check them and pressnextto install. As shown below.
After the installation is complete, restart Eclipse
3. Set up Pydev
After the installation is complete, you still need to set up PyDev, select Window -> Preferences to set up PyDev. Set the path toPythonand select New
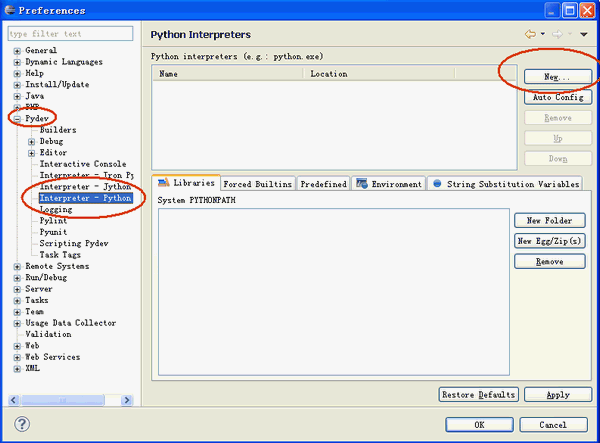
from Pydev's Interpreter - Python page. A window will pop up allowing you to select the installation location of Python. Select your installation The location of Python.
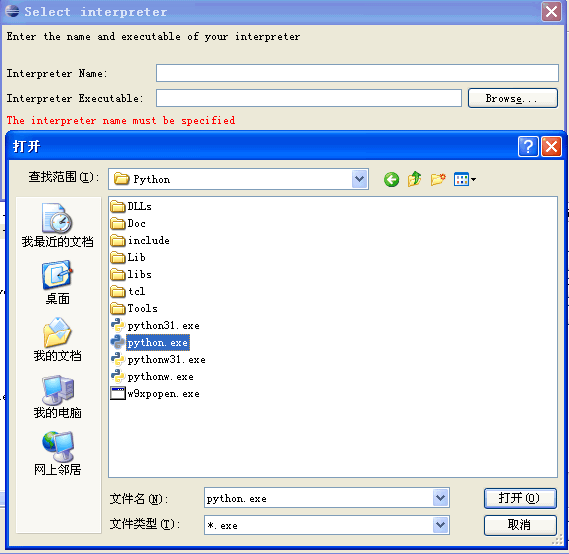
After completion, PyDev is set up and you can start using it
4. Establish a Python Project:
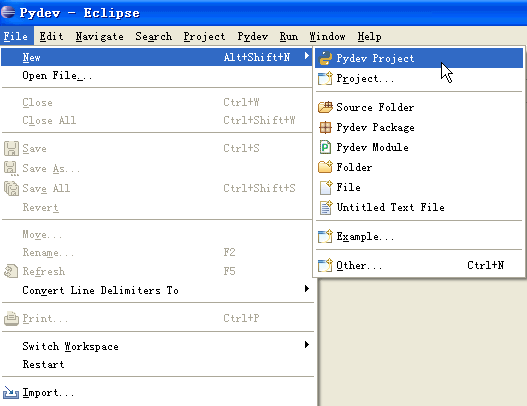
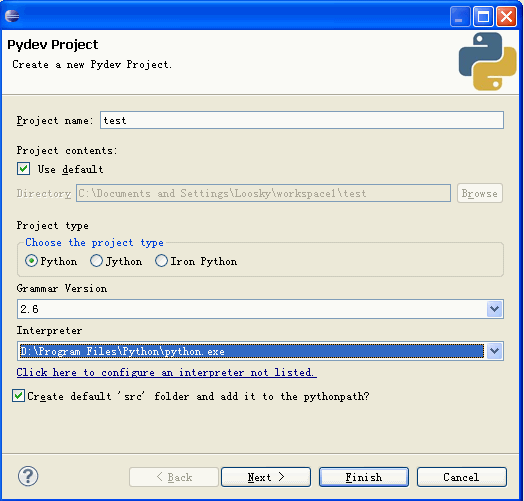
After installing Eclipse+PyDev, We can start using it to develop projects. First, create a project. Select File -> New ->Pydev Project
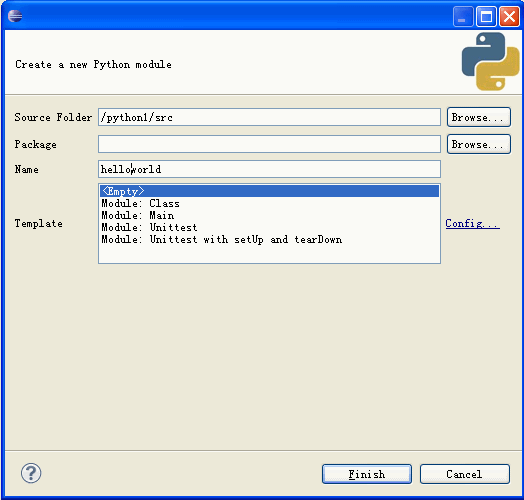
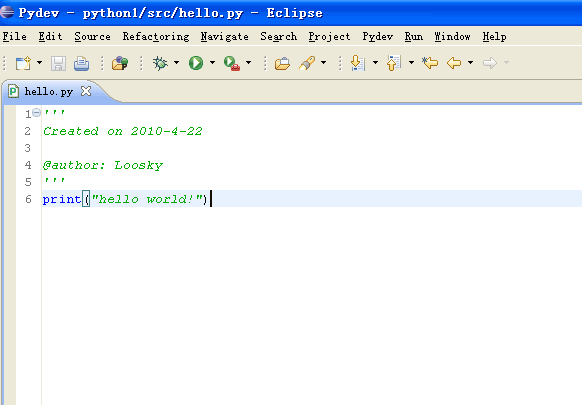
Enter the code for "hello world".
6. Execute the program
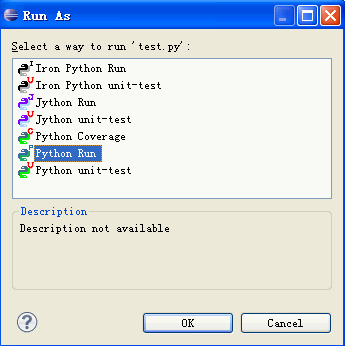
After the program is written, we can start executing the program and find the executionbutton# on the upper toolbar ##.
Special recommendation:"php programmer tools "Box" V0.1 version download
2. 3.Introducing 10 commonly used Python IDE
4.Choose a Python IDE that suits you
The above is the detailed content of Eclipse+Pydev installation tutorial. For more information, please follow other related articles on the PHP Chinese website!


