


In addition to using photoshop for measurements, front-end engineers must also use this software for cutting. This article is the third article in the series of clever uses of photoshop - picture cutting
Which pictures need to be cut out in web page production? ? Mainly divided into two categories, one is decorative pictures, the other is content pictures
[1] Modified pictures
Modified pictures mainly modify the content of the web page, generally It is made as a sprite image, used in the background attribute, and is usually saved in png24 (IE6 does not support translucency) and png8 formats. Decorative pictures mainly include the following categories:
1. Icons, logos
2. Buttons, text, etc. with special effects (if the fonts designed by the designer are not very common, put the text When the picture is cut out)
3. Non-solid color background
【2】Contentual picture
A picture is worth a thousand words, and the "picture" here refers to the content Sexual images mainly provide content for web pages and are generally used in the tag. Content pictures are rich in color, generally saved in JPG format, and require certain compression. Content pictures mainly include the following categories:
1. Banner, advertising pictures
2. Pictures in articles
[Note] Some content pictures are server data , no need to cut the image, just use placeholder
【1】Hide the text and leave only the background
If there are special effects on the text that cannot be written in code, then cut out the text and background together
1. If the text is an independent layer, hide the text image
First find the text layer, and then remove the eye icon
 |
 |
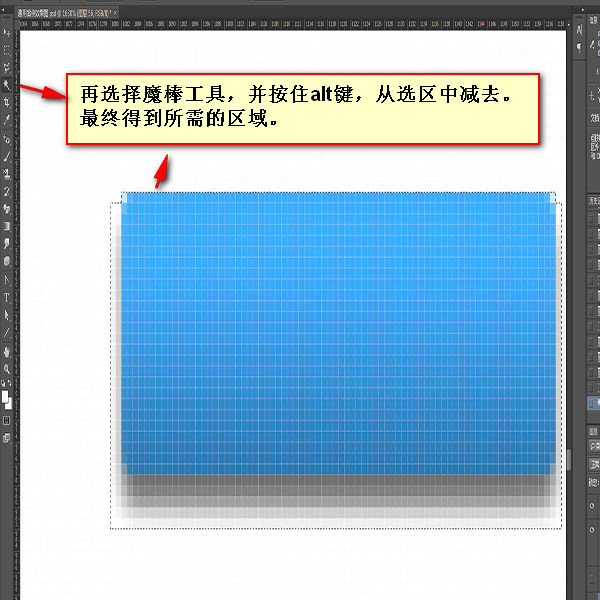
## 2. If the text and background are merged, the tiled background covers the text
a. If the background can be stretched, use the rectangular marquee tool Draw a small rectangular frame on the background, use the Free Transform Tool (ctrl+t) to stretch the background to cover the text, then double-click or press the Enter key |
 |
 |
||||||||
 |
 |
 |
 |
 |
 |
 |
 |
 |
#【2】
Move the tool to select the required layer (ctrl+click the rectangular area of the layer), and an ant line will appear
Merge layers (ctrl+e) (optional)
Check automatic selection, and then merge the multiple layers you need 【4】Copy layer (ctrl+c) ->Create new file (ctrl+n), and press OK->Paste layer (ctrl+v)
 |
 |
 |
 |
 |
 |
 |
 |
 # #
【Cut irregular small icons】 The cutting method is similar to that of png8 [Note] When selecting small hollow icons, be sure to cancel [Continuous] ]
|
 What are the requirements for Douyin live broadcast?
 How to center the web page in dreamweaver
 The running environment of java program
 What programs can be developed with php
 Implement 301 jump method through js code
 How to solve iis cannot start
 vscode runs c language
 What to do if windows photo viewer is out of memory


![[Web front-end] Node.js quick start](https://img.php.cn/upload/course/000/000/067/662b5d34ba7c0227.png)


