angular怎么实现tab栏切换?本篇文章给大家介绍一下angular4实现tab栏切换的方法。有一定的参考价值,有需要的朋友可以参考一下,希望对大家有所帮助。

相关教程推荐:《angular教程》
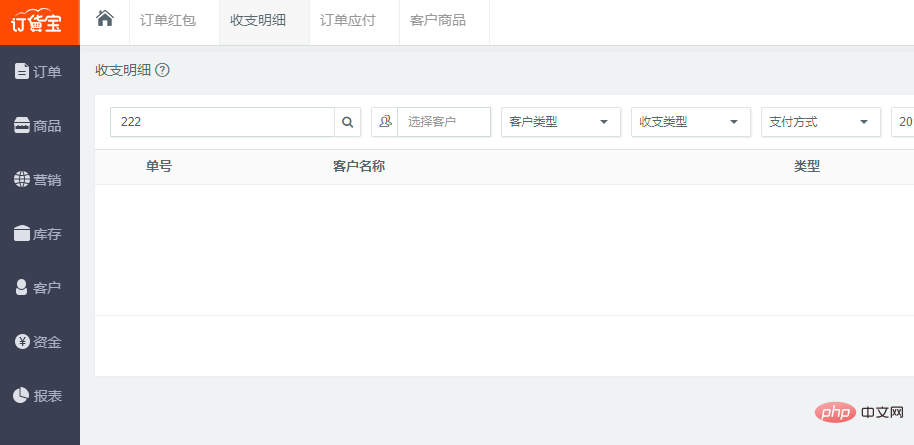
管理系统 tab 切换页,是一种常见的需求,大概如下:

点击左边菜单,右边显示相应的选项卡,然后不同的选项卡面可以同时编辑,切换时信息不掉失!
用php或.net,java的开发技术,大概是切换显示,然后加一个ifram来做到,或者通过ajax加载信息显示相应的层.
但是如果用angular 要如何实现呢?第一个想法,是否可以用同样的ifarm来实现呢?
第二个想到的是路由插座大概是这样的
但都没能实现,于是在想一个简单的tab页面就这么难吗?
或者真的没有什么简单的方法了吗?
很长一段时间,没有去管这个了
因为我知道自己对angular的理解和学习还不够,于是就放下了很长一段时间,直到在知乎看到一篇文章
Angular路由复用策略
于是有了一种思路,花了半天的时间终于实现了anguar 4 tab 切换页大概思路实现如下:
一、实现 RouteReuseStrategy 接口自定义一个路由利用策略
SimpleReuseStrategy.ts代码如下:
import { RouteReuseStrategy, DefaultUrlSerializer, ActivatedRouteSnapshot, DetachedRouteHandle } from '@angular/router';

export class SimpleReuseStrategy implements RouteReuseStrategy {

    public static handlers: { [key: string]: DetachedRouteHandle } = {}

    /** 表示对所有路由允许复用 如果你有路由不想利用可以在这加一些业务逻辑判断 */
    public shouldDetach(route: ActivatedRouteSnapshot): boolean {
        return true;
    }

    /** 当路由离开时会触发。按path作为key存储路由快照&组件当前实例对象 */
    public store(route: ActivatedRouteSnapshot, handle: DetachedRouteHandle): void {
        SimpleReuseStrategy.handlers[route.routeConfig.path] = handle
    }

    /** 若 path 在缓存中有的都认为允许还原路由 */
    public shouldAttach(route: ActivatedRouteSnapshot): boolean {
        return !!route.routeConfig && !!SimpleReuseStrategy.handlers[route.routeConfig.path]
    }

    /** 从缓存中获取快照,若无则返回nul */
    public retrieve(route: ActivatedRouteSnapshot): DetachedRouteHandle {
        if (!route.routeConfig) {
            return null
        }

        return SimpleReuseStrategy.handlers[route.routeConfig.path]
    }

    /** 进入路由触发,判断是否同一路由 */
    public shouldReuseRoute(future: ActivatedRouteSnapshot, curr: ActivatedRouteSnapshot): boolean {
        return future.routeConfig === curr.routeConfig
    }
}二、策略注册到模块当中:
import { BrowserModule } from '@angular/platform-browser';
import { NgModule } from '@angular/core';
import { FormsModule } from '@angular/forms';
import { CommonModule as SystemCommonModule } from '@angular/common';
import { AppComponent } from './app.component';
import { AppRoutingModule,ComponentList } from './app.routing'
import { SimpleReuseStrategy } from './SimpleReuseStrategy';
import { RouteReuseStrategy } from '@angular/router';

@NgModule({
  declarations: [
    AppComponent,
    ComponentList
  ],
  imports: [
    BrowserModule,
    AppRoutingModule,
    FormsModule,
    SystemCommonModule
  ],
  providers: [
    { provide: RouteReuseStrategy, useClass: SimpleReuseStrategy }
  ],
  bootstrap: [AppComponent]
})
export class AppModule { }上面两步基本上实现了复用策略但要实现第一张效果图,还是要做一些其它工作
三、定义路由添加一些data数据路由代码如下:
import { NgModule } from '@angular/core';
import { Routes, RouterModule } from '@angular/router';
import { AboutComponent } from './home/about.component'
import { HomeComponent } from './home/home.component'
import { NewsComponent } from './home/news.component'
import { ContactComponent } from './home/contact.component'


export const routes: Routes = [
  { path: '', redirectTo: 'home', pathMatch: 'full', },
  { path: 'home', component: HomeComponent,data: { title: '首页', module: 'home', power: "SHOW" } },
  { path: 'news',component: NewsComponent ,data: { title: '新闻管理', module: 'news', power: "SHOW" }},
  { path: 'contact',component: ContactComponent ,data: { title: '联系我们', module: 'contact', power: "SHOW" }},
  { path: 'about', component: AboutComponent,data: { title: '关于我们', module: 'about', power: "SHOW" } },
];

@NgModule({
  imports: [RouterModule.forRoot(routes)],
  exports: [RouterModule]
})

export class AppRoutingModule { }

export const ComponentList=[
    HomeComponent,
    NewsComponent,
    AboutComponent,
    ContactComponent
] 四、在
import { Component } from '@angular/core';
import { SimpleReuseStrategy } from './SimpleReuseStrategy';
import { ActivatedRoute, Router, NavigationEnd } from '@angular/router';
import { Title } from '@angular/platform-browser';
import 'rxjs/add/operator/filter';
import 'rxjs/add/operator/map';
import 'rxjs/add/operator/mergeMap';
@Component({
selector: 'app-root',
styleUrls:['app.css'],
templateUrl: 'app.html',
providers: [SimpleReuseStrategy]
})
export class AppComponent {
//路由列表
menuList: Array<{ title: string, module: string, power: string,isSelect:boolean }>=[];
constructor(private router: Router,
private activatedRoute: ActivatedRoute,
private titleService: Title) {
//路由事件
this.router.events.filter(event => event instanceof NavigationEnd)
.map(() => this.activatedRoute)
.map(route => {
while (route.firstChild) route = route.firstChild;
return route;
})
.filter(route => route.outlet === 'primary')
.mergeMap(route => route.data)
.subscribe((event) => {
//路由data的标题
let title = event['title'];
this.menuList.forEach(p => p.isSelect=false);
var menu = { title: title, module: event["module"], power: event["power"], isSelect:true};
this.titleService.setTitle(title);
let exitMenu=this.menuList.find(info=>info.title==title);
if(exitMenu){//如果存在不添加,当前表示选中
this.menuList.forEach(p => p.isSelect=p.title==title);
return ;
}
this.menuList.push(menu);
});
}
//关闭选项标签
closeUrl(module:string,isSelect:boolean){
//当前关闭的是第几个路由
let index=this.menuList.findIndex(p=>p.module==module);
//如果只有一个不可以关闭
if(this.menuList.length==1) return ;
this.menuList=this.menuList.filter(p=>p.module!=module);
//删除复用
delete SimpleReuseStrategy.handlers[module];
if(!isSelect) return;
//显示上一个选中
let menu=this.menuList[index-1];
if(!menu) {//如果上一个没有下一个选中
menu=this.menuList[index+1];
}
// console.log(menu);
// console.log(this.menuList);
this.menuList.forEach(p => p.isSelect=p.module==menu.module );
//显示当前路由信息
this.router.navigate(['/'+menu.module]);
}
}app.html 的代码如下:
<div class="row">
  <div class="col-md-4">
    <ul>
      <li><a routerLinkActive="active" routerLink="/home">首页</a></li>
      <li><a routerLinkActive="active" routerLink="/about">关于我们</a></li>
      <li><a routerLinkActive="active" routerLink="/news">新闻中心</a></li>
      <li><a routerLinkActive="active" routerLink="/contact">联系我们</a></li>
    </ul>
  </div>
  <div class="col-md-8">
    <div class="crumbs clearfix">
      <ul>
          <ng-container  *ngFor="let menu of menuList">
              <ng-container *ngIf="menu.isSelect">
                  <li class="isSelect">
                      <a routerLink="/{{ menu.module }}">{{ menu.title }}</a>
                      <span (click)="closeUrl(menu.module,menu.isSelect)">X</span>
                  </li>
              </ng-container>
              <ng-container *ngIf="!menu.isSelect">
                  <li>
                      <a routerLink="/{{ menu.module }}">{{ menu.title }}</a>
                      <span  (click)="closeUrl(menu.module,menu.isSelect)">X</span>
                  </li>
              </ng-container>
          </ng-container>
      </ul>
    </div>
    <router-outlet></router-outlet>
  </div>
</div>整体效果如下:

最终点击菜单显示相应的标签选中,可以切换编辑内容,关闭标签时,重新点击菜单可以重新加载内容。
更多编程相关知识,请访问:编程教学!!
Atas ialah kandungan terperinci angular4实现tab切换的方法介绍. Untuk maklumat lanjut, sila ikut artikel berkaitan lain di laman web China PHP!
 kekunci pintasan pr
 Syiling naga inskripsi Bitcoin
 Bagaimana untuk membuka fail html WeChat
 Keperluan konfigurasi minimum untuk sistem win10
 Bagaimana untuk mewakili nombor negatif dalam binari
 Bagaimana untuk membeli Ripple di China
 Cara membaca data excel dalam html
 Bagaimana untuk membuka kebenaran skop