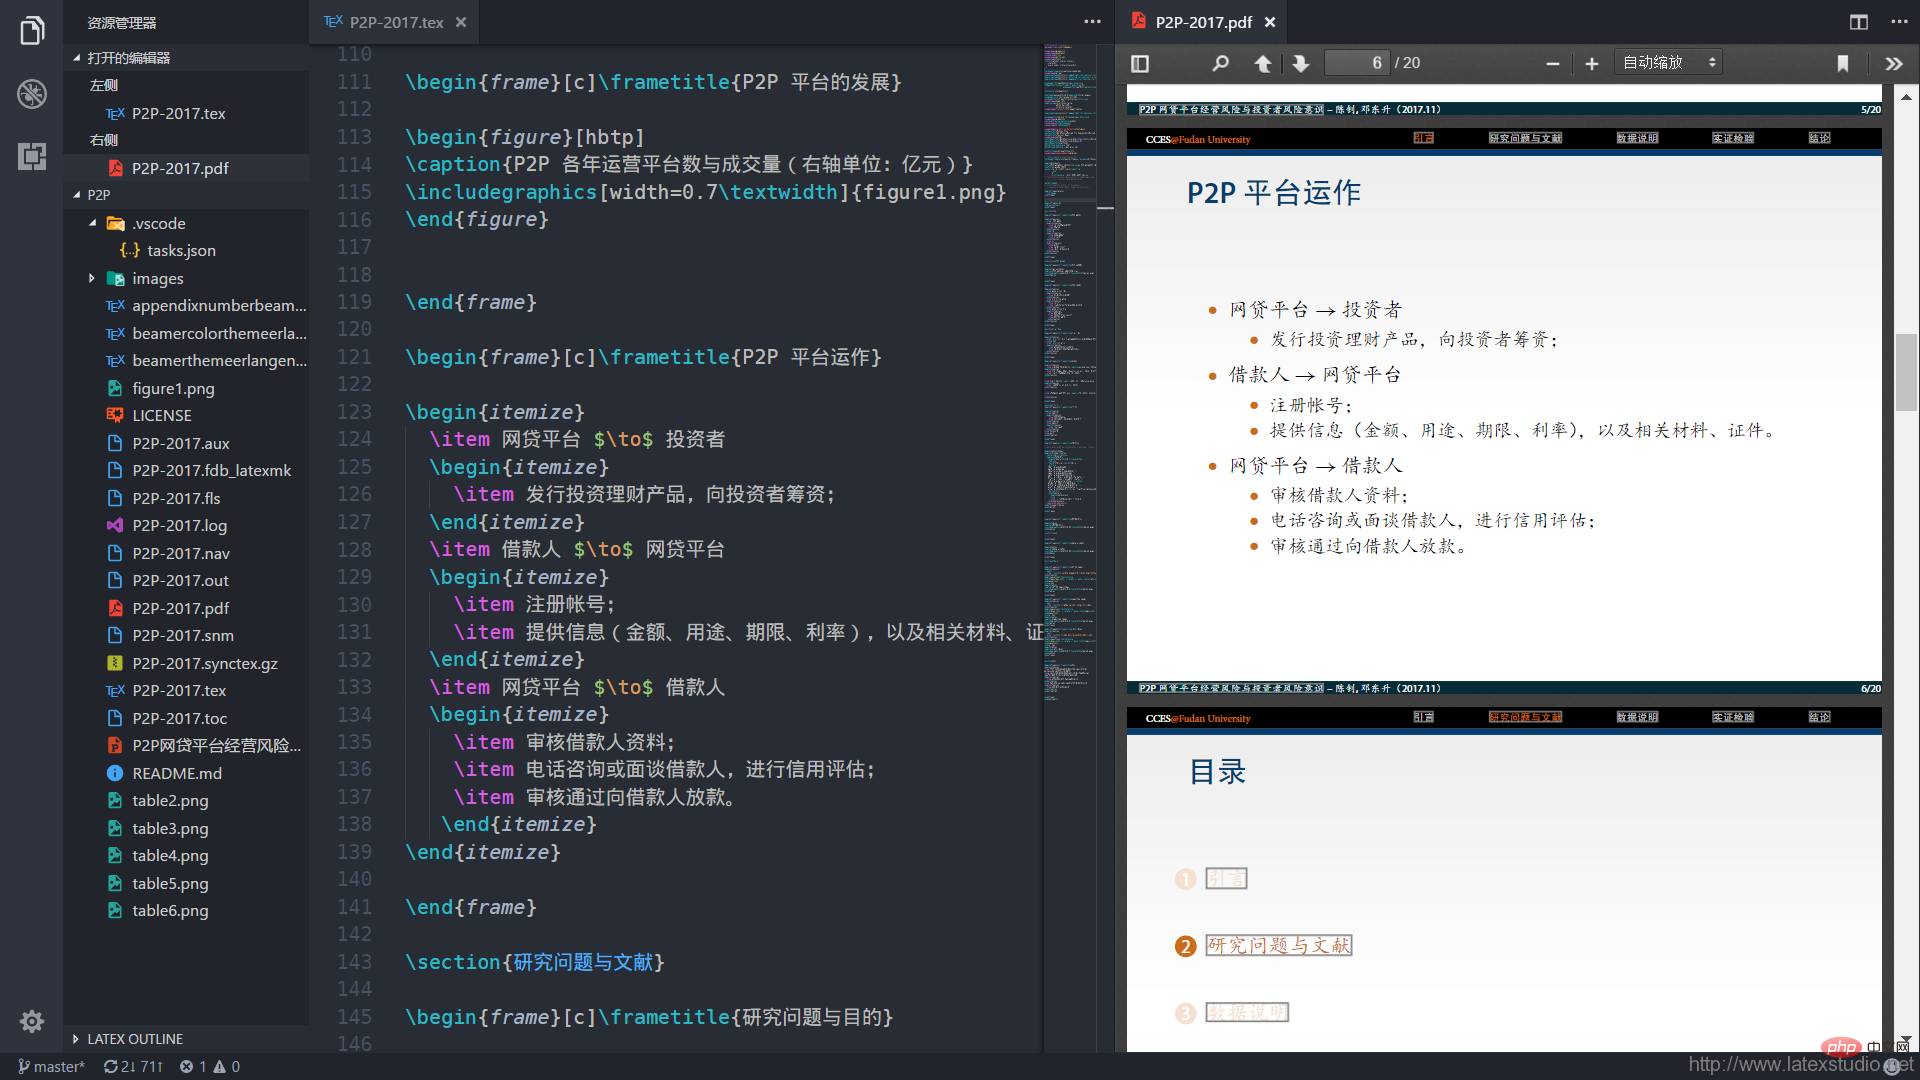
本篇文章给大家介绍一下VSCode搭建 LaTeX 编写环境的方法。有一定的参考价值,有需要的朋友可以参考一下,希望对大家有所帮助。

相关推荐:《vscode基础教程》
TeXlive 和 Visual Studio Code 的安装这里不赘述,需要注意的一个事情是,安装之后需要将 TeXlive 的 bin 目录(<span style="font-size:14px">C:\texlive\2015\bin\win32</span>)添加到系统的环境变量(PATH)中。
在安装 Visual Studio Code 之后,在左侧打开 扩展(快捷键 <span style="font-size:14px">Ctrl+Shift+X</span>),搜索 LaTeX Workshop,选择安装,并选择重启 VS Code 激活插件。
在我们编写 LaTeX 文档的时候,有两个命令很特殊,一个是 <span style="font-size:14px">%!TEX program = xelatex</span>,一个是 <span style="font-size:14px">% !TEX root = relative/or/absolute/path/to/root/file.tex</span>,前者指定编译方式,后者指定主(根)文件,借助这个,我们可以对不同文档设定不同的编译方式,这就简化了编译时的麻烦。如果我们指定了文档的编译方式,则只需要按照下面配置就可以编译 LaTeX 文档了。
具体做法是,在 VS Code 左下角,点击齿轮图案的按钮,选择 设置,在右侧添加 LaTeX Workshop 的配置命令
  "latex-workshop.latex.clean.enabled": false,
    "latex-workshop.view.pdf.hand": true,
    // 可变编译方式
    "latex-workshop.latex.toolchain": [
      {
        "command": "", // 注意这里是留空的
        "args": [
          "-synctex=1",
          "-interaction=nonstopmode",
          "-file-line-error",
          "%DOC%"
        ]
      }
],然后我们选择新建一个文档(前几天看到两个博主借鉴我们 2014 年 Sublime Text 搭建 LaTeX 编写环境博文的内容,连下面的代码都是一样的,但是在文中却没有引用我们的,呵呵呵),鉴于此,我决定加入一些个人信息。
%!TEX program = xelatex
% 使用 ctexart 文类,UTF-8 编码
\documentclass[UTF8]{ctexart}
\title{测试}
\author{ddswhu}
\date{\today}

\begin{document}
\maketitle

This is the context of the article.

这就是文章的所有内容。

\end{document}将这个文件保存为 <span style="font-size:14px">test.tex</span>,然后使用快捷键 <span style="font-size:14px">Ctrl+Alt+B</span> 编译,或者在文档中,鼠标右键,选择 Build LaTeX Project,这样就能使用 <span style="font-size:14px">xelatex</span> 编译 <span style="font-size:14px">test.tex</span> 了。
其实,LaTeX Workshop 默认的编译方式是 <span style="font-size:14px">latexmk</span>,我们还可以仿造 MiKTeX 里面的 TeXify 命令,只需要将配置修改为
"latex-workshop.latex.toolchain": [
  {
    "command": "texify",
    "args": [
      "--synctex",
      "--pdf",
      "--tex-option=\"-interaction=nonstopmode\"",
      "--tex-option=\"-file-line-error\"",
      "%DOC%.tex"
    ]
  }
]说到指定单独的编译方式,这里还是有两个不同的方式,一种是在上述的配置基础上继续修改,可以将 <span style="font-size:14px">command</span>修改为 <span style="font-size:14px">xelatex</span>或者<span style="font-size:14px">pdflatex</span>以及<span style="font-size:14px">bibtex</span>。
以下是一个完整的 PDFLaTeX 编译(pdflatex->bibtex->pdflatex->pdflatex)
"latex-workshop.latex.toolchain": [
  {
    "command": "pdflatex",
    "args": [
      "-synctex=1",
      "-interaction=nonstopmode",
      "-file-line-error",
      "%DOC%"
    ]
  }, {
    "command": "bibtex",
    "args": [
      "%DOCFILE%"
    ]
  }, {
    "command": "pdflatex",
    "args": [
      "-synctex=1",
      "-interaction=nonstopmode",
      "-file-line-error",
      "%DOC%"
    ]
  }, {
    "command": "pdflatex",
    "args": [
      "-synctex=1",
      "-interaction=nonstopmode",
      "-file-line-error",
      "%DOC%"
    ]
  }
]因为这里指定了具体的编译方式,所以在文档部分不需要指定编译方式。由于配置文件是全局的,所以这种方式对于不同文件,你需要临时配置文件,有点不太方便。
在 VS Code 中,在操作时并不是以单个文件为依托,而是以项目或者工程为单位。对应的,在 VS Code,我们需要将这个文件夹导入到 VS Code 中,并为这个项目配置 <span style="font-size:14px">tasks.json</span> 文件,在 <span style="font-size:14px">tasks.json</span> 文件中指定编译方式等。
具体操作是,在任务栏选择 任务->运行任务,然后 VS Code 会提示没有任务,需要配置任务,然后选择使用模板创建任务,在模板选择的时候,选择 MS.build 就行。然后将 <span style="font-size:14px">tasks.json</span>文件内容修改为(filename 替换为你需要编译的文件名(主文档))。
{
    "version": "0.1.0",
    "isShellCommand": true,
    "suppressTaskName": true,
    "tasks": [{
            "taskName": "PDFLaTeX",
            "command": "pdflatex",
            "isBuildCommand": true,
            "args": [
                "-synctex=1",
                "-interaction=nonstopmode",
                "-file-line-error",
                "filename.tex"
            ]}, {
            "taskName": "BibTeX",
            "command": "bibtex",
            "isTestCommand": true,
            "args": ["filename.aux"]
            },
           {
            "taskName": "XeLaTeX",
            "command": "xelatex",
            "isBuildCommand": true,
            "args": [
                "-synctex=1",
                "-interaction=nonstopmode",
                "-file-line-error",
                "filename.tex"
            ]},
        ]
}这样,任务配置好了,接下来就只要运行就行了。依次选择 任务->运行任务,选择你所需要的编译方式,如果需要完整编译,假设文档有 bib 文件,则需要选择 PDFLaTeX->BibTeX->PDFLaTeX->PDFLaTeX,这种配置的好处是,你可以完全控制编译方式,能选择编译 bib 文件,适用于大型项目,比如论文,笔记或者书籍等(推荐)。并且只要你配置好 <span style="font-size:14px">tasks.json</span>文件之后,以后打开文件就不用管编译方式和配置了,可以直接运行任务就行。
编译的默认快捷键是 <span style="font-size:14px">Ctrl+Alt+B</span>,由于我习惯了 Sublime Text 的 <span style="font-size:14px">Ctrl+B</span>,所以这里我们再提一下 VS Code 快捷键的设置,在 VS Code 左下角,点击齿轮图案的按钮,选择 键盘快捷方式,然后再搜索栏里面选择 LaTeX Workshop,将第一个 Build LaTeX Project 的快捷键修改为 <span style="font-size:14px">Ctrl+B</span> 即可。
通过右侧的红色 PDF 按钮,我们可以打开 PDF 预览,我们在查看 PDF 的时候,可以通过快捷键 <span style="font-size:14px">Ctrl+Shift+Left</span>跳转到代码。

更多编程相关知识,请访问:编程教学!!
Atas ialah kandungan terperinci 浅谈VSCode搭建 LaTeX 编写环境的方法. Untuk maklumat lanjut, sila ikut artikel berkaitan lain di laman web China PHP!