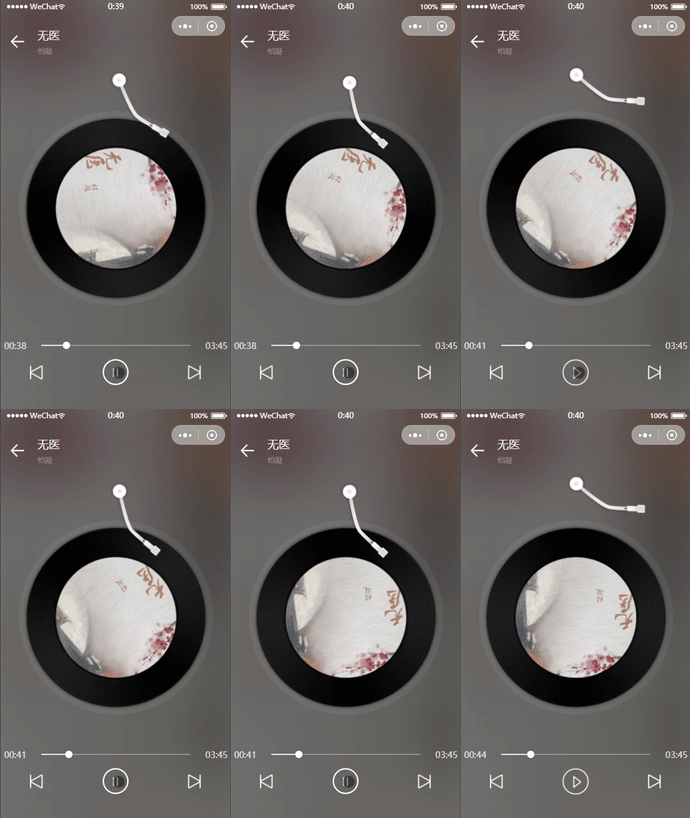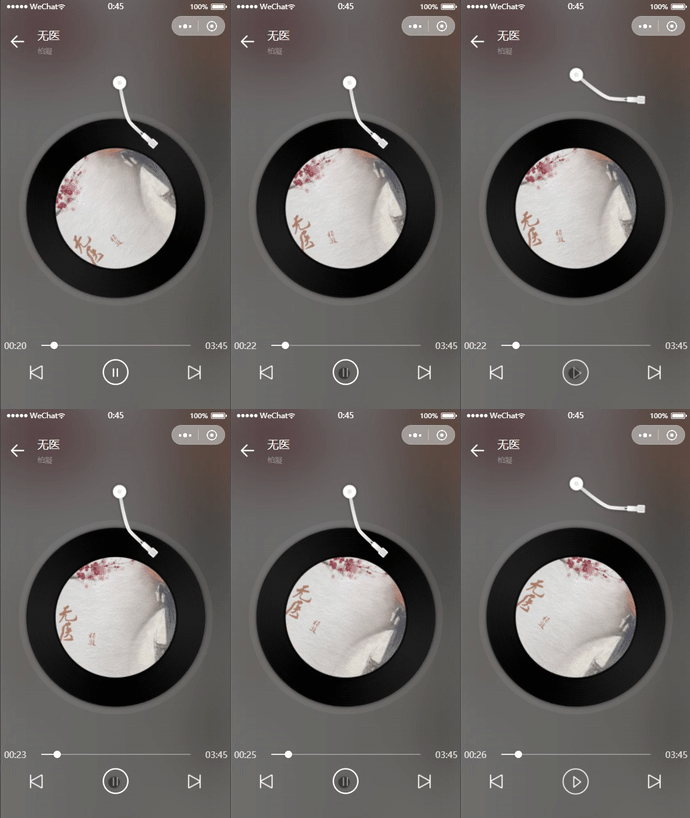

相关学习推荐:微信小程序教程
笔者前端小兵一枚,在学习了一段时间的小程序后,决定亲自动手做一款模仿一款手机软件来练手,自己平常也热爱音乐,并且发现各家的音乐平台的小程序都比较简单,于是就选择了这个方向来进行模仿学习,在这个过程中也遇到了很多问题,在解决这些问题后,也有了一些收获,今天就来和大家分享在这个小程序中,最难的音乐播放这一部分的种种问题和解决。
首先,先感谢本项目的api提供者binaryify
选择这个项目,也是因为后端api有大佬提供了,需要数据的时候只用发起一些接口请求就可以了,比较适合像我这样的初学者入门,只用写一些简单的前端逻辑就可以了。
由于播放页面需要处理的事情较多(例如歌词的处理与展示、进度条的快进快退等等),并且坑比较多,为了尽可能的描述清楚,所以本篇文章主要着重介绍和音乐播放有关的种种操作,有关于本项目其他页面的详情介绍,将放在后续文章进行详细叙述,感谢各位读者大大的理解。

github.com/shengliangg…
云村和视频模块目前还没有开发,后续有时间就写,本项目会不定期更新,日后有时间就写一篇项目使用文档
有关于音乐播放的几个接口请求中,几乎都需要携带歌曲 id,在本项目的所有页面中,播放页面作为一个独立的页面存在,当别的页面跳转到播放页面时,都会携带歌曲 id

本项目使用的接口请求有点多,为了方便,我将其封装在utils文件夹中的api.js文件中,再在页面中引用接口管理文件。
// method(HTTP 请求方法),网易云API提供get和post两种请求方式
const GET = 'GET';
const POST = 'POST';
// 定义全局常量baseUrl用来存储前缀
const baseURL = 'http://neteasecloudmusicapi.zhaoboy.com';

function request(method, url, data) {
  return new Promise(function (resolve, reject) {
    let header = {    //定义请求头
      'content-type': 'application/json',
    };
    wx.request({
      url: baseURL + url,
      method: method,
      data: method === POST ? JSON.stringify(data) : data,
      header: header,
      success(res) {
        //请求成功
        //判断状态码---errCode状态根据后端定义来判断
        if (res.data.code == 200) {  //请求成功
          resolve(res);
        } else {
          //其他异常
          reject('运行时错误,请稍后再试');
        }
      },
      fail(err) {
        //请求失败
        reject(err)
      }
    })
  })
}

const API = {
  getSongDetail: (data) => request(GET, `/song/detail`, data),  //获取歌曲详情
  getSongUrl:(data) => request(GET, `/song/url`, data),  //获取歌曲路径
};
module.exports = {
  API: API
}复制代码这里只展示了两个在本页面用到的请求API,在需要接口请求的页面引入就可以使用了
const $api = require('../../utils/api.js').API;
本页面的使用到的data数据源
  data: {
    musicId: -1,//音乐id
    hidden: false,  //加载动画是否隐藏
    isPlay: true,   //歌曲是否播放
    song: [],    //歌曲信息
    hiddenLyric: true,    //是否隐藏歌词
    backgroundAudioManager: {},  //背景音频对象
    duration: '',             //总音乐时间(00:00格式)
    currentTime: '00:00',      //当前音乐时间(00:00格式)
    totalProcessNum: 0,         //总音乐时间 (秒)
    currentProcessNum: 0,       //当前音乐时间(秒)
    storyContent: [],   //歌词文稿数组,转化完成用来在页面中使用
    marginTop: 0,    //文稿滚动距离
    currentIndex: 0,    //当前正在第几行
    noLyric: false,  //是否有歌词
    slide: false   //进度条是否在滑动
},复制代码其他页面跳转举例:其他页面跳转到play页面,携带musicId参数
  //播放音乐
  playMusic: function (e) {
    let musicId = e.currentTarget.dataset.in.id    // 获取音乐id
    // 跳转到播放页面
    wx.navigateTo({
      url: `../play/play?musicId=${musicId}`
    })
},复制代码在play.js的onLoad生命周期函数中,通过options拿到其他页面传过来的musicId这个参数,并且调用play()函数
  /**
   * 生命周期函数--监听页面加载
   */
  onLoad: function (options) {
    const musicId = options.musicId    //获取到其他页面传来的musicId
    this.play(musicId)    //调用play方法
  },复制代码
play()函数需要一个形参:musicId,这个形参非常重要,之后的接口请求都需要用到它
 //播放音乐
  play(musicId) {
    const that = this;//将this对象复制给that
    that.setData({
      hidden: false,
      musicId
    })
    app.globalData.musicId = musicId        // 将当前音乐id传到全局
    // 通过musicId发起接口请求,请求歌曲详细信息
    //获取到歌曲音频,则显示出歌曲的名字,歌手的信息,即获取歌曲详情;如果失败,则播放出错。
    $api.getSongDetail({ ids: musicId }).then(res => {
      // console.log('api获取成功,歌曲详情:', res);
      if (res.data.songs.length === 0) {
        that.tips('服务器正忙~~', '确定', false)
      } else {   //获取成功
        app.globalData.songName = res.data.songs[0].name
        that.setData({
          song: res.data.songs[0],  //获取到歌曲的详细内容,传给song
        })
        wx.request({     // 获取歌词
          url: 'http://47.98.159.95/m-api/lyric',
          data: {
            id: musicId
          },
          success: res => {
            if (res.data.nolyric || res.data.uncollected) { //该歌无歌词,或者歌词未收集
              // console.log("无歌词")
              that.setData({
                noLyric: true
              })
            }
            else {  //如果有歌词,先调用sliceNull()去除空行,再调用parseLyric()格式化歌词
              that.setData({
                storyContent: that.sliceNull(that.parseLyric(res.data.lrc.lyric))
              })
            }
          }
        })
        // 通过音乐id获取音乐的地址,请求歌曲音频的地址,失败则播放出错,成功则传值给createBackgroundAudioManager(后台播放管理器,让其后台播放)
        $api.getSongUrl({ id: musicId }).then(res => {
          //请求成功
          if (res.data.data[0].url === null) {  //获取出现错误出错
            that.tips('音乐播放出了点状况~~', '确定', false)
          } else {
            // 调用createBackgroundAudioManager方法将歌曲url传入backgroundAudioManager
            that.createBackgroundAudioManager(res.data.data[0]);
          }
        })
          .catch(err => {
            //请求失败
            that.tips('服务器正忙~~', '确定', false)
          })
      }
    })
      .catch(err => {
        //请求失败
        that.tips('服务器正忙~~', '确定', false)
      })
},复制代码总体大致的思路是:
wx.request做的请求),请求结果如果有歌词,就将请求回来的歌词数据设置到数据源中的storyContent中,这时的歌词还没有经过处理,之后还要处理一下歌词,先调用parseLyric()格式化歌词,再调用sliceNull()去除空行。
如果该歌没有歌词(情况比如:钢琴曲这种纯音乐无歌词的、或者一些非常小众的个人歌曲没有上传歌词的),就设置数据源中的noLyric为true,设置了之后,页面就会显示:纯音乐,无歌词。
  showLyric() {
    this.setData({
      hiddenLyric: !this.data.hiddenLyric
    })
},复制代码在请求回歌词之后,还需要对歌词进行分行处理
//格式化歌词
parseLyric: function (text) {
let result = [];
let lines = text.split('\n'), //切割每一行
pattern = /\[\d{2}:\d{2}.\d+\]/g;//用于匹配时间的正则表达式,匹配的结果类似[xx:xx.xx]
// console.log(lines);
//去掉不含时间的行
while (!pattern.test(lines[0])) {
lines = lines.slice(1);
};
//上面用'\n'生成数组时,结果中最后一个为空元素,这里将去掉
lines[lines.length - 1].length === 0 && lines.pop();
lines.forEach(function (v /*数组元素值*/, i /*元素索引*/, a /*数组本身*/) {
//提取出时间[xx:xx.xx]
var time = v.match(pattern),
//提取歌词
value = v.replace(pattern, '');
// 因为一行里面可能有多个时间,所以time有可能是[xx:xx.xx][xx:xx.xx][xx:xx.xx]的形式,需要进一步分隔
time.forEach(function (v1, i1, a1) {
//去掉时间里的中括号得到xx:xx.xx
var t = v1.slice(1, -1).split(':');
//将结果压入最终数组
result.push([parseInt(t[0], 10) * 60 + parseFloat(t[1]), value]);
});
});
// 最后将结果数组中的元素按时间大小排序,以便保存之后正常显示歌词
result.sort(function (a, b) {
return a[0] - b[0];
});
return result;
},复制代码 sliceNull: function (lrc) {
var result = []
for (var i = 0; i < lrc.length; i++) {
if (lrc[i][1] !== "") {
result.push(lrc[i]);
}
}
return result
},复制代码再接着通过id去获取歌曲的播放路径,获取到音频的数据源后,则调用createBackgroundAudioManager()函数,传入刚刚获取到的音频数据源。(下文详细介绍)
如果其中的任意一个环节出现了问题,则会弹出提示信息,调用tips()函数,并返回主页
wx.showModal,写成了一个tips()函数,在想给提示对话框的时候,直接调用tips()函数就可以,在出现错误之后,用户点击确定会触发回调函数中的res.confirm判断,然后回到首页,这里因为网易云手机app的导航在头部,所以我是用的自定义组件做的导航,没有使用 tabBar,页面跳转用的wx.navigateTo(),如果大家使用了tabBar,那么跳转就应该换成wx.switchTab()tips(content, confirmText, isShowCancel) {
wx.showModal({
content: content,
confirmText: confirmText,
cancelColor: '#DE655C',
confirmColor: '#DE655C',
showCancel: isShowCancel,
cancelText: '取消',
success(res) {
if (res.confirm) {
// console.log('用户点击确定')
wx.navigateTo({
url: '/pages/find/find'
})
} else if (res.cancel) {
// console.log('用户点击取消')
}
}
})
},复制代码loading标签,通过数据源中的hidden,来控制loading动画是否显示,一开始设置为false,,然后在数据请求完成后,将其更改为true。wxml中:
  <loading hidden="{{hidden}}">
        拼命加载中...
</loading>复制代码上面提到,在接口请求回音频路径之后,就会调用这个函数,把请求会的数据作为参数传过来,那现在就来剖析这个函数吧。
 // 背景音频播放方法
createBackgroundAudioManager(res) {
  const that = this;//将this对象复制给that
  const backgroundAudioManager = wx.getBackgroundAudioManager(); //调用官方API获取全局唯一的背景音频管理器。
  console.log(backgroundAudioManager.src);
  if (res.url != null) {
    if (backgroundAudioManager.src != res.url) {    //首次放歌或者切歌
     that.setData({     //重设一下进度,避免切歌部分数据更新过慢
        currentTime: '00:00',      //当前音乐时间(00:00格式)
        currentProcessNum: 0,       //当前音乐时间(秒)
        marginTop: 0,    //文稿滚动距离
        currentIndex: 0,    //当前正在第几行
      })
      backgroundAudioManager.title = that.data.song.name;                //把title音频标题给实例
      backgroundAudioManager.singer = that.data.song.ar[0].name;             //音频歌手给实例
      backgroundAudioManager.coverImgUrl = that.data.song.al.picUrl;         //音频图片 给实例
      backgroundAudioManager.src = res.url;        // 设置backgroundAudioManager的src属性,音频会立即播放
      let musicId = that.data.musicId
      app.globalData.history_songId = that.unique(app.globalData.history_songId, musicId) //去除重复历史
    }
    that.setData({
      isPlay: true,  //是否播放设置为true
      hidden: true,  //隐藏加载动画
      backgroundAudioManager
    })
  }
  app.globalData.backgroundAudioManager = backgroundAudioManager
  //监听背景音乐进度更新事件
  backgroundAudioManager.onTimeUpdate(() => {
    that.setData({
      totalProcessNum: backgroundAudioManager.duration,
      currentTime: that.formatSecond(backgroundAudioManager.currentTime),
      duration: that.formatSecond(backgroundAudioManager.duration)
    })
    if (!that.data.slide) {    //如果进度条在滑动,就暂停更新进度条进度,否则会出现进度条进度来回闪动
      that.setData({
        currentProcessNum: backgroundAudioManager.currentTime,
      })
    }
    if (!that.data.noLyric) {   //如果没有歌词,就不需要调整歌词位置
      that.lyricsRolling(backgroundAudioManager)
    }
  })
  backgroundAudioManager.onEnded(() => {  //监听背景音乐自然结束事件,结束后自动播放下一首。自然结束,调用go_lastSong()函数,即歌曲结束自动播放下一首歌
    that.nextSong();
  })
},复制代码音频播放函数里面的逻辑相对比较复杂,大致思路如下:
BackgroundAudioManager 实例,通过 wx.getBackgroundAudioManager 获取。
然后这里就需要做一个判断,因为当调用本方法有几种情况,一是首次放歌或切换歌曲、二是进来没切换歌曲,所以要判断当前音乐id获取url地址是否等于backgroundAudioManager.src,如果不相等,那就是第一种情况,需要将歌曲的musicId调用unique()去重方法,存入全局的history_songId[],这个历史歌单主要用来给用户切换上一首歌曲用的,后面会详细讲
然后给实例设置title、singer、coverImgURL、src、当设置了新的 src 时,音乐会自动开始播放,设置这些属性,主要用于原生音频播放器的显示以及分享,(注意title必须设置),设置之后,在手机上使用小程序播放音乐,就会出现一个原生音频播放器,如图:

感觉还不错,可惜的是,好像一直目前为止,这个原生的音频播放器都不能设置歌词,只能设置一下基本属性,这也是一个小遗憾,希望微信团队日后能够完善它。
作用:用户每播放一首歌,就将其存入历史列表中,在存入之前,先判断这首歌是否已经存在,如果不存在,直接存入到历史歌单数组后面,如果这首歌已经存在,那就先去除老记录,存入新纪录。
  // 历史歌单去重
unique(arr, musicId) {
  let index = arr.indexOf(musicId)  //使用indexOf方法,判断当前musicId是否已经存在,如果存在,得到其下标
  if (index != -1) {          //如果已经存在在历史播放中,则删除老记录,存入新记录
    arr.splice(index, 1)
    arr.push(musicId)
  } else {
    arr.push(musicId)       //如果不存在,则直接存入历史歌单
  }
  return arr  //返回新的数组
},复制代码backgroundAudioManager.onTimeUpdate()监听背景音乐的进度更新,页面进度条的秒数更新就和这有关!
<view class="page-slider">
            <view>
                {{currentTime}}
            </view>
            <slider class="slider_middle" bindchange="end" bindtouchstart="start" max="{{totalProcessNum}}" min="0" backgroundColor="rgba(255,255,255,.3)"
 activeColor="rgba(255,255,255,.8)"  value="{{currentProcessNum}}" block-size="12"></slider>
            <view>
                {{duration}}
            </view>
</view>复制代码backgroundAudioManager.currentTime和backgroundAudioManager.currentTime分别会返回音频播放位置和音频长度,单位为秒,而进度条左边的当前时间和右边的歌曲总时长需要显示成00:00的格式,所以使用formatSecond()来格式化秒数
  // 格式化时间
  formatSecond(second) {
    var secondType = typeof second;
    if (secondType === "number" || secondType === "string") {
      second = parseInt(second);
      var minute = Math.floor(second / 60);
      second = second - minute * 60;
      return ("0" + minute).slice(-2) + ":" + ("0" + second).slice(-2);
    } else {
      return "00:00";
    }
  },复制代码
wxml:
<!-- 歌词 -->
<!-- 需要设置高度,否则scroll-top可能失效 -->
<scroll-view
hidden="{{hiddenLyric}}"
scroll-y="true"
scroll-with-animation='true'
scroll-top='{{marginTop}}'
class="body-scroll"
>
<view class='contentText'>
<view class="contentText-noLyric" wx:if="{{noLyric==true}}">纯音乐,无歌词 </view>
<block wx:for='{{storyContent}}' wx:key="index">
<view class="lyric">
<view class="lyric-text {{currentIndex == index ? 'currentTime' : ''}}">{{item[1]}}</view>
</view>
</block>
</view>
</scroll-view>复制代码marginTop,这个值作用于scroll-view的scroll-top,实现自动滚动的,需要注意的是,scroll-view需要设置高度,否则scroll-top可能失效currentIndex是否和页面for循环中的index值是否相等,来给当前唱的歌词加上类名,使其高亮显示。 // 歌词滚动方法
lyricsRolling(backgroundAudioManager) {
const that = this
// 歌词滚动
that.setData({
marginTop: (that.data.currentIndex - 3) * 39
})
// 当前歌词对应行颜色改变
if (that.data.currentIndex != that.data.storyContent.length - 1) {//不是最后一行
// var j = 0;
for (let j = that.data.currentIndex; j < that.data.storyContent.length; j++) {
// 当前时间与前一行,后一行时间作比较, j:代表当前行数
if (that.data.currentIndex == that.data.storyContent.length - 2) { //倒数第二行
//最后一行只能与前一行时间比较
if (parseFloat(backgroundAudioManager.currentTime) > parseFloat(that.data.storyContent[that.data.storyContent.length - 1][0])) {
that.setData({
currentIndex: that.data.storyContent.length - 1
})
return;
}
} else {
if (parseFloat(backgroundAudioManager.currentTime) > parseFloat(that.data.storyContent[j][0]) && parseFloat(backgroundAudioManager.currentTime) < parseFloat(that.data.storyContent[j + 1][0])) {
that.setData({
currentIndex: j
})
return;
}
}
}
}
},复制代码在进度条开始滑动的时候将数据源中的slide设置为true,这时backgroundAudioManager.onTimeUpdate()中的更新数据源currentProcessNum就不会再进行,这样就缓解了进度条抖动的问题。
抖动问题:如图,在拖动进度条想快进或者快退音乐的时候,可以看到小滑块非常明显的抖动,这是由于onTimeUpdate()在不停的监听并更改数据源中的currentProcessNum,导致拖动过程中的小滑块不停的前后跳动。

//进度条开始滑动触发
  start: function (e) {
    // 控制进度条停,防止出现进度条抖动
    this.setData({
      slide: true
    })
},复制代码结束滑动的时候,通过backgroundAudioManager.seek(position)来让音频跳到指定位置,然后判断当前歌词到了多少行,立马设置数据源中的currentIndex,让歌词就会在上面的歌词跳转方法中改变marginTop的值,歌词就会跳转到相应的位置。

//结束滑动触发
end: function (e) {
const position = e.detail.value
let backgroundAudioManager = this.data.backgroundAudioManager //获取背景音频实例
// console.log(position)
backgroundAudioManager.seek(position) //改变歌曲进度
this.setData({
currentProcessNum: position,
slide: false
})
// 判断当前是多少行
for (let j = 0; j < this.data.storyContent.length; j++) {
// console.log('当前行数', this.data.currentIndex)
// console.log(parseFloat(backgroundAudioManager.currentTime))
// console.log(parseFloat(this.data.storyContent[j][0]))
// 当前时间与前一行,后一行时间作比较, j:代表当前行数
if (position < parseFloat(this.data.storyContent[j][0])) {
this.setData({
currentIndex: j - 1
})
return;
}
}
}复制代码backgroundAudioManager.onEnded()监听背景音乐的自然结束,结束就调用nextSong()函数,这个函数用来播放待放列表里面的歌。
播放前一首歌,那么现在这首歌就变成了下一首要放的歌,因为每一首当前播放的歌曲都会放到被push()到历史列表,那么将当前歌曲(把历史列表数组里面的最后一项从数组删除,并将其头插加入到待播放列表)放入待放歌单,然后调用play()方法就好了(传入删除了最后一项之后新的历史列表数组的最后一项,即原历史列表的倒数第二项)
// 播放上一首歌曲
beforeSong() {
if (app.globalData.history_songId.length > 1) { //前面有歌
app.globalData.waitForPlaying.unshift(app.globalData.history_songId.pop())//将当前播放歌曲从前插入待放列表
this.play(app.globalData.history_songId[app.globalData.history_songId.length - 1]) //播放历史歌单歌曲
} else {
this.tips('前面没有歌曲了哦', '去选歌', true)
}
},复制代码播放下一首歌曲,如果待播放列表数组长度大于0,那就把数组第一个元素删除并返回传入到play()方法中
  // 下一首歌曲
  nextSong() {
    if (app.globalData.waitForPlaying.length > 0) {
      this.play(app.globalData.waitForPlaying.shift())//删除待放列表第一个元素并返回播放
    } else {
      this.tips('后面没有歌曲了哦', '去选歌', true)
    }
},复制代码比较简单,拿到数据原中的backgroundAudioManager,通过其自带的pause()、play()的方法就可以实现播放和暂停

  // 播放和暂停
  handleToggleBGAudio() {
    const backgroundAudioManager = this.data.backgroundAudioManager
    //如果当前在播放的话
    if (this.data.isPlay) {
      backgroundAudioManager.pause();//暂停
    } else {      //如果当前处于暂停状态
      backgroundAudioManager.play();//播放
    }
    this.setData({
      isPlay: !this.data.isPlay
    })
},复制代码本项目并不复杂,适合初学者上手,因为免去了写复杂的后端,只用写好js逻辑就可以,并且在听到自己仿的小程序可以放出音乐的时候会有很大的成就感,但是同时还是存在一些小坑等待大家处理的,在写本小程序的时候,我也是遇到了挺多问题的,遇到问题先思考,想不出来,就去看看别的大佬写的经验分享,由于本人经验不是特别丰富,只是浅浅入门,很多问题的解决思考的并不到位,如果个位发现我在代码中有什么bug,欢迎个位读者大大指出,期待我们的共同成长。
相关学习推荐:javascript视频教程
Atas ialah kandungan terperinci 那些年,看看微信小程序仿网易云音乐的相关播放. Untuk maklumat lanjut, sila ikut artikel berkaitan lain di laman web China PHP!
 Pengenalan kepada maksud tetingkap muat turun awan
 Penyelesaian kepada penetapan vscode antara muka Cina tidak berkuat kuasa
 Bagaimana untuk menutup port 135 445
 Mengapakah pemacu keras mudah alih begitu lambat dibuka?
 Bagaimana untuk menggunakan split dalam python
 skrin telefon bimbit tft
 Bagaimana untuk mengubah saiz gambar dalam ps
 0x80070057 penyelesaian ralat parameter